

Richmond homeowners usually start a hardwood project because they want a warmer room, a cleaner look, and a floor that feels permanent. The part many underestimate is how to install hardwood flooring the right way, because the boards are only one piece of the job. Success comes from moisture testing, subfloor prep, and choosing the right method for the house in Richmond VA.
A good install feels simple on the surface, but on a jobsite it's a sequence of checks that have to line up. When they don't, you get cupping, gaps, squeaks, or a floor that starts moving after the first season change in Richmond VA. That's why the work starts before the first board goes down.
What Richmond Homeowners Should Know Before Installing Hardwood
A homeowner in Richmond VA often calls with the same story. The room looks ready, the new hardwood has arrived, and the plan is to get the floor down over a long weekend. Then the old flooring comes up, the subfloor shows humps or soft spots, and the project turns into a real installation instead of a quick cosmetic upgrade.
That is the point where good planning matters more than good intentions. Hardwood floor installation is a system of decisions, and the floor only performs well when the substrate, the wood, and the room conditions all line up. Before any boards go down, I want the home checked for moisture, the subfloor corrected where needed, and the material given time to settle into the house. Richmond's humid summers and HVAC swings in the colder months make that part of the job especially important, because wood that goes in too wet, too dry, or over an uneven base is far more likely to move later.
The installation method also has to match the floor, not the other way around. Solid hardwood usually wants a nail-down approach over a proper wood subfloor. Engineered products may call for glue-down or a floating system, depending on the room and the substrate. If you want a local overview before you commit, this Richmond hardwood flooring guide is a useful place to compare how different flooring types behave in area homes.
Richmond's climate changes the decision-making. Humid summers push boards to expand, then winter heat pulls moisture back out of the air and the wood contracts. A floor that survives its first year usually had those swings accounted for before the first board was fastened. One practical step many homeowners overlook is preparing a place to find a vapor barrier when the installation calls for one, because moisture control below the floor can matter just as much as the finish on top.
Solid hardwood, engineered hardwood, and concrete each change the job in a different way. By the time a contractor starts laying boards, the layout, the moisture readings, the underlayment, and the expansion plan should already be settled. That is what keeps the floor from becoming a seasonal problem instead of a long-term upgrade.
Subfloor Preparation and Moisture Testing
A hardwood floor can look perfect on install day and still fail later if the base under it was uneven, damp, or not fully ready. That problem usually starts in the prep stage, not at the moment the boards are going down. Richmond homes feel that even more because humid summers, then dry winter heat, keep changing what the wood and subfloor are doing.
Check flatness, then check it again
The subfloor has to be flat enough for the flooring system you're using. A practical field check is 3/16 inch in any 10-foot area or 1/8 inch in any 6-foot area (Wayfair installation guide). If the surface is outside that range, it needs to be corrected before a single board is fastened.
Moisture testing comes next, and it cannot be skipped. One published guideline recommends at least 20 moisture readings for the first 1,000 square feet, plus 4 additional readings per 100 square feet beyond that, with a minimum of three tests per room (SOLID-INSTALL PDF). That may feel tedious, but it tells you whether the subfloor is ready or just looks ready.
A wood floor does not care how clean the room is. It reacts to what is under it.
Let the boards and the room come into balance
Acclimation matters because the wood needs time in the room before installation. Guidance commonly calls for 3 to 7 days of acclimation in the space, and another source says at least 72 hours (This Old House). In Richmond, that waiting period matters because the house may be dry one week and humid the next, especially once HVAC starts cycling.
The goal is to let the boards adjust to the room they will live in. If they go down before they stabilize, seasonal movement can show up as gaps, cupping, or tight seams that strain the floor later.
Concrete changes the moisture conversation even more. If the job is over slab, it helps to know how to install hardwood flooring on concrete before choosing the underlayment and moisture control approach. For those situations, it is smart to find a vapor barrier before the boards go down, because moisture coming through the slab can create trouble that only shows up after the floor has been in use for a while.
Budget for the prep, not just the boards
Prep work adds cost because weak subfloors do not fix themselves. Published guidance notes that subfloor repair can add $1 to $5 per square foot, and homeowners should reserve an extra 10% to 15% of the budget for unexpected subfloor issues uncovered during demolition or prep. In Richmond, that is ordinary planning, not worst-case thinking.
The board package is only part of the job. Plywood patches, leveling compound, moisture mitigation, and underlayment can all change the final total once the old floor comes out. A floor that starts on a sound, dry, flat base has a much better chance of holding up through Richmond's humid summers and the drier air that comes with heating season.
Choosing the Right Installation Method for Your Floor
The method has to match both the material and the structure under it. Homeowners usually get into trouble when they pick the easiest-sounding option instead of the one that fits the room, the subfloor, and the way the wood will move through Richmond's humid summers and HVAC-driven winter dry-out. The right choice depends on whether the floor is solid hardwood, engineered hardwood, or a system meant to float over a prepared underlayment.
Nail-down, glue-down, or floating
Nail-down is the standard fit for solid hardwood over a wood subfloor. It is the traditional approach in many Richmond homes with framed floors and crawl spaces, because the boards can be fastened directly to the structure below. Manufacturer guidance says solid hardwood should generally be installed perpendicular to the floor joists, and if the span perpendicular to the grain is greater than 20 feet, field expansion space may be required (Somerset installation guide).
Glue-down belongs in situations where the substrate calls for it, especially on slab or in below-grade installs with engineered flooring. Floating floors look forgiving on paper, but the prep still has to be right underneath them. If the subfloor is out of flat, holding moisture, or covered with debris, a floating system will still telegraph the problem.
| Hardwood Installation Methods Compared | Best For | Subfloor Type | Grade Level | DIY Difficulty |
|---|---|---|---|---|
| Nail-down | Solid hardwood | Wood subfloor | Above grade, sometimes on grade | Moderate to difficult |
| Glue-down | Engineered hardwood | Concrete or approved wood substrate | On grade, below grade when approved | Difficult |
| Floating | Engineered or click-lock systems | Prepared underlayment over suitable base | Varies by product | Moderate |
What Richmond homes usually call for
Older Richmond homes often have wood-framed subfloors that work well with nail-down when the structure is sound and the moisture readings are stable. Homes with slabs, additions, or basement areas usually need a different setup, and the product choice matters more than the look on the sample board. If you are deciding between solid and engineered, a practical local reference on engineered hardwood floor installation helps explain where engineered construction gives you more flexibility.
Bottom line: the best method is the one that matches the room conditions and the wood's movement, not the one that takes the fewest tools.
A homeowner can love the look of solid planks and still have a floor that performs poorly if the substrate and moisture conditions do not support it. In Richmond VA, that honest call matters more than pushing a method just because it is familiar. If the installation is going to survive the first year, the method has to fit the house, not the sales pitch.
Laying the Boards with Precision and Proper Fastening
Once the subfloor is ready and the wood has had time to settle in the house, the install still lives or dies on discipline. The first row controls everything that follows. If it is not straight, square, and secure, the error shows up at the far wall when there is no easy way to hide it.
Start with the line, not the plank
Snap a chalk line parallel to the longest straight wall and build the starter row from that reference. Leave the perimeter expansion gap in place too, commonly 3/4 inch at the walls, so the floor can move with Richmond's humidity swings and the heating season that dries the house out later. That gap disappears under trim, but it has to be there from day one.
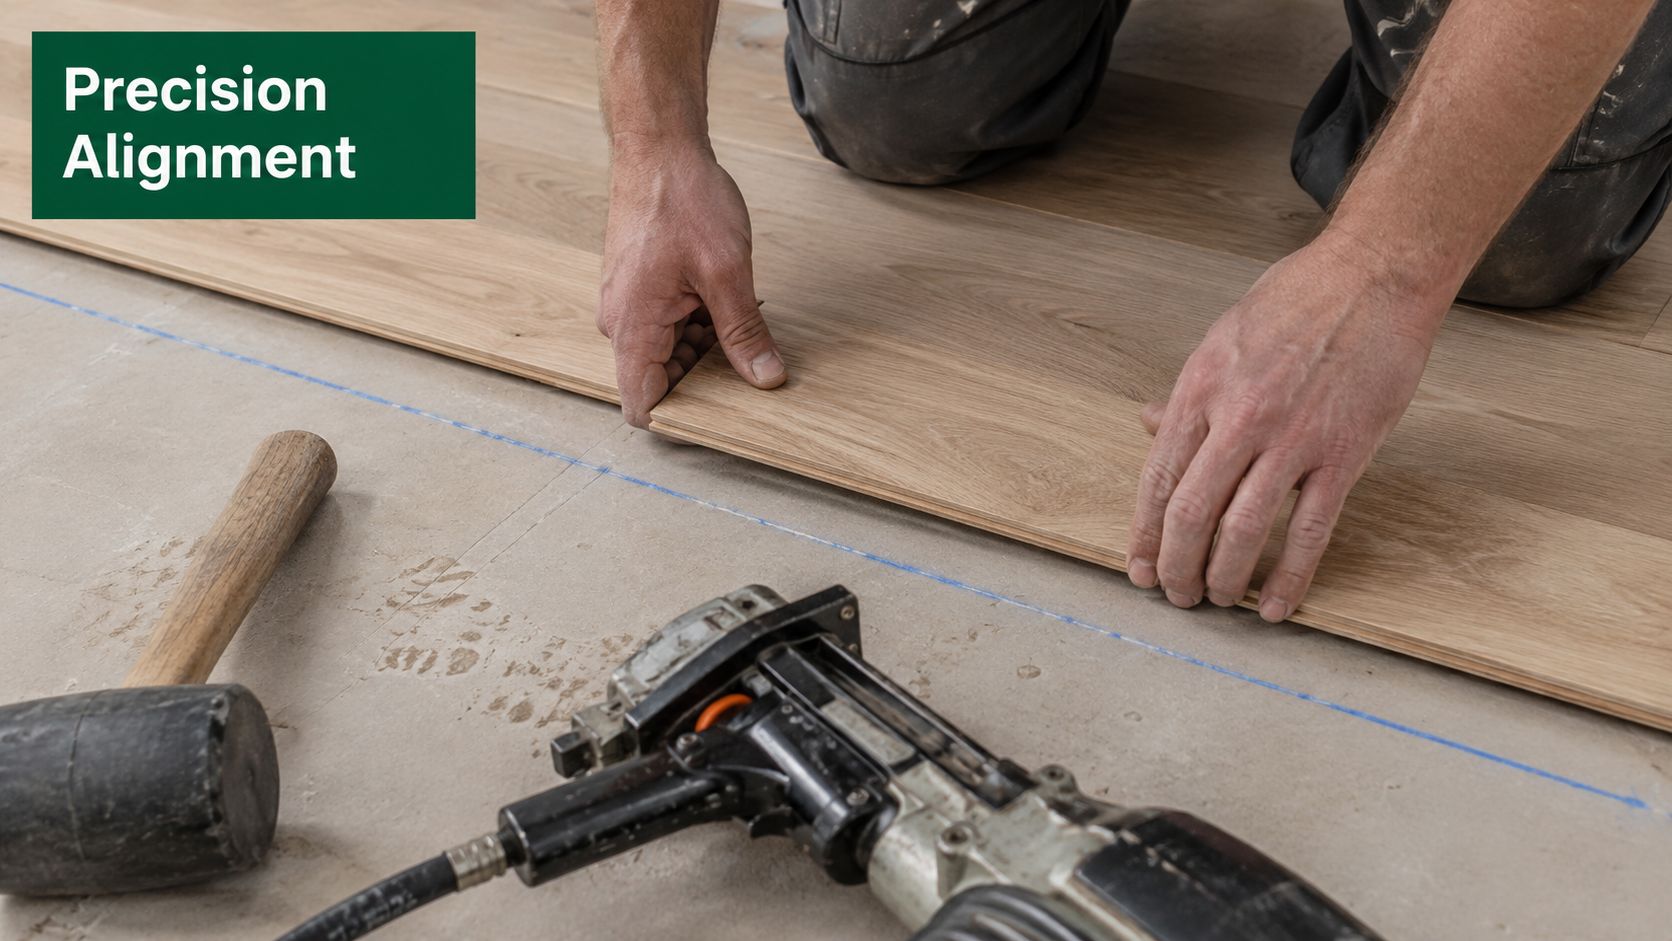
Fastener layout matters just as much as the line. For 3/4-inch solid hardwood, Lowe's installation guide says installers should blind-nail through the tongue with staples or cleats placed about 1 1/2 to 3 inches from the ends and every 8 to 10 inches for strip flooring, while boards 3 inches or wider should get fasteners every 6 to 8 inches, with a minimum of 2 fasteners per plank (Lowe's installation guide). That spacing helps hold the board flat without crowding the wood, which matters when the house is damp in summer and dry in winter.
Stagger, check, and keep the field clean
End joints should never line up in a visible pattern. A good stagger spreads movement across the floor and keeps the seams from drawing the eye. Keep the layout randomized as you go, and keep checking the row for drift before the error gets buried under several more courses.
Installer's habit that saves headaches: mix boards from multiple boxes as you go. The color and grain variation spread out naturally instead of clustering in one corner.
The last rows usually need more hand work. Face-nailing, a pull bar, and sometimes a small amount of glue become part of the finish work when the wall space tightens up. If you are sourcing the right hardware for that stage, take a moment to browse stainless steel fasteners before the job starts.
Doorways, vents, and transitions need the same attention. Check alignment every few rows, because a small drift at the starter line turns into a visible wedge at the opposite end. Homeowners notice that kind of mistake every time they walk into the room.
Common Installation Mistakes and How to Avoid Them
The jobs that come back for repairs usually start with a small shortcut. A board gets fastened before the subfloor is checked, a damp slab gets covered, or the installer assumes the room is close enough to ready. Those choices may look harmless on install day, then show up later as movement, noise, or visible distortion.
The mistakes that cause the most trouble
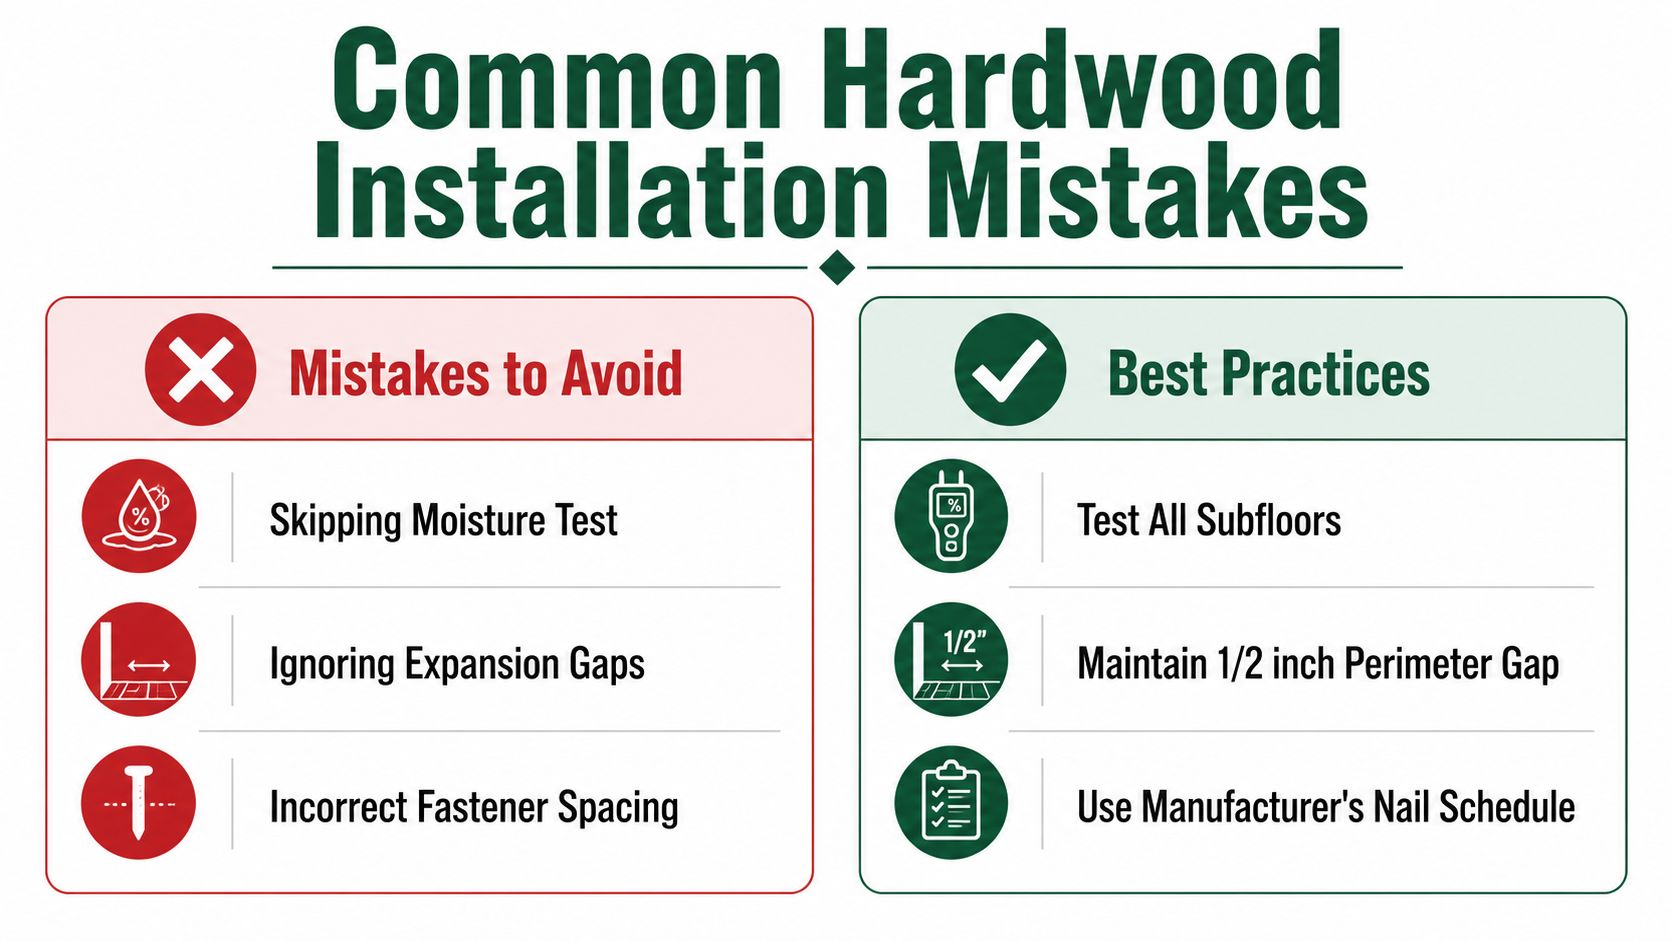
- Skipping moisture tests can lead to cupping, swelling, or adhesive failure once Richmond's humid summers or seasonal HVAC swings change the room conditions.
- Ignoring expansion gaps traps the floor, so it can buckle or press hard against the wall when the house holds moisture.
- Incorrect fastener spacing lets the boards move, which shows up as squeaks, loose boards, or seams that open over time.
The repair is usually straightforward, but it has to happen before the floor is finished. The subfloor needs to be flat enough, the room needs to be dry, and the boards need enough time to acclimate to the space. In Richmond VA, that matters more than many guides admit, because a floor that looks fine at install can still fail its first year if moisture balance was ignored.
What the visible symptoms usually mean
If boards start to gap after the heat comes on, the problem often began with moisture imbalance or weak acclimation. If the floor feels hollow or squeaks in patches, the fastening pattern or the subfloor condition is usually at fault. If edges lift after a humid spell, the floor was likely installed too tight at the perimeter or laid over a moisture issue that never got solved.
Use this rule of thumb: when a hardwood floor fails, the cause is usually under it, not on top of it.
Solid hardwood also belongs in the right space. Wayfair says solid wood should go over a dry, flat, damage-free subfloor that is on or above grade (Wayfair installation guide). Putting the wrong product in the wrong area invites trouble, especially in lower spaces where moisture is harder to control.
Cost Estimates Timelines and When to Hire a Professional
Hardwood still sits in the premium range, and Richmond homeowners feel that in the estimate. Installed hardwood often lands around $6 to $25 per square foot, with many standard jobs falling between $10 and $16 per square foot. A typical 1,000-square-foot project can easily run about $10,000 to $16,000.
That spread makes sense once you break the job down. Room layout, species, subfloor condition, and installation method all push the price in different directions. A straight, open room over a flat wood subfloor is a very different job from a space that needs moisture control, patching, and extra prep before the first board goes down. In Richmond VA, prep work can move the number as much as the material itself.
DIY or hire it out
A DIY install can work in a simple room if the subfloor is already sound, the boards have acclimated, and the right tools are on hand. It stops being a smart do-it-yourself project when the layout has tricky transitions, the space is below grade, the floor has flatness problems, or the moisture readings do not make sense. At that point, hiring a professional usually costs less than fixing a floor that was installed over bad conditions.
Buff & Coat Hardwood Floor Refinishing also handles floor installation Richmond projects, including full hardwood floor installation and repair work, so homeowners can compare install, refinish, or buff and coat service options without guessing which approach fits the room.
What to expect on timing
The schedule usually starts with demolition and subfloor prep, then moves into acclimation, installation, and final details. The waiting period for the boards is part of the job, not dead time. In Richmond, that matters because humid summers and HVAC swings can move the wood after it is installed if the home was not checked and prepped correctly first. A floor rushed through install and finish often ends up showing its mistakes when the season changes.
For Richmond homeowners, the decision is straightforward. If the room is dry and the layout is simple, a DIY install can make sense. If the room has moisture risk, an older subfloor, or a layout that will not forgive mistakes, hire a pro and get the floor done right the first time.
Why Richmond Homeowners Choose Buff & Coat
- 15 years in business
- Dustless sanding systems
- Local, owner-operated
- High-quality finishes
- Clear pricing and honest advice
- 5-star customer service
Ready to restore your hardwood floors? Buff & Coat makes the process fast, clean, and stress-free. Call 804-392-1114 or request your free estimate at Buff & Coat Hardwood Floor Refinishing.