That first deep scratch or patch of faded wood is a frustrating sight for any Richmond homeowner. You start wondering if your floors just need a simple refresh or if it's time for a full hardwood floor sanding and staining. Knowing the difference is the first step toward bringing back their original beauty and protecting your home's value for years to come.
How to Know if Your Hardwood Floors Need Refinishing
Hardwood floors are built to last, but life happens. From pet claws and scooting furniture to accidental spills and beaming sunlight, everyday living eventually wears down the protective finish. Regular cleaning handles the surface grime, but it can't fix the deeper wear that makes your floors look tired, dull, and damaged.
For homeowners in Richmond, VA, recognizing when it's time to go beyond basic maintenance is crucial. After all, your floors are one of your home’s most important features.
Telltale Signs It’s Time for a Change
Not sure if your floors have reached the point of needing professional attention? Keep an eye out for these clear giveaways:
- Widespread Surface Scratches: A few minor scuffs are just part of life. But when your floor is covered in a web of fine scratches that even a well-placed rug can't hide, it’s a clear sign the topcoat is failing.
- A Dull, Worn-Out Finish: Does your floor look flat and lifeless, even right after you’ve cleaned it? A lack of sheen means the protective polyurethane layer has worn thin, leaving the bare wood exposed and vulnerable.
- Graying or Discolored Boards: Take a hard look at high-traffic zones like hallways, entryways, and kitchens. Gray or dark-looking boards are a red flag that moisture has seeped past the finish and is slowly damaging the wood fibers themselves.
- Fading and Sun Damage: In sunny rooms, you might notice that the floor near windows is much lighter than the areas that were protected under furniture or rugs. This UV damage creates an uneven, patchy look that only sanding can truly fix.
Sanding vs. Buff & Coat: Which Do Your Floors Need?
So, you've spotted some of the signs above. Does that automatically mean a full, disruptive sanding job is in your future? Not always. Sometimes, a less invasive "buff and coat" (also called a screen and recoat) is all you need. Here’s a quick way to tell the difference.
| Symptom | Recommended Service | Reason |
|---|---|---|
| Fine surface scratches, dull finish | Buff & Coat | The damage is only in the top protective layer. A light buffing and new topcoat will restore the shine. |
| Deep scratches or gouges that have reached the raw wood | Full Sanding & Staining | These can't be buffed out. The floor needs to be sanded down to bare wood to remove them. |
| Gray or black boards from water damage | Full Sanding & Staining | This indicates the wood itself is stained. Sanding is required to remove the damaged wood fibers. |
| Faded or discolored areas from sun exposure | Full Sanding & Staining | The color change is in the wood and stain. The entire surface must be sanded for a uniform color. |
| You want to change the color of your floors | Full Sanding & Staining | A buff and coat only adds a clear protective layer. To change the color, you must sand and re-stain. |
| The finish is peeling, bubbling, or flaking | Full Sanding & Staining | This signals finish failure. The old, failing finish must be completely removed before reapplying. |
In short, if the problems are just on the surface, a Buff & Coat service is a fantastic, affordable option. But if the damage has penetrated the finish and reached the wood itself, a full sanding is the only way to truly restore your floors.
Protecting Your Investment
Ignoring these signs does more than just drag down your home's appearance—it can lead to much bigger, more expensive problems down the road. A worn-out finish is like a crack in your home's armor. It lets dirt, moisture, and grime seep directly into the wood, which can cause permanent staining, warping, and even splintering.
Beautifully restored floors are a huge draw for potential buyers. In fact, updated flooring is consistently ranked among the top home upgrades that attract offers. By investing in a professional hardwood floor sanding and staining service, you’re not just fixing an issue—you’re actively boosting your home’s appeal and market value.
The Hardwood Floor Sanding and Staining Process Explained
Tackling a hardwood floor sanding and staining project can seem like a huge undertaking, but it’s really a methodical process. When done right, it completely transforms your home. At Buff & Coat, we treat every floor like a piece of fine furniture, following a careful workflow designed to deliver flawless results. Think of it like restoring a valuable antique—every step is deliberate and builds on the last.
The journey from a worn-out floor to a beautifully restored surface has several key phases. It all starts with careful preparation, moves into the heavy lifting of sanding, transitions to the artistry of staining, and finishes with the all-important protective coating.
Step 1: Preparation and Room Setup
Before a single sander touches the floor, proper prep work is the key to a smooth, clean project. This first phase ensures the rest of your home stays protected and the workspace is clear for our equipment.
Our team will:
- Secure the Area: We carefully section off the work area with plastic sheeting. This contains any stray dust and prevents it from migrating into other parts of your home.
- Inspect and Prepare the Floor: We’ll do a final walkthrough, hunting for any protruding nails or staples that need to be countersunk below the surface. This is critical for preventing damage to our sanding equipment and ensuring a perfectly flat final product.
Step 2: Dustless Sanding to Bare Wood
This is where the real transformation begins. The goal of sanding is to methodically strip away the old, damaged finish, erase scratches and imperfections, and reveal a fresh, clean layer of raw wood. It’s not a one-and-done pass; it’s a multi-stage process that requires precision and the right machinery.
We use progressively finer grits of sandpaper with each pass:
- Aggressive First Pass: We start with a coarse grit (like 36 or 40-grit) to power through the old polyurethane and get rid of any deep scratches.
- Medium Grit Sanding: Next, we switch to a medium grit (around 60-grit) to smooth out the marks left by the first, more aggressive pass.
- Fine Grit Finishing: The final pass with a fine grit (80 or 100-grit) creates a silky-smooth surface that’s ready to accept stain beautifully and evenly.
Throughout this stage, our focus is on creating a perfectly flat and uniform canvas. The real game-changer here is our commitment to a cleaner work environment. You can learn more about how our advanced dustless sanding technology captures nearly all airborne particles, which keeps your home healthier and minimizes the cleanup.
Step 3: The Art of Staining
With the wood perfectly prepped, we move on to the most visually dramatic step: applying the stain. This is where your chosen color is carefully worked into the wood, enhancing its natural grain and bringing your design vision to life.
Our process ensures a rich, even color without blotches or streaks. We apply the stain methodically, wipe away the excess, and allow it to penetrate the wood fibers. This step requires a skilled hand and a deep understanding of how different wood species—like the red and white oak so common in Richmond homes—absorb color.
Step 4: Applying Durable Protective Finish
The final step is arguably the most important for the long-term health and beauty of your floors. We apply multiple coats of high-quality, commercial-grade polyurethane to create a durable shield over the stained wood.
This protective finish is what stands between your beautiful new floors and everyday life. It resists scratches, scuffs, and spills, and it's what gives your floor its final sheen—whether you prefer a modern matte look or a classic satin glow.
We typically apply three coats of finish, lightly buffing or "screening" between coats. This small step ensures each layer bonds perfectly to the one before it, creating a strong, cross-linked protective barrier. Proper drying time between each coat is essential for a hard, long-lasting finish that will protect your investment for years to come.
If you're just starting to figure out what your floors need, this diagram breaks down the common issues we see every day.
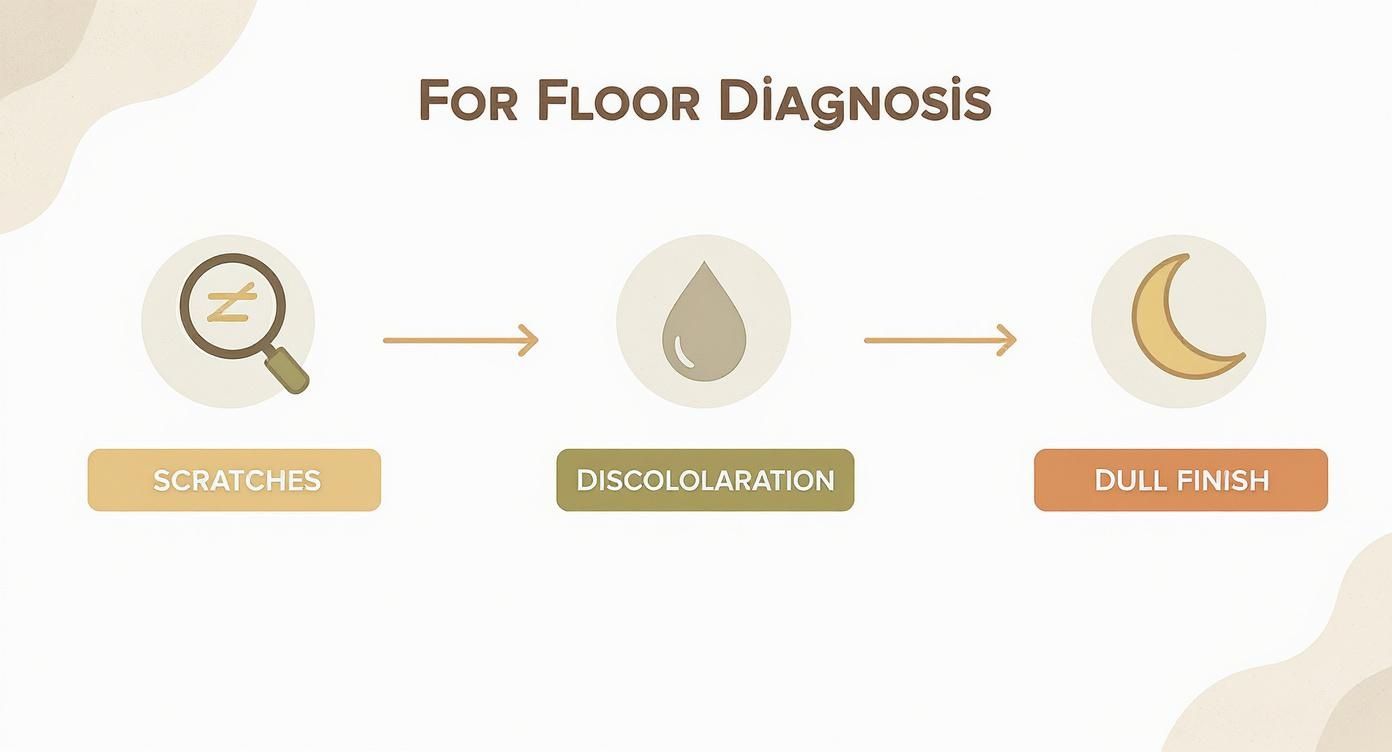
By identifying whether your floors have deep scratches, discoloration, or just a dull finish, you can get a better sense of which refinishing steps are most critical for your home. If you're seeing deep scratches or water spots, the full sanding and staining process is what you'll need to bring them back.
If you're unsure whether your hardwood floors need refinishing, Buff & Coat can take a look and give you honest recommendations.
Ready for a transparent quote? Call 804-392-1114 or request your free estimate today.
Choosing the Perfect Stain and Finish for Your Home
Once the sanding is done and the raw, beautiful grain of your wood is exposed, the real fun begins. This is your chance to dial in the exact look and feel of your home by choosing the perfect stain color and protective finish. This single decision will define your home's character for years to come, influencing everything from the overall mood to your daily maintenance routine.
For homeowners in the Richmond area, this choice is a big deal. You might be trying to preserve the historic soul of a Fan District rowhouse with a classic, warm stain. Or maybe you're aiming for a bright, modern vibe in a newer Glen Allen home. Whatever your goal, getting the right combination is key, and we're here to walk you through the options so you can feel confident in your decision.
Oil-Based vs. Water-Based Finishes
After you’ve landed on a stain color, the most important decision you'll make is what kind of protective topcoat to use. Your two main choices are oil-based and water-based polyurethane, and they each come with their own set of pros and cons.
- Oil-Based Polyurethane: This is the traditional choice, long known for its impressive durability and slightly lower cost. It gives floors a warm, amber glow that actually gets deeper and richer with time. While many love this classic look, it comes with a very strong odor during application and takes much longer to dry and fully cure.
- Water-Based Polyurethane: The modern champ. This finish is incredibly popular because it dries crystal-clear and stays that way—it won't yellow over time. This means the true color of your wood and stain shines through. It has a much lower odor (low-VOC), dries significantly faster, and is a healthier choice for indoor air quality, making it a favorite for families and anyone sensitive to harsh fumes.
Here at Buff & Coat, we almost always recommend a high-quality water-based finish. The clarity, quick drying time, and healthier application process are huge wins. The initial cost might be a little higher, but our clients find the long-term color stability and being able to get back into their homes faster are well worth it.
Finding the Perfect Sheen for Your Lifestyle
Next up is the sheen, which is all about how much light your floors reflect. This has a massive impact on both the look and the practicality of your floors.
- Matte: Gives you a very modern, almost raw-wood appearance with almost no shine. It’s fantastic at hiding small imperfections, dust, and footprints.
- Satin: This is, by far, the most popular choice for a reason. It offers a soft, subtle glow that looks elegant without being overly shiny. It’s the perfect middle-ground for busy households.
- Semi-Gloss: If you want a noticeable shine and a sleek, polished look, this is it. It’s quite durable, but it will show off scratches and dust more easily than the lower sheens.
- High-Gloss: This is your mirror-like finish for a very dramatic, formal style. It can be absolutely stunning, but be warned: it requires constant upkeep because it highlights every single speck of dust and tiny scratch. To learn more, explore our guide on high-gloss floor finishes.
Stains from Classic to Contemporary
The stain is what gives your floor its color. And it’s a big business—in the United States, wood stain sales hit around $2.3 billion in 2023. That number shows just how important getting the color right is to homeowners. You can learn more about these trends in the wood stain industry on factmr.com.
We offer a huge palette of colors to match any vision you have for your home:
| Stain Style | Common Colors | Best For |
|---|---|---|
| Natural/Clear | No stain, just a clear protective finish | Showcasing the wood's natural grain; ideal for a light, Scandinavian, or minimalist look. |
| Light Stains | Golden Oak, Natural, Early American | Brightening up spaces and creating a warm, inviting atmosphere in traditional homes. |
| Medium Stains | Provincial, Special Walnut, Dark Walnut | A timeless, versatile choice that hides imperfections well and complements many decors. |
| Dark Stains | Jacobean, Ebony, True Black | Creating a bold, dramatic, and sophisticated look well-suited for modern or formal spaces. |
During our consultation, we don’t just show you little sample chips. We apply several of your top choices directly onto your freshly sanded floor. This is the only way to see how each color truly reacts with your specific type of wood and the unique lighting in your home. No guesswork, no surprises.
If you’re feeling stuck, don’t worry. The Buff & Coat team can give you expert recommendations based on your home, your wood, and your lifestyle.
Call 804-392-1114 or request a free estimate today.
Understanding Project Costs and Timelines in Richmond
We believe in being upfront and honest, especially when it comes to your budget and schedule. A hardwood floor sanding and staining project is a real investment in your home, and as a Richmond homeowner, you deserve to know exactly what to expect from day one. At Buff & Coat, you won't find hidden fees or surprise charges—just straightforward advice and clear pricing right from the start.
This section will walk you through the factors that shape the final cost and give you a realistic timeline, so you can plan everything with confidence.
What Determines the Cost of Refinishing
No two hardwood refinishing projects are ever the same, which is why the cost can vary. The price we quote is custom-tailored to your home and the specific work needed to get a beautiful, lasting result.
Here are the main things we look at when building your estimate:
- Total Square Footage: This is the biggest piece of the puzzle. Naturally, larger spaces require more materials, time, and labor to complete. Most refinishing jobs are priced by the area, so it helps to know how to calculate cost per square foot for construction projects in general.
- Current Floor Condition: A floor with just a few surface scuffs is a much different job than one with deep gouges, pet stains, water damage, or layers of old, gummy finish. The more intensive the prep work and sanding required, the more it will influence the cost.
- Stain and Finish Selection: The products you choose make a difference. For example, a premium, fast-drying, low-VOC water-based finish might cost a bit more upfront than a standard oil-based polyurethane. However, it pays off with incredible durability, faster cure times, and better indoor air quality.
- Layout Complexity: Big, open rooms are one thing, but spaces with lots of tight corners, closets, or nooks require much more detailed hand-edging. This precision work simply takes more time than sanding a wide-open area.
The only way to get a truly accurate price for your project is with an in-person estimate. It allows a professional to see the unique challenges and opportunities your floors present, ensuring your quote is spot-on.
For a deeper dive into budgeting, you can read our complete guide to hardwood refinishing costs.
A Typical Project Timeline From Start to Finish
Quality work takes time, and you can't rush the process—especially when it comes to letting finishes properly dry and cure. For a typical hardwood floor sanding and staining project of about 500-800 sq. ft. here in the Richmond area, the timeline usually looks something like this:
- Day 1: Sanding. This is the most labor-intensive day. Our crew arrives, preps the entire area, and starts the multi-stage sanding process to take your floors down to the bare, raw wood.
- Day 2: Final Sanding and Staining. We finish up with a final, fine-grit sanding to get the surface perfectly smooth. Then, we apply your chosen stain color and let it penetrate the wood and dry completely.
- Day 3: First and Second Coats of Finish. Time to protect the wood. We apply the first coat of protective polyurethane. Once it’s dry (usually 2-3 hours for water-based finishes), we lightly buff the surface and lay down the second coat.
- Day 4: Final Coat and Initial Curing. The third and final coat of finish goes on. After this coat, the floor needs to be left alone for at least 24 hours before you can walk on it in your socks.
You can typically move furniture back carefully after 72 hours. We strongly recommend waiting at least one to two weeks before putting down any area rugs to allow the finish to fully harden and cure. A little patience at the end is the key to a beautiful, long-lasting result.
If you’re ready to get a clear picture of what your project will involve, Buff & Coat is here to help.
Richmond homeowners: get a fast, no-obligation quote for your refinishing project.
Why Professional Refinishing Outperforms a DIY Project
Thinking about tackling a hardwood floor refinishing project yourself? It can seem like a great way to save a few bucks. But what often starts as a weekend task can quickly turn into a frustrating, costly, and permanent mistake.
The truth is, professional hardwood floor sanding and staining is a craft. It depends on specialized equipment and years of hands-on experience—two things a rental machine from a big-box store just can't give you.
It’s like getting a professional paint job for a classic car versus using a few cans of spray paint. Sure, both apply color, but the difference in prep, tools, technique, and the final look is worlds apart. One gives you a flawless, mirror-like finish. The other often leaves you with drips, an uneven coat, and a look that tanks the car's value. The exact same thing happens with your floors.
The Common Pitfalls of DIY Floor Sanding
Many homeowners in Richmond and Chesterfield don't realize just how much skill it takes to handle floor sanding equipment. Those powerful drum sanders you can rent are notoriously tough to control.
A moment of hesitation or one uneven pass can carve deep, permanent gouges, divots, or "chatter" marks right into your floorboards. You might not even see these mistakes until the stain and finish go on, and by then, they’re glaringly obvious and impossible to fix without starting all over.
The most common DIY disaster we see is uneven sanding. Homeowners often unintentionally create low spots or leave swirl marks from the edger, resulting in a floor that looks blotchy and unprofessional once the stain is applied.
Other frequent DIY headaches include:
- Uneven Stain Application: Without the right technique, stain can look streaky or blotchy. This is especially true on porous woods like oak, which soak up stain unevenly.
- Finish Bubbles and Debris: Applying polyurethane in a normal home environment almost always traps dust, hair, and air bubbles. The result is a rough, gritty final surface instead of a smooth one.
- Massive Dust Contamination: Even with a shop vac taped to the side, rental sanders kick up an incredible amount of fine wood dust. It settles on every single surface in your home and sticks around for weeks.
The Buff & Coat Professional Advantage
Choosing a pro like Buff & Coat is an investment in your peace of mind and a guarantee of a top-quality result. We bring a level of precision and expertise that a DIY project simply can't touch.
Our process is built on three pillars: superior equipment, deep product knowledge, and a meticulous approach. We use commercial-grade, dustless sanding systems that capture nearly 99% of airborne particles. This protects your home's air quality and completely eliminates the massive cleanup nightmare.
On top of that, our team has over 15 years of experience working with the specific types of hardwood found in Richmond-area homes, from historic heart pine to modern white oak. We understand the unique chemistry of different stains and finishes, making sure they're applied perfectly for maximum beauty and durability.
If you're still on the fence, it helps to weigh the real risks and rewards. Here’s a quick comparison to put things in perspective.
DIY vs. Professional Hardwood Refinishing
| Factor | DIY Approach | Buff & Coat Professional Service |
|---|---|---|
| Equipment | Hard-to-control rental sanders; massive dust production. | Commercial-grade, dustless systems that capture 99% of particles. |
| Skill & Experience | High risk of permanent mistakes like gouges, divots, and chatter marks. | 15+ years of local experience ensures a flawless, even finish. |
| Stain & Finish | Prone to blotches, streaks, bubbles, and trapped debris. | Expert application for a smooth, durable, and professional look. |
| Time & Effort | Typically takes multiple weekends; involves heavy lifting and a huge cleanup. | Project completed efficiently in a few days with no dust mess left behind. |
| Cost | Lower upfront cost, but high potential for costly mistakes requiring a do-over. | Higher initial investment but guarantees a lasting, high-quality result. |
| Final Result | Often looks "good enough" from a distance but shows flaws up close. | A beautiful, long-lasting finish that adds significant value to your home. |
A DIY project might seem cheaper at first, but a professional job not only looks infinitely better, it also lasts longer. It’s a true investment that protects your floors and boosts your home’s value for years to come.
If you’re unsure whether to DIY, let Buff & Coat provide an honest assessment and a free estimate. Call 804-392-1114 to schedule a consultation.
Why Richmond Homeowners Choose Buff & Coat
Choosing someone to work on your hardwood floors is a big deal. It’s not just about getting a good result—it’s about trusting the people you invite into your home. For over 15 years, Buff & Coat has been the company homeowners across Richmond, Midlothian, and Chesterfield call because we’ve built our business on solid craftsmanship, clear communication, and genuinely great service. We’re not a franchise; we're a local, owner-operated business that puts a ton of pride into every single floor we restore.
The demand for quality floor refinishing is stronger than ever. The global market for wood floor staining services was valued at around USD 1.2 billion in 2023, largely because of the strong renovation market right here in North America. This just goes to show how important it is to pick a contractor who truly masters the craft. You can read more about the growth of the wood staining market at dataintelo.com.
When you hire us, you're not just getting a service. You're getting a commitment to quality from start to finish.
- 15+ Years in Business: We have the know-how to handle any challenge your floors can throw at us.
- Dustless Sanding Systems: We've invested in advanced dustless sanding systems that capture nearly all the airborne particles right at the source, resulting in a much cleaner, healthier process for your family.
- Local, Owner-Operated: We're your neighbors, not a faceless corporation. We put our reputation on the line with every job.
- High-Quality Finishes: We only use professional-grade, low-odor finishes that are tough enough to protect your floors and keep them looking beautiful for years.
- Clear Pricing and Honest Advice: You’ll get a detailed, upfront estimate with no surprises. We'll always give you our honest opinion on what your floors need.
- 5-Star Customer Service: From the moment you call to the final walkthrough, our goal is to make the entire process smooth, respectful, and completely stress-free.
Ready to restore your hardwood floors? Buff & Coat makes the process fast, clean, and stress-free.
Call 804-392-1114 or request your free estimate at buffandcoatvirginia.com.
Frequently Asked Questions About Hardwood Floor Refinishing
We get it—refinishing your floors is a big decision, and you've probably got some questions. To make things easier, we’ve put together answers to the most common things Richmond homeowners ask us about the sanding and staining process. Think of this as your final checklist to help you move forward with total confidence.
How long does hardwood floor refinishing take?
Every project is a bit different, but for a typical 500 to 800 square foot space, you can expect the entire job to take about 3 to 5 days. That timeline gives us the breathing room to do a meticulous, multi-stage sanding, apply the stain perfectly, and add multiple coats of polyurethane. Most importantly, it allows for the critical drying and curing time between each coat, which is the secret to a rock-solid, durable finish. We’ll give you a detailed schedule upfront so there are no surprises.
Is dustless sanding really dust-free?
While no system on the planet is truly 100% dust-free, ours is as close as it gets. Our professional-grade dustless sanding equipment is a game-changer, capturing about 99% of airborne dust right at the source. This means the dust never gets a chance to float around your home and settle on your furniture. It’s a much cleaner, healthier approach compared to old-school sanding methods and drastically cuts down on the cleanup.
Can engineered hardwood floors be refinished?
That’s the million-dollar question, and the answer is: it depends entirely on the thickness of the top wood layer. Many quality engineered floors have a thick enough wear layer to be fully sanded and refinished at least once or twice. On the flip side, some cheaper products have a paper-thin veneer that just can’t handle a full sanding.
There's only one way to know for sure: a professional inspection. During your free in-home consultation, our team will actually measure the wear layer of your floors. We'll give you a straight, honest answer on whether refinishing is a safe and smart option for you.
What should I do to prepare my home for refinishing?
A little prep work from you goes a long way in making sure the project kicks off smoothly. We just ask that you completely clear the rooms before we show up.
Here’s a quick checklist:
- Remove all furniture from the rooms.
- Take down any curtains, drapes, and blinds.
- Roll up and move any area rugs.
- Clear off pictures, art, or decorations from the walls.
Once the space is empty, we handle everything else. We'll carefully seal off the work area with plastic sheeting to protect the rest of your home and then we’ll get right to work.
If any other questions pop up, just give us a call. Our team at Buff & Coat Hardwood Floor Refinishing is always here to help homeowners in the Richmond, VA area.
Get your free, no-obligation estimate at https://buffandcoatvirginia.com or call us at 804-392-1114 today.