Why Covering Wood Floors Is Sometimes the Smart Choice
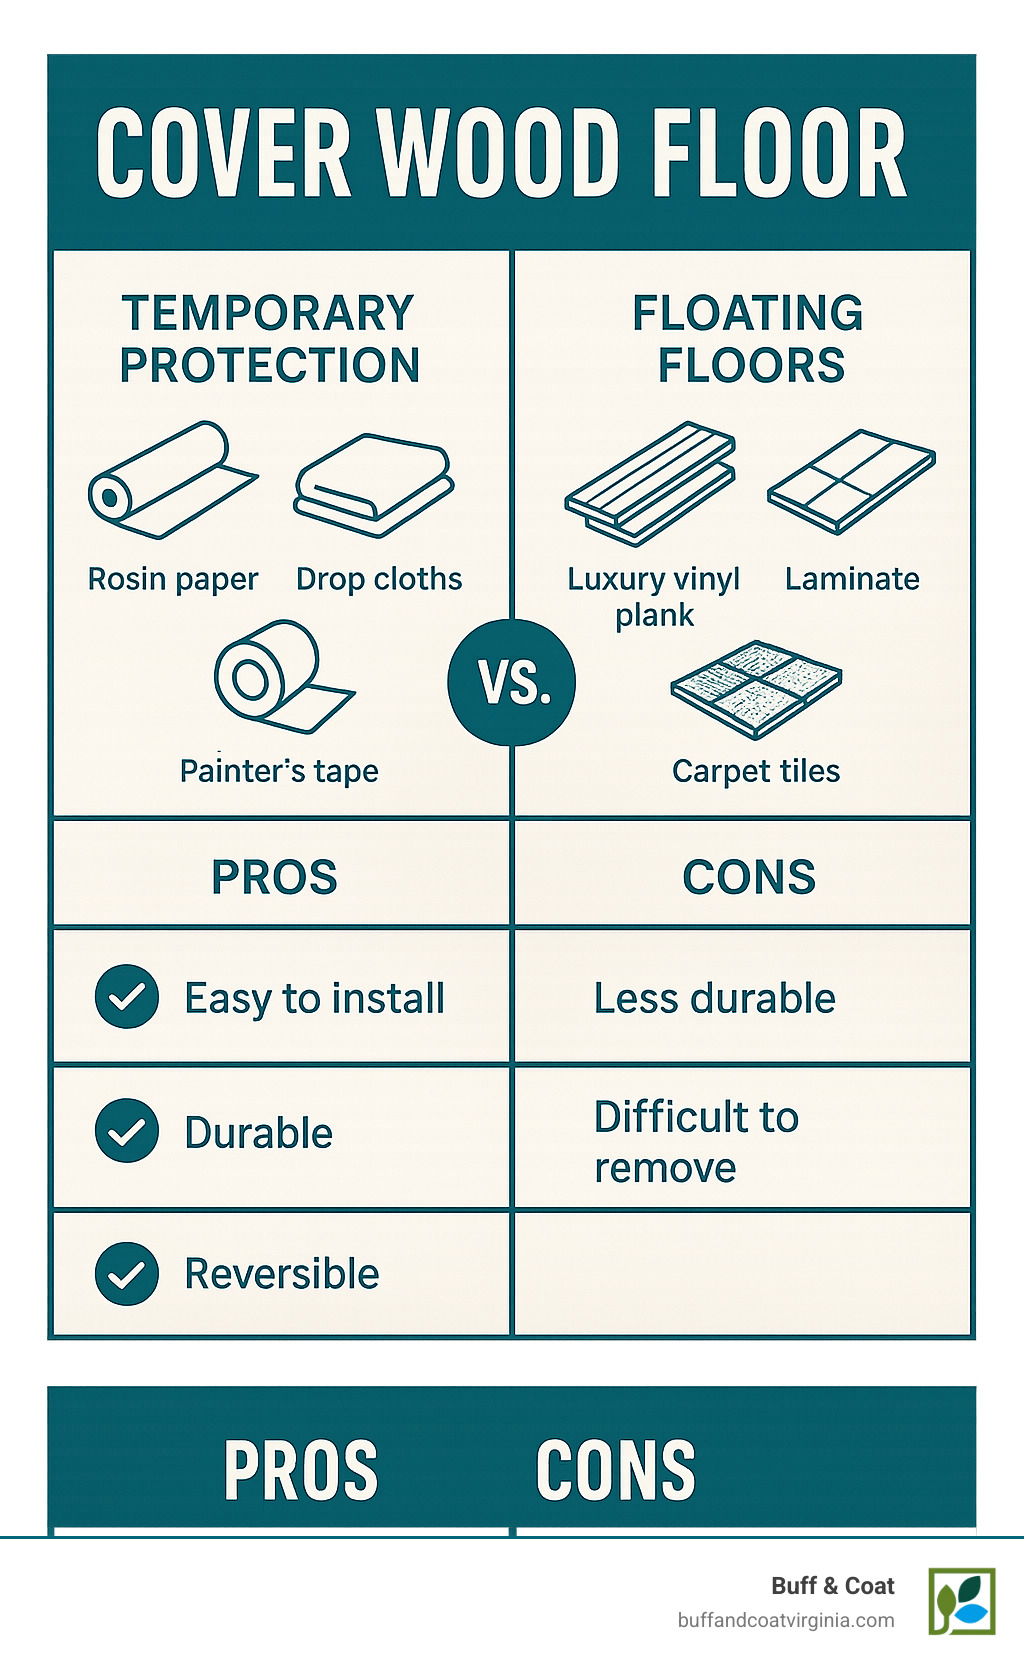
When you need to cover wood floor surfaces, you have several options that won’t damage your investment. Here are the main approaches:
- Temporary protection: Rosin paper and painter’s tape for projects
- Floating floors: Luxury vinyl plank (LVP) or laminate that clicks together
- Removable coverings: Carpet tiles or interlocking mats
- Area solutions: Strategic rug placement with proper padding
Avoid glue-down installations – they can permanently damage your hardwood when removed.
Whether you’re protecting floors during a painting project or need a long-term solution for a high-traffic area, the key is choosing methods that preserve your original hardwood underneath. As one flooring expert noted: “Keeping paint off a hardwood floor is a lot easier than trying to remove it later.”
Your hardwood floors represent a significant investment in your home’s value and beauty. Sometimes covering them temporarily or semi-permanently makes perfect sense – whether you’re creating a kid-friendly play area, protecting during renovations, or simply want a different look for a few years.
The good news? Modern covering solutions can give you the durability and style you want while keeping your original floors intact for future restoration.
I’m David Emmerling, and in my 20+ years of hardwood floor restoration experience, I’ve seen homeowners successfully cover wood floor surfaces using various methods before eventually restoring their original beauty. My expertise with Buff & Coat has shown me which covering approaches preserve floors and which ones cause costly damage.
Temporary Solutions: How to Protect Wood Floors During Projects
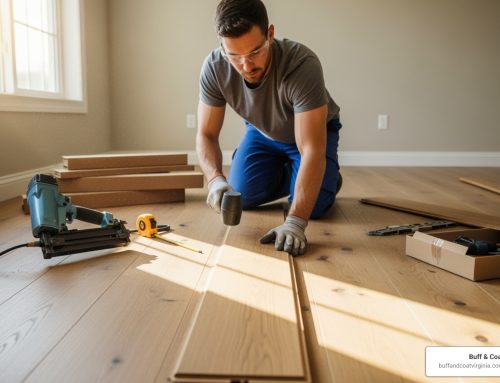
We’ve all been there: you’re excited to tackle a home improvement project, perhaps a fresh coat of paint on the walls, and suddenly the beautiful hardwood floors beneath feel incredibly vulnerable. The thought of a rogue paint drip or a spilled can of primer sends shivers down our spines! But don’t despair; protecting your wood floors during these activities is entirely doable with the right temporary coverings.
The primary goal here is prevention. As we often say, “Preventing paint from drying on the floor is easier than removing it.” Trying to remove dried paint could lead to scraping or using harsh solvents, both of which can damage your precious hardwood. For painting projects, renovations, or even just moving furniture, we recommend using materials like rosin paper, painter’s tape, and sturdy drop cloths. You might even find anti-slip, self-adhesive temporary protection films that are 100% paint-proof and cover up to 300 sq ft, saving you time and effort.
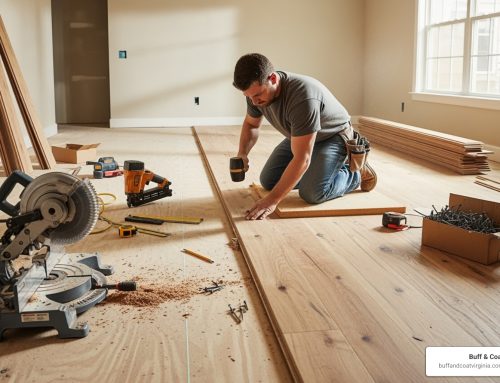
How to Properly Install Protective Paper
When it comes to protecting your wood floors during painting, rosin paper is your best friend. It’s affordable, easy to work with, and provides a good barrier. But the trick isn’t just laying it down; it’s how you secure it.
Here’s our step-by-step guide for proper installation to cover wood floor surfaces for temporary protection:
- Roll it out: Start by unrolling a piece of 3-foot wide rosin paper. Place it carefully along the trim, ensuring it covers the floor right up to the baseboard.
- Secure to the baseboard, not the floor: This is crucial! Instead of taping the paper directly to your hardwood floor, secure it along the baseboard with a delicate surface painter’s tape, like Scotch® Delicate Surface Painter’s Tape. This prevents any adhesive residue or damage to your floor’s finish when you remove the tape.
- Overlap and tape paper to paper: For larger areas, you’ll need multiple pieces of rosin paper. When laying down subsequent pieces, overlap them slightly. Then, tape these overlapping pieces of paper to each other, not to the floor. This creates a continuous, protected surface without risking tape damage to your hardwood. For long stretches of trim, a painter’s tape dispenser can really speed up the job.
- Add drop cloths: For extra protection, especially in high-spill areas or under your work zone, lay down canvas drop cloths over the rosin paper. These provide an absorbent layer for heavier spills.
Following these steps will ensure your floors are well-protected without causing any unintended damage from the protective materials themselves. It’s a small effort that saves a huge headache later! For more tips on preparing your home for flooring projects, check out our guide on Preparing Your Home for Hardwood Floor Refinishing.
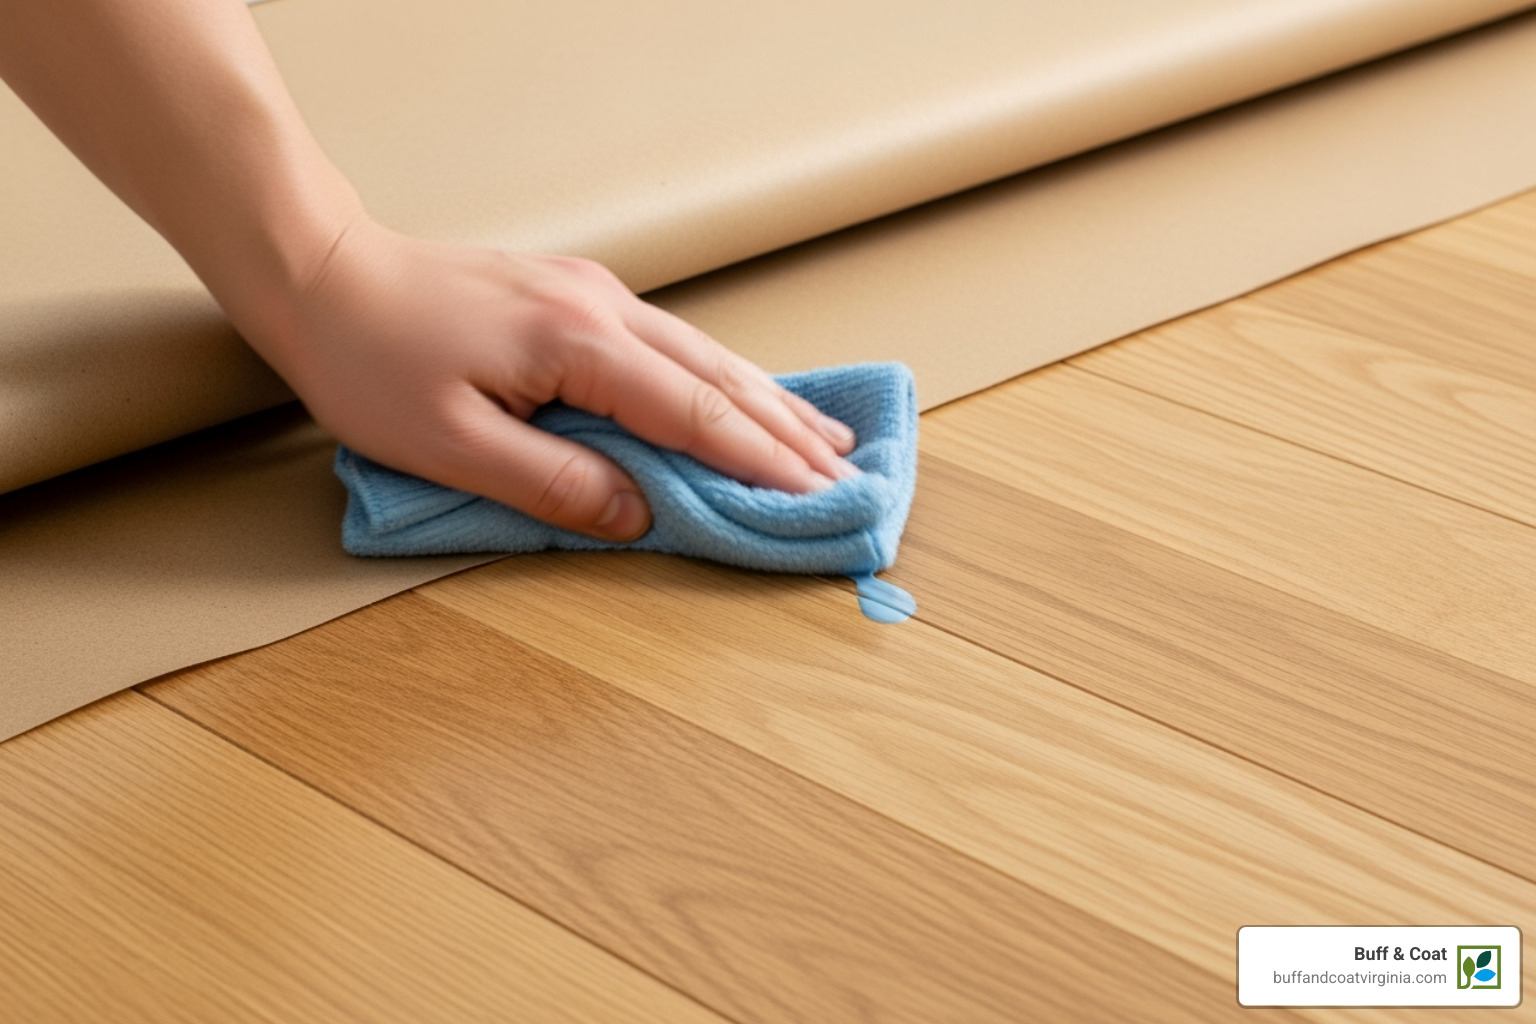
Why You Must Clean Spills Immediately
Okay, you’ve taken all the precautions: rosin paper is down, tape is in place, and drop cloths are spread. But accidents happen. A tiny drip, a splash, or even a full-blown spill can occur. When it does, our golden rule is simple: Act fast!
Here’s why immediate action is non-negotiable:
- Paint spills: If paint dries on your wood floor, it becomes incredibly difficult to remove. You might be forced to resort to scraping, which can scratch or gouge the wood, or using harsh chemical solvents that can strip the finish or even damage the wood itself. Cleaning paint spills immediately prevents this permanent damage.
- Water damage: Even though you’re protecting from paint, water can be just as insidious. If water seeps through the paper or gets under a drop cloth and sits on your hardwood for too long, it can lead to staining, warping, or buckling of the wood. Hardwood and standing water are not friends!
- Staining: Many substances, even seemingly innocuous ones, can stain wood if left to dry. Paint, certain cleaning solutions, or even food and drink spills can leave unsightly marks that are challenging to remove without professional help.
So, the moment you spot a spill, grab a clean, dry cloth and blot it up immediately. Avoid wiping, as this can spread the liquid. The quicker you address the spill, the higher the chance of completely preventing any damage to your beautiful hardwood floors.
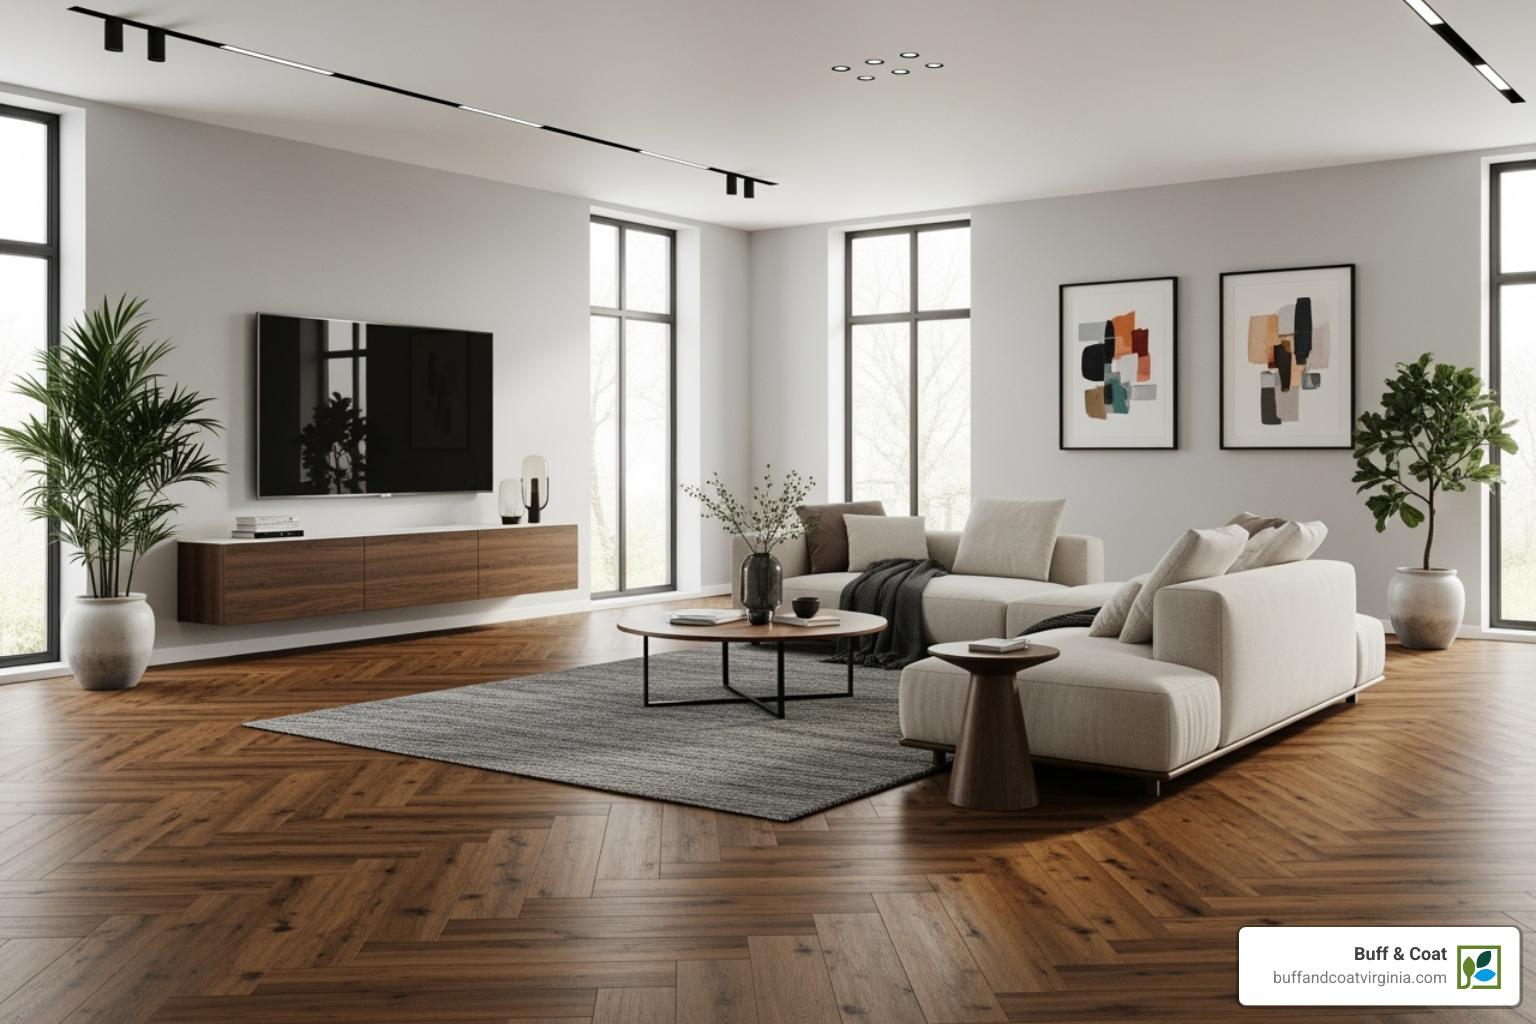
Damage-Free Ways to Cover Wood Floor Long-Term
Sometimes you need more than just temporary protection. Maybe you’re dealing with energetic kids who love to play indoors, pets that can’t help but scratch, or you simply want to refresh your home’s look without committing to permanent changes. The wonderful news is that you can cover wood floor surfaces for months or even years without causing any damage to your precious hardwood underneath.
The secret lies in choosing “floating” installation methods. These systems rest on top of your existing floors without any glue, nails, or adhesives that could harm your hardwood. Think of it as giving your floors a protective outfit that can be removed whenever you’re ready to show off their natural beauty again.
The Best Option to Cover Wood Floor: Floating Luxury Vinyl
When homeowners ask us about the best long-term solution to cover wood floor surfaces, we consistently recommend floating Luxury Vinyl Plank (LVP) flooring. This isn’t your grandmother’s vinyl – modern LVP has evolved into a sophisticated, durable option that can fool even flooring experts.
Here’s why LVP consistently wins our hearts (and our clients’ approval). It’s completely waterproof, making it perfect for kitchens, bathrooms, or any room where spills happen. We’ve seen families transform their entire main floor with LVP, knowing their original hardwood stays safe underneath while they enjoy worry-free living.
The scratch-resistant surface is a game-changer for pet owners. Dogs running through the house, cats with their claws, even kids dragging toys – LVP handles it all with grace. Brands like Armstrong Vivero with Diamond 10 technology and COREtec have particularly impressed us with their durability in real-world family situations.
What makes LVP truly special is its click-lock installation system. Each plank simply clicks together with its neighbors, creating a solid, continuous surface that “floats” over your hardwood. No glue, no nails, no permanent attachment whatsoever. When you’re ready to reveal your original floors, the LVP lifts right off without leaving a trace.
Daily maintenance couldn’t be easier – a quick sweep and occasional damp mopping keep it looking pristine. After years of wear, you can remove the LVP and have your hardwood professionally restored to its original glory. Our Wood Floor Installation Services ensure your LVP installation protects rather than harms your existing floors.
Other Reversible Flooring Ideas
While LVP often steals the show, several other options can successfully cover wood floor surfaces without permanent damage. Each brings its own personality to your space.
Laminate flooring works similarly to LVP with its click-lock floating system. It’s budget-friendly and can beautifully mimic wood or tile. The main difference? Laminate is water-resistant rather than waterproof, so you’ll need to clean up spills quickly. A quality underlayment beneath laminate protects your hardwood from scratches and moisture while reducing noise.
Carpet tiles offer warmth and sound absorption that hard surfaces can’t match. These modular squares install easily and individual tiles can be replaced if damaged. They’re particularly nice in bedrooms or play areas where comfort matters. Just remember they’ll need regular vacuuming rather than the simple sweeping that hard surfaces allow.
Interlocking rubber tiles work well for home gyms or utility areas, providing excellent cushioning and protection. However, we recommend caution here – rubber can trap moisture and prevent air circulation, potentially damaging your hardwood’s finish over time. If you choose rubber, look for tiles with textured backing that allows airflow, and consider them for shorter-term use.
Area rugs and strategic runners remain the simplest way to protect high-traffic zones. The key is using proper rug pads underneath – they prevent slipping, cushion impact, and allow air circulation to prevent moisture problems. Quality felt or natural rubber pads work best.
Remember to rotate your rugs periodically. This prevents “tan lines” where covered areas age differently than exposed wood. Nobody wants a checkerboard effect when they finally remove their coverings!
Some homeowners get creative with heavy vinyl remnants for messy hobby areas or loose lay vinyl planks designed to stay in place without clicking together. These solutions work well for specific situations where maximum protection is needed.
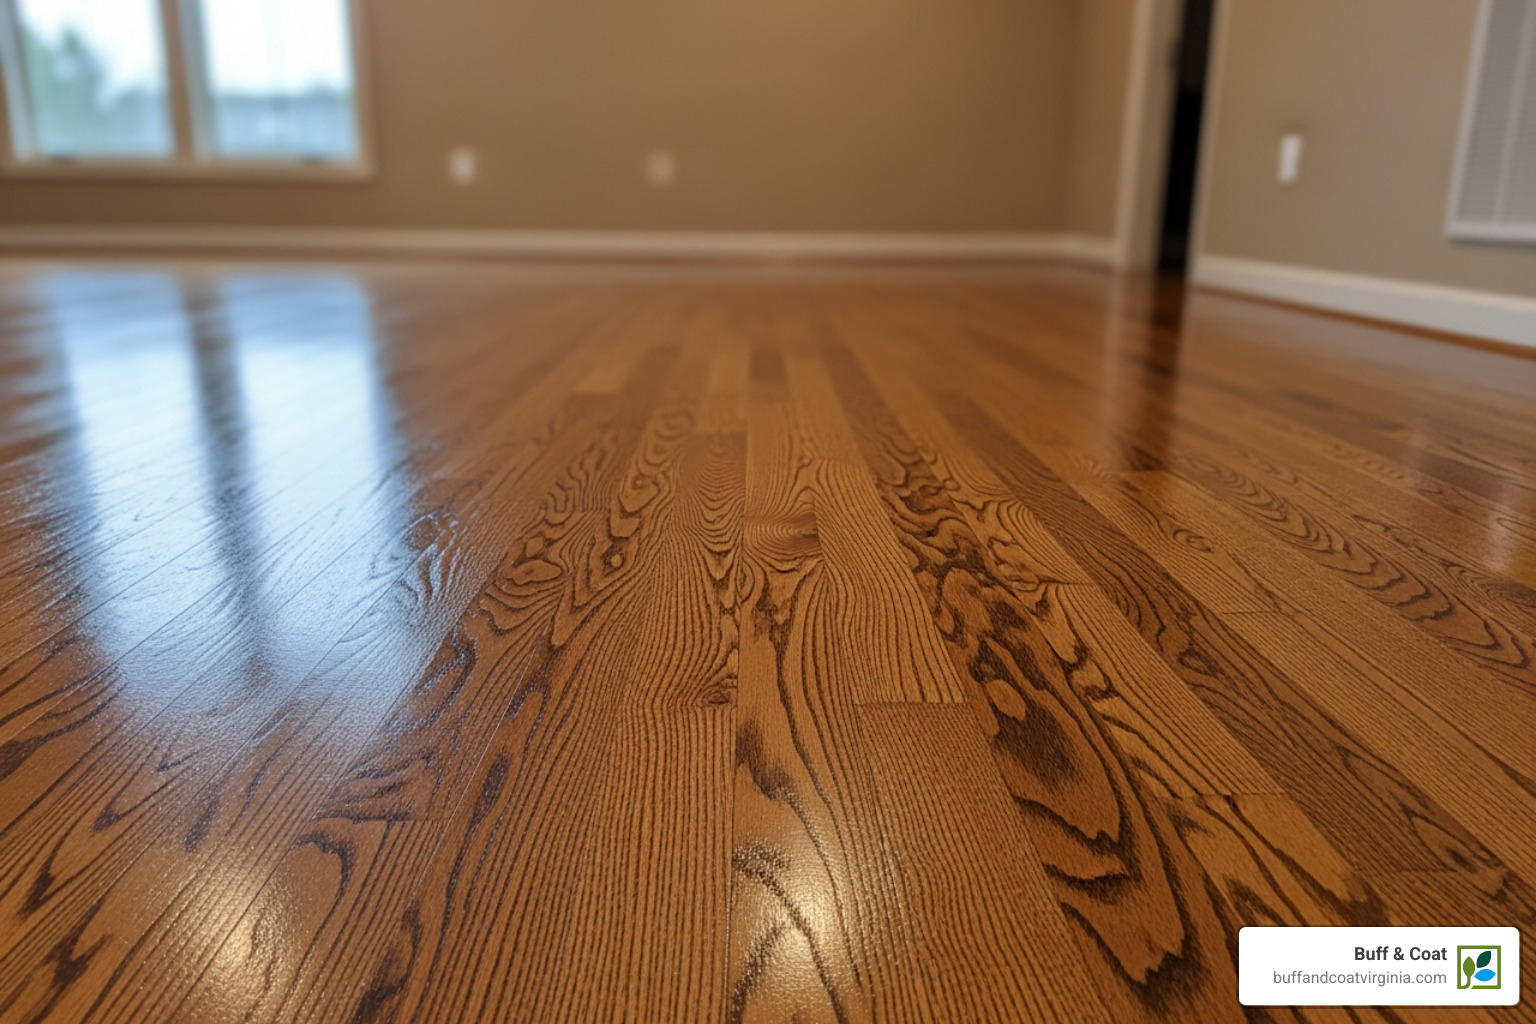
The beauty of all these options is their reversibility. When you’re ready to enjoy your original hardwood again, our signature Buff and Coat process can restore its original shine and protect it from future damage, making it look as stunning as the day it was first installed.
What to Avoid When Covering Hardwood Floors
I wish I could tell you that every method to cover wood floor surfaces is safe and reversible, but that would be doing you a disservice. In my two decades of restoring hardwood floors, I’ve walked into homes where well-meaning homeowners made choices that turned their beautiful hardwood into an expensive nightmare.
The truth is, some covering methods can cause permanent damage that’s either impossible to fix or costs more to repair than the original floor was worth. Let me share what I’ve learned the hard way – through countless restoration projects where I had to deliver bad news to homeowners.
The Dangers of Glue-Down Installations
Here’s the conversation I dread having with homeowners: “I’m sorry, but your hardwood can’t be saved.” It usually happens when someone decided to install glue-down flooring directly over their existing hardwood.
I get it – glue-down installations seem logical. They’re permanent, they don’t move, and contractors often recommend them. But when you want to preserve the hardwood underneath, glue is your worst enemy.
Adhesive damage is the first problem you’ll face. The industrial-strength adhesives used for permanent flooring don’t just stick to the surface – they penetrate deep into the wood grain and strip away the protective finish. I’ve seen gorgeous oak floors turned into a blotchy, discolored mess because the adhesive chemically altered the wood itself.
Then comes the difficult removal process. As one flooring expert bluntly put it about removing glued-down floors: “YOU CAN’T” save the underlying wood. The removal process often requires heavy-duty scrapers, sanders, and sometimes even machinery typically used for concrete work. The difficulty of removing glued-down floors is so well-documented that most professionals won’t even attempt it without warning homeowners about the likely outcome.
The costly repairs that follow are heartbreaking. I’ve seen homeowners spend three times more trying to fix glue damage than they would have spent on a proper floating installation. Often, the damage is so severe that complete replacement becomes the only option. Your beautiful hardwood investment becomes expensive firewood.
Why Trapping Moisture is a Major Risk
The second major mistake I see is homeowners choosing non-breathable materials that trap moisture against their hardwood. Wood is a living material that needs to breathe, and when you suffocate it, bad things happen quickly.
Warping and buckling are usually the first signs of trouble. Wood naturally expands and contracts with humidity changes, but when moisture gets trapped underneath a covering, the wood can’t regulate itself properly. I’ve seen floors that looked like rolling hills because the trapped moisture caused uneven expansion.
Mold growth and mildew follow close behind. That musty smell when you lift up a rubber mat? That’s your hardwood crying for help. The dark spots and fuzzy growth aren’t just unsightly – they can create serious indoor air quality problems for your family.
Wood rot is the final stage, and it’s devastating. When moisture sits against wood for extended periods, the wood literally begins to decompose. At this point, there’s no restoration possible – only replacement.
The importance of breathability cannot be overstated. This is why I always recommend coverings that allow air circulation. Even something as simple as using area rugs with proper rug pads can make the difference between protection and destruction.
I’ve learned that preventing moisture damage is much easier than fixing it. When clients ask about covering options, I always emphasize choosing materials that work with their hardwood’s natural properties, not against them.
Frequently Asked Questions About Covering Wood Floors
Over the years, we’ve helped countless homeowners steer the ins and outs of protecting their beautiful hardwood floors. These three questions come up time and time again, so let’s dive into what you really need to know when you’re planning to cover wood floor surfaces.
Will covering my hardwood floor cause it to change color?
Here’s the honest truth: yes, it might. But don’t panic – this is actually a natural process that happens whether you cover your floors or not!
Your hardwood floors are living, breathing materials that react to light, especially those UV rays streaming through your windows. Over time, wood naturally “mellows” – some species darken while others lighten. It’s like getting a gentle tan, but for your floors.
When you cover wood floor areas with rugs or furniture for extended periods, those covered sections stay protected from UV exposure. Meanwhile, the exposed areas continue their natural aging process. Remove that area rug after a year, and you might find what we call the “tan line effect” – where the covered wood looks different from the surrounding floor.
The good news? You can minimize this with some simple strategies. Rotate your rugs and furniture every few months to let different areas get equal light exposure. Think of it as giving your floors a chance to tan evenly! Choose breathable rug pads made from felt or natural rubber – they protect your finish from scratches while allowing air circulation that prevents moisture buildup and potential yellowing.
Consider UV protection too. Modern finishes and sealants can slow down the mellowing process, though they won’t stop it entirely. Some color change is perfectly natural and often adds character to your floors.
How should I prepare my hardwood floor before covering it?
Think of this as setting the stage for success. Proper preparation ensures your covering protects rather than harms your precious hardwood.
Start with a thorough cleaning – and we mean thorough! Every speck of dust, grit, or debris needs to go. Why? Because anything trapped between your hardwood and its covering becomes like sandpaper over time, slowly scratching and dulling your beautiful finish. Sweep first, then vacuum with a soft brush attachment, and finish with a damp mop using a wood-safe cleaner.
Address minor repairs next. Tighten any loose screws, remove old staples, and smooth out imperfections. If you notice waxy residue from old cleaning products, a bit of white spirit can help remove it. The smoother your surface, the better your covering will perform.
Check for levelness, especially if you’re installing floating floors like LVP or laminate. While temporary coverings can handle minor bumps, floating floors need a relatively even surface for proper installation and long-term performance. Significant dips or humps can cause problems down the road.
Consider adding a protective layer for long-term coverings. Some homeowners apply a fresh coat of wax or temporary sealant before covering, especially in high-traffic or spill-prone areas. This extra protection makes future cleanup easier and adds another barrier against potential damage.
For more detailed maintenance tips, check out The Impact of Proper Hardwood Floor Maintenance.
Can I install a floating floor myself?
Absolutely! Many homeowners successfully tackle floating floor installations, and honestly, it’s one of the more DIY-friendly flooring projects out there. Modern floating floors like laminate and LVP are designed with user-friendly click-lock systems that make the process surprisingly accessible.
The beauty of click-lock systems is in their simplicity. The planks literally click and lock together – no glue, no nails, no permanent attachment to your precious hardwood underneath. One homeowner described installing laminate as “physically demanding but easy on a difficulty scale,” which pretty much sums up the experience.
You’ll need some basic tools: tape measure, utility knife (for LVP), miter saw or laminate cutter (for laminate), spacers, tapping block, and a pull bar. Nothing too fancy or expensive.
The keys to success? Patience and precision. While the process is straightforward, cutting around doorways or irregular shapes requires careful measuring and cutting. Take your time with measurements – the old “measure twice, cut once” rule definitely applies here.
Don’t forget the underlayment! This crucial layer provides moisture protection, sound dampening, and a smooth surface for your new floating floor. It’s not optional – it’s essential for protecting your hardwood underneath.
That said, professional installation has its advantages. We can handle unexpected challenges, ensure a flawless finish, and typically complete the job much faster. Plus, there’s real peace of mind knowing experts are protecting your hardwood investment. For insights on when to call in the pros, visit Why Hire Professionals for Hardwood Floor Refinishing.
Whether you DIY or hire professionals, the goal remains the same: protecting your beautiful hardwood while getting the functionality and style you want.
Conclusion: Preserve Your Floors, Perfect Your Style
Your hardwood floors are more than just a surface to walk on – they’re an investment in your home’s beauty and value. The good news is that when you need to cover wood floor surfaces, you don’t have to say goodbye to that investment forever.
Throughout this guide, we’ve explored solutions for every situation. Maybe you’re tackling a weekend painting project and need temporary protection with rosin paper and painter’s tape. Or perhaps you’re looking for a long-term solution like floating luxury vinyl plank that can handle kids, pets, and daily life while keeping your original hardwood safe underneath.
The key to success lies in making smart choices. Floating floors preserve your investment while glue-down installations can destroy it. Breathable materials protect while moisture-trapping coverings can cause warping and mold. By following the principles we’ve outlined, you can enjoy the benefits of a fresh look or added durability without compromising your beautiful hardwood.
At Buff & Coat, we’ve spent over 20 years helping homeowners in Richmond, Glen Allen, and Midlothian steer these decisions. We understand that life happens – kids spill juice, pets scratch floors, and sometimes you just want a different style for a few years. That’s perfectly okay!
When you’re ready to restore your original floors, our signature buff and coat process can bring them back to life. We’ve seen floors that were covered for years emerge looking absolutely stunning after our dust-free restoration techniques work their magic. It’s like unwrapping a beautiful gift that’s been waiting patiently for its moment to shine again.
Your hardwood floors can handle whatever life throws at them, especially when you have the right knowledge and trusted partners. Whether you’re preserving home value, creating a pet-friendly space, or simply perfecting your style, your stunning hardwood is always ready for its grand reveal.
Ready to find what lies beneath your current covering? Learn about our signature Buff and Coat process and let us help restore your floors to their former glory!