Refinishing your own hardwood floors is a tempting DIY project that promises big rewards: saving money and the satisfaction of a job well done. For many homeowners here in Richmond, restoring that original charm seems within reach. The basic idea is simple enough—sand away the old, beat-up finish, then apply a fresh stain and protective coat. But the reality is far more complex and carries significant risks if not done correctly.
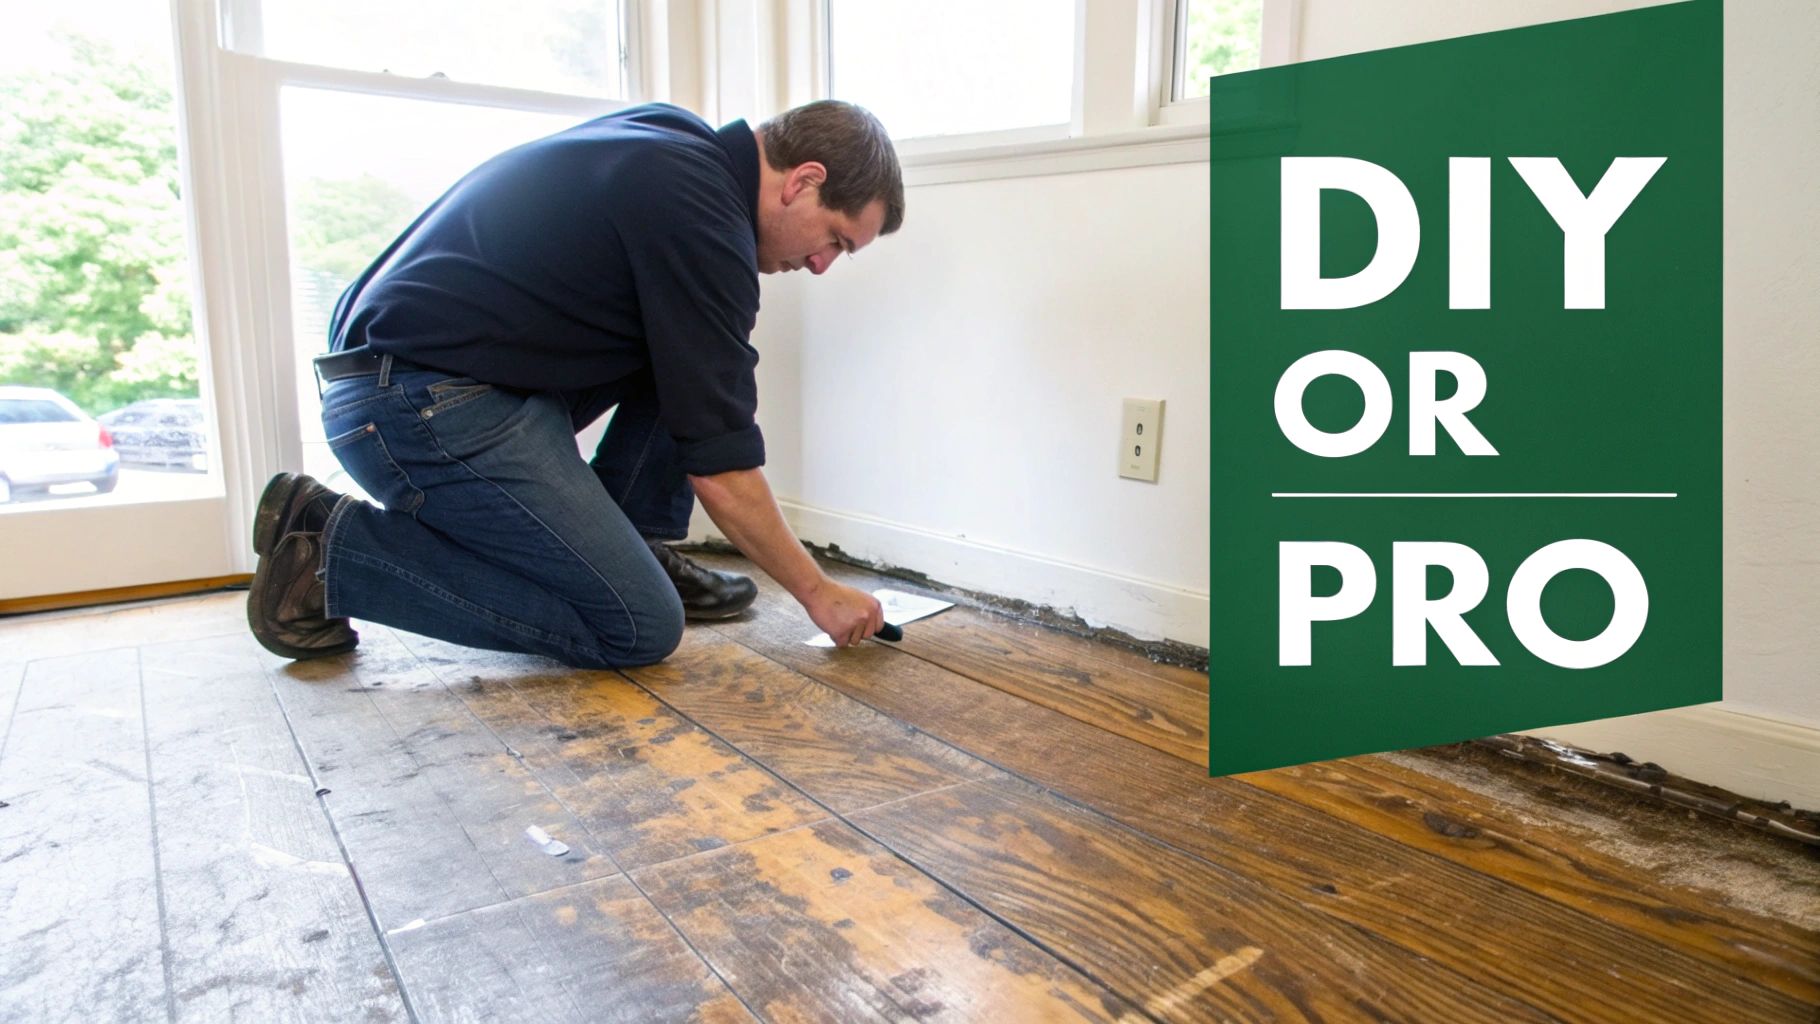
Is a DIY Hardwood Floor Refinish Right for You?
The idea of personally reviving your home’s hardwood floors is powerful. The cost savings can be substantial, and there’s a certain pride in tackling a major home improvement project yourself. But before you run out to rent a drum sander, it’s crucial to take a realistic look at what the job truly entails.
Weighing the Pros and Cons
Let’s start with the biggest motivator: money. Handling the labor yourself cuts out the single largest expense of professional hardwood floor refinishing. You also gain total control over the schedule and the final look, without waiting on a contractor’s availability.
But the flip side is significant. This job is physically demanding, creates an incredible amount of dust (even when you think you’ve sealed everything off), and requires serious patience. One wrong move with a heavy-duty drum sander can carve a permanent divot into your floor, instantly turning your money-saving project into a costly repair nightmare. It also takes time—often several full days of focused, non-stop work.
Expert Insight: The biggest risk for a DIYer is irreversible damage. We often see homeowners in the Richmond, VA area who have accidentally sanded through the thin top layer of their engineered hardwood, which unfortunately means the entire floor needs to be replaced.
Signs Your Floors Need Attention
So, how do you know if your floors are ready for refinishing? Some signs are glaringly obvious, while others are more subtle. A quick walk-through can tell you almost everything you need to know.
Keep an eye out for these tell-tale signs:
- Widespread Scratches: A few surface scuffs are normal, but if your floors are covered in deeper scratches that have broken through the finish, it’s time for a refresh.
- A Dull, Worn Finish: Does the floor look thirsty? If it absorbs light instead of reflecting it, the protective topcoat is gone, leaving the raw wood exposed to damage.
- Color Fading and Discoloration: Sun exposure is a major factor, especially in Richmond homes with large windows. It can cause blotchy, uneven fading over time.
- Water Damage or Stains: Small water spots or old pet stains that haven’t soaked too deep into the wood can often be sanded away completely.
Catching these issues early is always your best bet. At the end of the day, refinishing your floors is a fantastic way to improve your home’s feel and value. If that’s on your mind, you might also be interested in other strategies to increase property value.
But if you’re looking at your floors and the scale of the job just feels overwhelming, that’s your gut telling you it might be time for an expert opinion. If you’re unsure whether your hardwood floors need refinishing, Buff & Coat can take a look and give you honest recommendations.
What to Know Before You Even Think About Sanding
Too many homeowners get excited about refinishing their floors and make a beeline for the rental equipment aisle. That’s one of the biggest—and potentially costliest—mistakes you can make. Before you even think about sanding, you have to do some serious detective work on what you’re actually dealing with.
This initial assessment is non-negotiable. What you find will shape your entire project, from the tools you need to whether a DIY job is even a good idea. Getting this wrong can lead to irreversible damage, turning a money-saving project into a nightmare of costly replacements.
Solid vs. Engineered Hardwood: The Most Critical Distinction
First things first: you absolutely have to figure out if your floors are solid hardwood or engineered. This one detail changes everything.
- Solid Hardwood: Just like it sounds. Each plank is a single, solid piece of wood, usually ¾ inch thick. These floors are the workhorses of the flooring world and can be sanded down and refinished multiple times.
- Engineered Hardwood: This is a composite product, built with a plywood or HDF base and topped with a thin layer—a veneer—of real hardwood. That top layer’s thickness is the key.
So, how can you tell? The easiest way is to find a floor vent or a threshold, remove the cover, and take a peek at the side of a board. If you see one solid piece of wood from top to bottom, you’ve got solid hardwood. If you see layers stacked like a sandwich, it’s engineered.
The Engineered Floor Dilemma: Is It Thick Enough?
If you’ve discovered you have engineered floors, your investigation isn’t over. Now you need to determine the thickness of that top hardwood layer. A powerful drum sander can tear right through a thin veneer in seconds, exposing the plywood underneath. Once that happens, the board is ruined and needs to be replaced.
Here’s a simple trick we call the “dime test.” A regular dime is just a hair over 1 millimeter thick. Hold it up against the edge of that top veneer. If the wood layer is thinner than the dime, you cannot sand it with a drum sander. A light screening for a buff and coat service might be an option, but a full refinishing is completely off the table.
This is where so many DIY projects go sideways. Engineered products now make up 74% of the $6.33 billion U.S. hardwood flooring market (as of 2024). Many people don’t realize that thin veneer can’t handle aggressive sanding, and they end up with a disaster. If you’re curious about the industry trends, the full hardwood report from Floor Daily is a great resource.
Identifying Your Current Finish
Next up, you need to play chemist and figure out what kind of finish is on your floors right now. Why? Because slapping a new water-based polyurethane over an old oil-based finish without the right prep is a recipe for peeling, bubbling, and total adhesion failure.
Here’s a quick test:
- Find a hidden spot, like the floor inside a closet.
- Put a little acetone (most nail polish removers will work) on a cotton ball.
- Rub it on the finish for a few seconds.
If the finish gets soft, sticky, or comes off on the cotton, it’s likely a water-based polyurethane. If it stays hard and nothing happens, you’re probably dealing with an oil-based finish. Knowing this is crucial for picking a compatible new topcoat.
Cataloging the Damage
Last but not least, it’s time for a thorough walk-through. Grab a notepad and take a detailed inventory of every single issue you can find, room by room.
Your Floor Damage Checklist
- Surface Scratches: Light scuffs in the topcoat that haven’t changed the color of the wood. These are the easy ones.
- Deep Gouges: Scratches that are dark or show the raw wood. These might need wood filler, or in bad cases, a board replacement.
- Pet Stains: These are the dark, almost black stains that mean urine has soaked deep into the wood fibers. Sanding can lighten them, but it rarely gets them out completely.
- Water Damage: Look for gray or blackened wood, especially near exterior doors, windows, or under radiators.
- Gaps and Squeaks: Make a note of any big gaps between boards or spots that creak when you walk on them.
If your checklist is full of deep gouges, widespread pet stains, or significant water damage, that’s a huge red flag. It’s a sign that you might be in over your head and need professional hardwood floor repair. For homeowners in the Richmond area, if your assessment reveals more than you bargained for, Buff & Coat can give you an honest evaluation and walk you through your real-world options.
Gathering Your Floor Refinishing Tools and Materials
A successful DIY project comes down to being prepared. Nothing throws a wrench in the works—or risks a botched job—like a last-minute, panicked trip to the hardware store. Think of this list as your game plan. Get everything lined up before you start, and you’ll be set for a smooth process from start to finish.
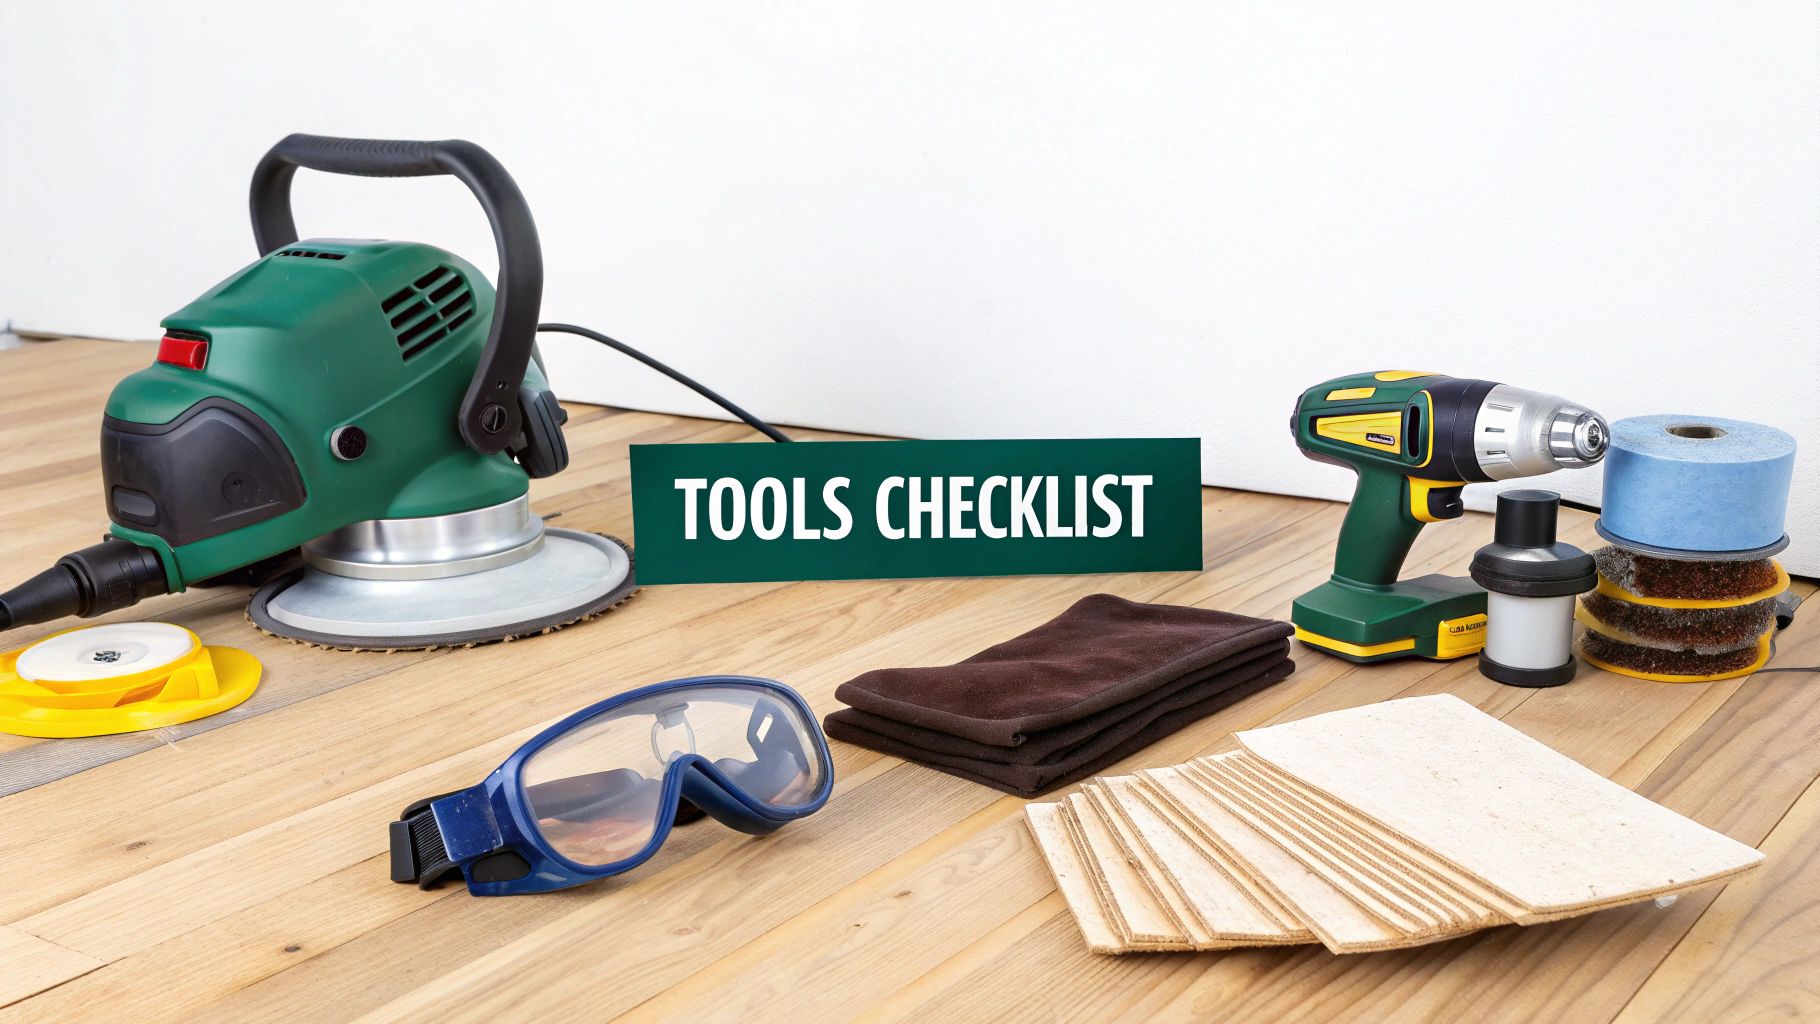
The Essential Rental Equipment
The big-ticket items are the ones you’ll rent, and this is absolutely not the place to cut corners. A cheap, poorly maintained sander is a one-way ticket to a floor full of divots and chatter marks. Insist on quality machines from a reputable rental shop.
- Drum Sander: This is the beast of the operation, built to strip the old finish and level the wood across the main field of your floor. It’s powerful and aggressive, so handle it with respect and care to avoid gouging your beautiful hardwood.
- Edger Sander: The drum sander is big and clumsy; it can’t get into corners or snug up against your baseboards. That’s where the edger comes in. It’s a smaller, handheld disc sander that lets you tackle all the perimeter areas the big machine misses.
- Random Orbital Sander: After the heavy lifting is done, this is your finishing tool. You’ll use it for the final, finer sanding passes to blend the patterns from the drum sander and edger, leaving you with a perfectly smooth surface that’s ready for stain or polyurethane.
Sandpaper: A Strategic Progression
You can’t just grab a single grit of sandpaper and call it a day. Refinishing is a process that demands a specific progression from coarse to fine grits to systematically erase old scratches and smooth the wood. It’s always smart to buy more than you think you’ll need.
Your grit progression will look something like this:
- Coarse Grit (36-40): Your first pass. This is for aggressively chewing through the old polyurethane and any existing stain.
- Medium Grit (60): The second pass is all about smoothing out the deep scratches left by the coarse grit.
- Fine Grit (80-100): This is your final sanding pass. It polishes the wood to a silky-smooth finish, prepping it perfectly for stain and the final topcoat.
Pro Tip: Whatever you do, never skip a grit. Jumping straight from a 36-grit to a 100-grit will leave behind deep swirl marks from the first pass. You might not see them at first, but they will scream at you the moment you apply stain.
To get the job done right, you’ll need quality tools and supplies, including durable orbital sander pads that can stand up to the task.
Your Shopping List for Prep and Finishing
Beyond the big machines, a whole host of smaller supplies are what separate an amateur job from a professional-looking result. For an even deeper dive, our ultimate guide to wood floor supplies can help you walk the aisles with confidence.
Preparation and Cleanup
- Painter’s Tape: Get the good stuff. You’ll need it for protecting baseboards and trim.
- Plastic Sheeting: This is for sealing off doorways, HVAC vents, and covering anything you can’t remove from the area. Sanding dust is relentless and gets everywhere.
- Shop Vacuum: Absolutely essential. You’ll use it for a thorough cleanup between every single sanding pass and right before you apply your finish.
Finishing and Application
- Applicators: A T-bar applicator or a high-quality natural bristle brush will give you the best results for applying polyurethane. Lambswool applicators are another popular choice.
- Stain: This is only necessary if you’re planning to change the color of your floors.
- Polyurethane Finish: You’ll have to choose between oil-based (extremely durable, ambers with age) and water-based (dries much faster, has a clear finish, and is a low-odor finish).
Don’t Forget Safety Gear
This part is completely non-negotiable. The fine dust created from sanding old finish and wood is nasty stuff to breathe, and the fumes from stains and polys are no joke.
- Respirator: A NIOSH-approved respirator with P95 or P100 filters is a must-have for both sanding and finishing. A simple dust mask won’t cut it.
- Safety Goggles: Protect your eyes from flying debris and any potential chemical splashes.
- Gloves: Nitrile gloves are your best friend when handling stains and finishes.
- Ear Protection: Drum sanders are incredibly loud. Protect your hearing with quality earplugs or earmuffs.
Having every single item on this list ready to go before you even start will make the entire process smoother, safer, and ultimately set you up for a result you can be proud of for years.
If you’re looking at this list and feeling overwhelmed, that’s perfectly normal. It’s a big undertaking! Richmond homeowners can call 804-392-1114 or request a free estimate today from Buff & Coat.
Your Guide to the Refinishing Process
Alright, you’ve got the room cleared and your tools are lined up. Now comes the part where patience and a steady hand make the difference between a floor you’ll love for years and a DIY project you’ll regret.
We’re going to walk you through this just like we would an apprentice, sharing the know-how we’ve picked up over 15+ years of refinishing floors right here in the Richmond area.
Meticulous Preparation: The Foundation of a Flawless Finish
Before you even think about plugging in a sander, you have to get serious about prep. This is all about one thing: dust containment. Trust us, sanding dust is relentless. It’s finer than you can imagine and will sneak into every nook, cranny, and cabinet in your home if you give it the chance.
First, get everything out. Every last chair, rug, and picture frame needs to go. Then, it’s time to seal the room.
- Cover Your HVAC Vents: Use plastic sheeting and good painter’s tape to completely seal off every single air vent, both supply and return. You absolutely do not want that fine wood dust circulating through your HVAC system.
- Seal Doorways: Tape plastic sheeting over every doorway leading out of the room. A pro tip is to install a stick-on zipper in the plastic so you can get in and out without breaking the seal every time.
- Protect Trim and Baseboards: Carefully run a line of high-quality painter’s tape along the bottom edge of your baseboards. This small step protects them from getting chewed up by the edger sander later.
It might feel like overkill, but skipping this is one of the biggest mistakes we see. A clean workspace is the first step toward a clean, professional-looking finish.
The Art of Sanding: The Three-Pass Method
Sanding isn’t a race; it’s a systematic process. The goal is simple: strip off the old finish and create a perfectly smooth, level canvas for the new one. The professional standard is a three-pass method, using a progressively finer grit of sandpaper with each pass.
Your first pass is the heavy-lifting round, done with a coarse grit (around 36-40). This is what rips off the bulk of the old polyurethane and grinds out shallow scratches. The key is to move the drum sander at a slow, consistent pace, always going with the grain of the wood. Never stop moving while the sanding drum is down on the floor—it will leave a divot you’ll never get out.
After covering the main field, you’ll use the edger with the same coarse grit to sand the perimeter. The real skill here is blending the two sanding patterns so you don’t see a “picture frame” effect. Once that’s done, vacuum everything. Thoroughly. Any dust left behind will just clog up your next round of sandpaper.
A Critical Warning: That drum sander is a beast. It’s heavy and powerful, and it can easily get away from you. One wrong move can leave “chatter marks”—a nasty series of ripples—or deep gouges that are almost impossible to fix. If you can, practice in a closet first to get a feel for the machine’s pull before you take it to the main floor.
Your second and third passes follow the exact same routine, just with finer sandpaper grits (60-grit, then 80 or 100-grit). Each new pass smooths out the scratches left by the one before it. And between every single pass, you have to vacuum like your life depends on it. Any leftover grit will get dragged by the sander and carve new, deep scratches into your beautifully smoothed surface.
While you can do this yourself, professional dustless sanding systems make the process infinitely cleaner and healthier. If you want to see how that technology works, check out our detailed guide on the benefits of a dustless system.
Applying Stain and Finish: The Final Transformation
With the sanding done and the floor absolutely spotless, it’s time for the finish line. If you’re adding color, staining comes next. Apply it evenly with a rag or applicator, working in small, manageable sections. The trick is to wipe off the excess stain before it starts to dry so you don’t end up with ugly overlap marks or “lap lines.”
Let the stain dry completely based on what the can says—this could take 24-48 hours. If you rush this part, you’ll trap solvents under the polyurethane and your finish will fail.
Finally, the protective topcoat. Using a T-bar applicator or a high-quality brush, apply a thin, even coat of polyurethane. Always start at the wall farthest from your exit and work your way out of the room. Ventilation is crucial here, so get windows open and use fans to keep the air moving.
Most floors need 2-3 coats of polyurethane for real-world protection. Between coats, you’ll need to lightly “screen” or sand the floor with a very fine sandpaper (220-grit) to give the next layer something to grip onto. And yes, that means you have to vacuum meticulously one more time before applying the next coat.
After that final coat is down, let the finish cure for several days before even thinking about moving furniture back. It’s a long haul, but that stunning result of a freshly refinished hardwood floor is worth the effort.
If this process sounds like more than you bargained for, just give us a call. Richmond homeowners can reach us at 804-392-1114 for a free, no-pressure estimate.
Common DIY Mistakes and When to Call a Pro
Even with the best intentions, a DIY floor refinishing project can go sideways—fast. What starts as a great idea to save money can quickly spiral into a costly, irreversible nightmare. Knowing the most common pitfalls is the key to avoiding a DIY disaster.
The basic process seems simple enough: prep, sand, and finish. But the devil is truly in the details.
While it looks straightforward, each step is loaded with potential traps that can completely ruin the final look of your floors.
Costly and Common DIY Sanding Errors
Sanding is, without a doubt, where most DIY projects fail. The powerful machines you rent are brutally unforgiving, and one small slip-up can leave permanent, glaring damage.
- Drum Sander Divots and Gouges: This is the classic rookie mistake. Pause for just a split second while the drum sander is running, and it will carve a deep, ugly trough into your floor. The only way to fix it is to sand the entire room down to that new, lower level, which often isn’t even possible.
- Chatter Marks: Ever see ripple-like marks running across the wood grain? Those are chatter marks. They’re caused by poorly maintained rental sanders with warped drums or worn belts. Once they’re in the wood, they are incredibly difficult to get out and will show up clearly once you apply stain.
- The “Picture Frame” Effect: This happens when the sanding from the edger (used for the perimeter) isn’t blended seamlessly with the field sander’s work. You end up with a visible halo around the room that looks different, feels different, and absorbs stain differently.
Finishing Flops That Ruin the Look
You could do a perfect sanding job and still fumble the project at the finish line. Applying stain and polyurethane requires patience and a delicate touch.
Here are a few finishing nightmares we see all the time:
- Lap Lines: These are the dark, ugly stripes that appear where you’ve overlapped stain or finish on an area that has already started to dry. The secret to avoiding them is to always maintain a “wet edge,” working quickly and methodically across the room.
- Bubbles and Debris: This is almost always the result of a contaminated workspace. A single speck of dust, a stray hair, or even shaking the can of polyurethane can create air bubbles that dry into a rough, gritty surface.
- Sanding Through the Veneer: This is the catastrophic, unfixable error for engineered floors. If you get too aggressive with the sander, you can burn right through the thin top layer of real wood and expose the plywood core. The only fix is a total floor replacement.
There’s a reason the professional flooring installer industry is valued at $33.8 billion—improper DIY jobs frequently turn into expensive professional rescues. As you can find out over at fcnews.net, issues like gouges and uneven finishes can ruin floors, turning what was supposed to be a weekend project into a major unexpected expense.
When to Put Down the Sander and Call an Expert
It takes courage to admit a project is beyond your skill level. Here are some clear signs that it’s time to call a professional hardwood floor contractor in Richmond.
- You Find Deep Pet Stains or Water Damage: If sanding reveals dark, stubborn stains that aren’t getting any lighter, stop right there. Continuing to sand that one spot will just create a low point in the floor. A pro needs to assess if the boards can be salvaged or if they need to be replaced.
- You Have Warped or Cupped Boards: Uncovering boards that are bowed, separating, or warped usually points to a bigger moisture problem that sanding alone will never fix.
- You Just Feel Overwhelmed: If the project is causing more stress than satisfaction, it’s okay to tag in a professional. A pro ensures you get a beautiful, durable result without the headache and heartache of a DIY job gone wrong.
If you’re a Richmond homeowner who has hit a snag or decided the DIY route isn’t for you, Buff & Coat can give you an honest assessment and a clear quote to get your floors finished right. Call us at 804-392-1114 for help.
Why Richmond Homeowners Choose Buff & Coat
After seeing what goes into a full DIY floor refinishing project, it’s easy to understand why so many Richmond homeowners ultimately decide to hand the job over to a professional.
What starts as a rewarding weekend project can quickly spiral into a stressful ordeal. The risk of gouging the wood, the intense physical labor, and the sheer time commitment are real. That’s exactly where Buff & Coat comes in—we offer the expert alternative without the headache.
Learning how to refinish hardwood floors yourself is one thing, but getting it perfect takes years of practice. We see it all the time. Homeowners from the historic Fan District to the newer developments in Short Pump call us because they want beautiful, durable results without the DIY guesswork.
Quality, Cleanliness, and Honesty—That’s Our Promise
Our entire approach is built around what homeowners actually care about. We don’t just slap on a new coat of finish; we restore your floors with precision and treat your home with respect.
Here’s why Richmond trusts Buff & Coat:
- 15+ Years of Local Experience: We know the wood in Central Virginia homes. From old heart pine in historic homes to modern oak in Chesterfield, our advice is always honest and tailored to what your floors need.
- Advanced Dustless Sanding: The biggest fear with any sanding project is the mess. Our modern equipment captures the vast majority of dust right at the source, keeping your home cleaner and the air healthier.
- An Owner-Operated Business: You’re not dealing with a big, faceless company. As the owner of Buff & Coat, I am on-site for every job, ensuring the quality meets our high standards from start to finish.
- Pro-Grade, Durable Finishes: We use high-quality, low-odor finishes that you can’t get at a hardware store. These products are designed for superior durability to handle kids, pets, and daily life.
- Clear Pricing and No Upsells: We give you a straightforward estimate with no surprises. If a simple buff and coat service is all you need to bring your floors back to life, that’s what we’ll recommend.
- 5-Star Customer Service: Our reputation is built on happy clients. We are committed to a smooth, stress-free process and won’t consider the job done until you’re thrilled with your beautifully restored floors.
When the risks and stress of a DIY job start to outweigh the potential savings, calling in a pro is the smartest decision you can make.
Ready to restore your hardwood floors? Buff & Coat makes the process fast, clean, and stress-free. Call 804-392-1114 or request your free estimate at buffandcoatvirginia.com.
Your Top Floor Refinishing Questions Answered
To wrap things up, let’s tackle the most common questions we get from homeowners around Richmond, VA. Whether you’re all-in on DIY or starting to think a pro might be the way to go, these answers should clear things up.
How long does refinishing take?
If you’re doing it yourself, be realistic and block off four to six days for an average-sized room. And that’s assuming you can work on it without major interruptions. This refinishing timeline gives you enough breathing room for proper prep, multiple sanding passes, staining, and applying a few coats of finish—with the critical drying time between each step. A professional service like ours can often complete the job in just two to four days by using efficient equipment and a streamlined process without cutting corners.
Can I actually do a ‘dustless’ refinishing job myself?
Honestly, a truly dustless DIY job is next to impossible. The sanders you can rent from a big-box store just don’t have the sophisticated dust containment systems that professional rigs do. You can minimize the mess by sealing off the room with plastic and keeping a shop vac attached to the sander, but you should still expect a fine layer of dust to settle on everything. A professional dustless sanding system is engineered to capture 95% or more of airborne particles right at the source, which makes a world of difference for your home’s air quality.
What’s the real cost of DIY vs. hiring a pro?
Once you tally up all the costs, the DIY route isn’t always the bargain it seems. Equipment rentals for a drum sander and edger, plus sandpaper, applicators, stain, and a top-shelf polyurethane finish can easily run you $600 to $900 for a 300-square-foot room. Hiring a professional for hardwood floor refinishing in Richmond, VA will cost more upfront, but that investment eliminates the risk of botching the job (which can be expensive to fix), saves you days of back-breaking labor, and comes with the peace of mind that you’re getting a durable, beautiful finish. It’s about getting it done right the first time.
Can engineered hardwood be refinished?
It depends entirely on the thickness of the top wood veneer. High-quality engineered flooring with a thick veneer (3mm or more) can typically be sanded and refinished once or twice. However, many modern engineered products have a veneer that is too thin for aggressive sanding. Always perform the “dime test” mentioned earlier before attempting to refinish engineered hardwood refinishing yourself.
Is it better to refinish or replace hardwood floors?
Refinishing is almost always more cost-effective and environmentally friendly than a full replacement. If the wood is structurally sound, even floors with significant surface damage can be brought back to life. A full replacement is usually only necessary in cases of severe water damage, termite damage, or if the floors have already been sanded down to their maximum limit.
If you’re still on the fence about whether your floors need a full refinish, let us help. Buff & Coat Hardwood Floor Refinishing can take a look and give you an honest, no-pressure recommendation. Call us at 804-392-1114 or request a free estimate online today.