Why Tongue and Groove Floor Damage Can’t Be Ignored
Tongue and groove repair is a specialized process for fixing damaged interlocking wood planks. When boards are damaged by water, impact, or wear, they require careful replacement to preserve your floor’s look and stability, a core part of our hardwood flooring services at Buff & Coat. This guide will walk you through the process.
Quick Repair Overview:
- Time needed: 2-4 hours for a single board
- Cost: $40-$60 for DIY materials
- Key steps: Remove damaged board, modify replacement board, install with adhesive
- Tools required: Circular saw, chisel, pry bar, rubber mallet
- Difficulty: Moderate carpentry skills needed
Whether you’re dealing with a water-stained plank or a cracked board, understanding the repair process can save you from costly floor replacement. For homeowners in the Richmond area seeking professional results, our hardwood floor repair services ensure flawless repairs that blend seamlessly with your existing floor.
I’m David Emmerling of Buff & Coat. With over 20 years in hardwood floor restoration, I’ve seen how proper tongue and groove repair techniques extend the life of a flooring investment.

Learn more about tongue and groove repair:
Understanding the Problem and Preparing for Repair
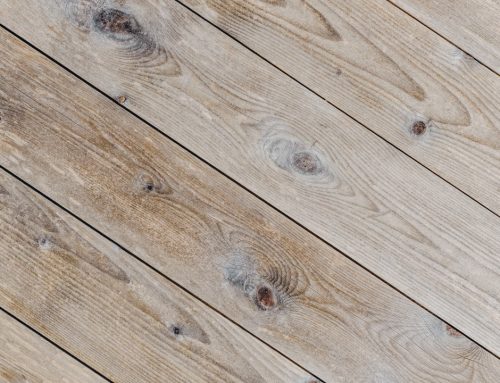
Before starting a tongue and groove repair, it’s crucial to identify the cause of the damage to prevent future issues and gather the right tools. Common culprits include moisture, leading to water stains or wood rot, and physical impact from dropped items. Other issues can be termites or board shrinkage, which creates gaps and compromises structural integrity. In older homes, shrunken planks can cause a “spongey” feel. A thorough damage assessment is the first step to a successful repair.
Essential Tools and Materials
Having the right instruments makes all the difference. Here’s what you’ll need:
- Circular saw: For making precise cuts to remove the damaged board.
- Oscillating multi-tool: Excellent for plunge cuts near walls; use a speed square for straightness.
- Wood chisel: A 1-inch chisel is indispensable for prying and cleaning out grooves.
- Flat pry bar: For leveraging and removing sections of the damaged board.
- Hammer: For tapping and chiseling.
- Rubber mallet: For gently tapping new boards into place without causing damage.
- Tape measure: For accurate measurements.
- Speed square: Ensures clean, straight cuts. Score a line with a utility knife to guide the blade.
- Shop vacuum: For cleaning up dust and debris.
- Safety glasses and gloves: Always protect yourself!
You can find many of these essential repair tools online or at a hardware store. You will also need construction adhesive, wood filler, and a matching replacement board.
Common Problems That Lead to Damage
Understanding the root cause is key to preventing a repeat performance:
- Moisture Exposure: The biggest enemy of wood floors. Spills, leaks, or high humidity can cause boards to swell, warp, and rot. Porch flooring is especially vulnerable.
- High Foot Traffic: Constant wear in busy areas can lead to thinning, scuffs, and cracks.
- Heavy Furniture: Dragging furniture without pads can leave deep scratches or gouges.
- Pet Damage: Accidents and claws can cause stains and surface scratches.
- Improper Installation: Boards not secured correctly can lead to movement, squeaks, and damage.
- Subfloor Issues: An unstable subfloor can cause planks to flex, leading to broken tongues and gaps. If you hear excessive noise, check our Squeaky Floor Repair Complete Guide.
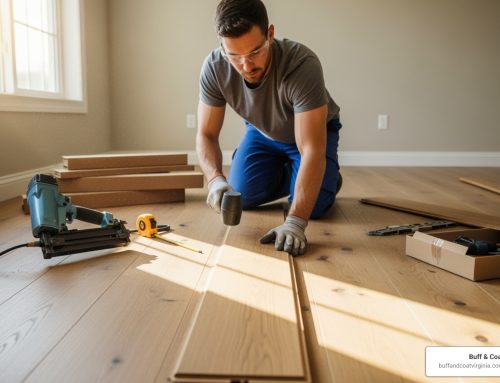
The Complete Step-by-Step Process for Tongue and Groove Repair
For a single board, this process typically takes 2 to 4 hours, with a material cost of around $40 to $60, making it a cost-effective DIY project.
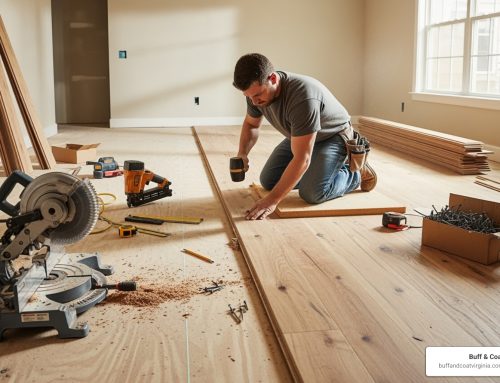
Step 1: Removing the Damaged Board
- Mark the Board: Mark the damaged board, ensuring perpendicular lines land over the center of the floor joists to provide a stable base for the new board.
- Set Saw Depth: Adjust your circular saw or oscillating multi-tool to the exact depth of your flooring to avoid cutting the subfloor.
- Plunge Cuts: Make two parallel cuts along the length of the damaged board, about an inch in from the edges. Use a speed square to guide your saw for clean end cuts. You can see a great example of how to use a speed square for straight cuts with an oscillating tool.
- Center Relief Cut: Make a diagonal or straight cut between the parallel cuts to release tension.
- Chisel Out Pieces: Use a wood chisel and hammer to chop through the board, starting from the relief cut. Break the board into smaller, manageable pieces.
- Pry Bar Use: Gently lift and remove the pieces with a flat pry bar, being careful not to damage adjacent boards.
- Clean Subfloor: Vacuum the subfloor thoroughly, removing any nails, screws, or debris.

Step 2: Preparing the New Board for Installation
- Measure the Gap: Accurately measure the length of the opening.
- Cut to Length: Transfer the measurement to your new board and cut it to length.
- 5-Degree Bevel Cut (Optional): For a snugger fit on uneven floors, consider a 5-degree bevel when crosscutting the new board.
- Rip Off Bottom of Groove: This is the key trick. Use a table saw to carefully rip off the bottom lip of the groove on one long edge of the new board. This allows you to drop the board into place from above.
- Test Fit: Dry-fit the new board to ensure it sits flush. Make minor adjustments by sanding if needed.

Step 3: Installing the Replacement Board
- Apply Construction Adhesive: Run a bead of construction adhesive onto the subfloor.
- Insert Tongue Side First: Angle the new board to slide its intact tongue into the groove of the existing floor.
- Tap Into Place: Lower the other side and use a rubber mallet and a tapping block to tap the board snugly into place.
- Face-Nailing (If Necessary): If needed, use a finish nailer to drive nails through the top surface of the board. These can be filled later. For more details, see our article on How to Replace a Hardwood Floor Board.

Achieving a Seamless Finish and Preventing Future Damage
The final steps are crucial for blending your repair and ensuring your hard work lasts.
Best Practices for a Lasting Tongue and Groove Repair
A great repair should look like the damage never happened.
- Wood Filler Application: If you face-nailed, use quality wood filler to cover the nail holes and any minor gaps. Apply with a putty knife so it’s flush with the surface.

- Sanding: Once the filler is dry, sand the new board with 120-grit sandpaper on a random orbit sander to smooth the surface. A light hand-sanding with 100-grit sandpaper can refine it before finishing.
- Staining to Match: To match a stained floor, test your stain on a scrap piece of wood first. Apply it evenly and wipe off any excess.
- Polyurethane Varnish: Apply at least two coats of high-quality polyurethane varnish to protect the wood and give it a durable finish. For a complete overview, see our Hardwood Floor Refinishing Complete Guide.
How to Prevent Future Damage
Prevention is the best strategy for keeping your floors looking fantastic.
- Moisture Control: Clean up spills immediately. Use mats at entryways and maintain indoor humidity between 35-55%.
- Use Furniture Pads: Place felt pads under all furniture legs to prevent scratches. Lift heavy items, don’t drag them.
- Regular Cleaning: Sweep or vacuum regularly to remove abrasive dirt. Use wood-specific cleaners.
- BoraCare Treatment: For moisture-prone areas like subfloors, treat wood with a borate solution like BoraCare for long-term rot and termite protection.
- Proper Ventilation for Porches: Ensure adequate ventilation under porch flooring to prevent moisture buildup. Porch floors should have a slight drainage slope.
- Sealing End Grains: For exterior applications, seal the end grain of boards to block water absorption. Using a wood glue like Titebond III wood glue in the end grain creates a protective barrier.
Special Considerations for Different Applications
While the general principles of tongue and groove repair are consistent, different applications present unique challenges.
Flooring vs. Ceilings and Porches
- Ceiling Repair Safety: Repairing a tongue and groove ceiling is physically demanding and requires extra safety precautions. A crack could indicate underlying issues like dry rot or structural instability. We strongly advise a professional assessment to determine if the damage is superficial or a symptom of a larger problem.
- Porch Flooring Exposure: Tongue and groove porch flooring is constantly exposed to the elements. Pressure-treated pine can last 10-15 years, but regular pine may rot quickly if not maintained. Many experts argue T&G is not ideal for exposed decks due to water pooling. When repairing, use treated lumber, ensure a proper drainage slope, and maintain a 1/16″ gap between boards for expansion. Blind nailing is often preferred for a more water-tight finish. For a deep dive, check this guide on Fixing a Rotten Tongue and Groove Porch Floor.
Repairing a Tongue and Groove Subfloor
Repairing a subfloor, especially in an older home, has significant implications for structural integrity.
- Structural Integrity: An older home’s plank subfloor may lose integrity if the tongues and grooves no longer nest, leading to a “spongey” floor. While adding a 1/4″ layer of plywood can help, a full replacement is often the best solution.
- Supporting Walls: If walls rest on the planks, they may need temporary support during replacement, which is a complex job.
- Plywood vs. OSB: For subflooring, especially under tile, plywood is generally recommended over OSB for its stability and moisture resistance.
- Adding Blocking Between Joists: When replacing subfloor sections, adding blocking (e.g., 2x6s) between joists is crucial for support and provides a solid nailing surface. New subfloor boards should be spaced 1/8″ apart and glued at the seams. For more on this topic, see our guide on Hardwood Floor Board Replacement.
When to Call a Professional for Your Tongue and Groove Repair
While many repairs are DIY-friendly, tongue and groove repair can be complex. Sometimes, a professional is the best way to ensure a flawless result and avoid costly mistakes.
Signs You Need an Expert
Know when to call for help. Here are some indicators that it’s time for a professional:
- Extensive Water Damage: If damage extends into the subfloor or there’s evidence of mold, you need expertise in moisture remediation and structural assessment.
- Suspected Structural Issues: A significantly unstable or bouncy floor may indicate joist damage. This is especially true for cracked ceiling boards, which could signal dry rot and require immediate professional assessment.
- Widespread Rot: Serious rot can compromise your home’s structure and often points to a larger moisture problem that an expert must identify and fix.
- Lack of Proper Tools: If you don’t have or want to buy specialized equipment like professional-grade sanders, a pro is already equipped.
- Matching an Exotic or Aged Finish: Blending a repair with an antique floor or a custom finish requires an experienced eye.
- Multiple Board Replacements: Replacing a large section of your floor is time-consuming and requires a high level of precision.
- Time Constraints or Desire for a Perfect Finish: If you’re short on time or want a guaranteed, impeccable result, a professional is your best bet.
For homeowners in the Richmond, VA area, we at Buff & Coat are experts in these scenarios. Our guide to Richmond VA’s Best Hardwood Repair Solutions outlines how we handle complex repairs with precision.
Frequently Asked Questions about Tongue and Groove Repair
Here are answers to some common questions about tongue and groove repair.
Can you repair just one tongue and groove board?
Yes, it is entirely possible to replace a single damaged board. The key is to carefully cut out the old board without damaging the surrounding planks. You then modify the new board by removing the bottom of its groove, which allows you to drop it into place from above. It’s a common and effective method for localized repairs.
How do you fix a gap in a tongue and groove floor?
For minor gaps, use a color-matched wood filler or a flexible wood-specific caulk. For larger gaps from board shrinkage or structural issues, the repair might be more involved. This could mean replacing the board entirely. In some older floors, a “spline” or “slip tongue”—a thin piece of wood—can be inserted into the grooves of both boards to bridge the gap, secured with glue and clamping.
Do you lose the tongue and groove when replacing a board?
You don’t lose the entire system, but you do modify it for the replacement board. The new board’s tongue still inserts into the existing floor’s groove on one side. To fit the final side, you must remove the bottom lip of the groove on the replacement board. This allows the board to drop flat into place. It’s then secured with construction adhesive and a few discreet face nails, which are filled with wood filler. This method keeps the new piece flush and stable.
Conclusion: A Flawless Floor is Within Reach
Tackling tongue and groove repair is a manageable DIY project that can restore the beauty and integrity of your hardwood floors. By following our step-by-step guide, you can confidently address issues like water damage and scratches. Precision, careful preparation, and meticulous finishing are your keys to success.
However, not every floor challenge is a simple DIY fix. For extensive damage, structural concerns, or if you simply desire a flawless, professional finish, the team at Buff & Coat is here to help. Serving homeowners in Richmond, VA, and surrounding areas, we offer expert hardwood floor repair that ensures a perfect, dust-free result every time. We pride ourselves on revitalizing floors with our signature “buff and coat” process, protecting your investment for years.
Don’t let damaged floors diminish your home’s beauty. We offer free estimates! Schedule a free inspection today by visiting our contact page and let us bring your floors back to life.