Why Buffing Is the Smart Choice for Tired Hardwood Floors
Learning how to buff hardwood floors can transform your dull, scuffed surfaces into the gleaming showpieces you see in our gallery of beautifully restored hardwood floors. If you’d prefer expert help, start with our professional hardwood floor refinishing team. This process addresses most surface-level scratches and dullness without the cost and disruption of full sanding.
Quick Answer – How to Buff Hardwood Floors:
- Clean the floor thoroughly and let it dry completely.
- Rent or buy a floor buffer with appropriate pads.
- Start in the corner farthest from the exit and work backward.
- Move the buffer side-to-side with overlapping passes, keeping it moving constantly.
- Hand-buff corners and edges the machine can’t reach.
- Wait 1-2 hours for light traffic, 24 hours before returning furniture.
Buffing is like exfoliating for your floors. It smooths minor imperfections in the polyurethane coating, either restoring shine or preparing the surface for a fresh protective coat. Unlike sanding, which strips wood bare, buffing preserves your existing finish and can often be done in a single day.
The cost difference is significant. Professional sanding can run $3-8 per square foot, while buffing typically costs $1-2.50 per square foot professionally, or under $100 for a DIY rental.
I’m David Emmerling, President of Buff & Coat Hardwood Floor Refinishing. With over 20 years of experience, I’ve seen how proper buffing can extend a floor’s life by years, delivering dramatic visual improvements that homeowners love.
, polishing (adding sheen to existing finish), and sanding (complete finish removal down to bare wood), including when to use each method based on floor condition - how to buff hardwood floors infographic infographic-line-3-steps-colors")
How to buff hardwood floors terms to learn:
Is Buffing the Right Choice for Your Floors?

Before you learn how to buff hardwood floors, you must determine if it’s the right solution. Many homeowners overestimate the damage, thinking they need a full refinishing when a simple buff will suffice. The key difference is that buffing works on the floor’s protective finish layer, while sanding strips everything down to bare wood.
Your floors are ideal for buffing if they have:
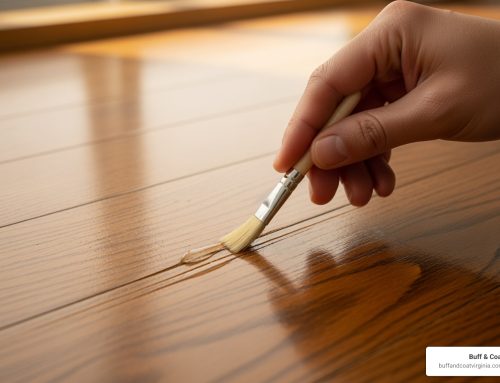
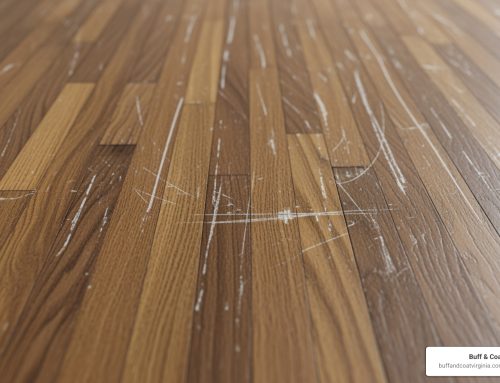
- Surface-level scratches and scuffs: These are marks from daily life that are visible but don’t catch your fingernail. The polyurethane finish is intact but just needs smoothing.
- Dullness: If your floors have lost their luster but show no bare wood, buffing can restore their shine without the mess of sanding.
Buffing is not the answer for deep gouges, extensive water damage, or areas where the finish has worn away to expose bare wood. If a scratch catches your fingernail, it has likely penetrated the wood and requires sanding. For more on this, see our guide to Hardwood Floor Scratch Repair.
A simple test: In good light, if you see mostly surface scuffs and dullness with consistent wood color, buffing is your best bet. If you see deep stains or bare patches, you’re likely looking at a full refinishing job.
| Feature | Buffing | Sanding | Polishing |
|---|---|---|---|
| Purpose | Refresh finish, remove surface scratches | Remove old finish/stain, repair deep damage | Add sheen, fill micro-scratches |
| Best For | Dull, lightly scuffed finishes, recoating | Deeply damaged, discolored floors | Quick shine boost |
| Skill Level | Intermediate (DIY possible) | Professional recommended | Easy (DIY friendly) |
| Cost | Low-Moderate ($1-2.50/sq ft pro) | High ($3-8/sq ft pro) | Low (product cost only) |
In my experience, about 70% of floors that homeowners think need refinishing only need a good buff and a fresh protective coat. Buffing is also used to prepare surfaces for recoating with new polyurethane, a “screen and recoat” process that adds years to your floor’s life at a fraction of the cost of full refinishing.
Gearing Up: Tools and Preparation
Proper preparation is the key to professional-looking results when learning how to buff hardwood floors.
What Tools and Supplies Are Needed?
- Floor Buffer: Rent one from a home improvement store for about $50/day.
- Buffing Pads: Use soft white or red pads for polishing. Use more abrasive tan or green pads for a “screen and recoat” process.
- Screening Discs (for recoating): A 120-grit or 220-grit mesh disc is needed to abrade the old finish so a new coat can adhere.
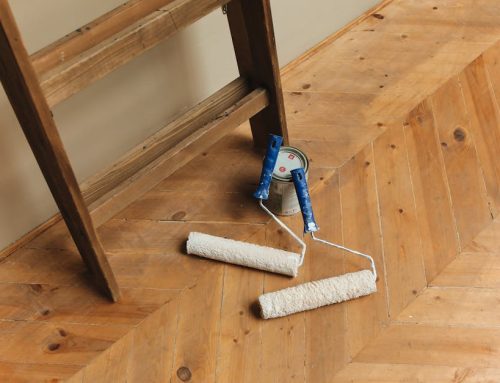
- Cleaning Supplies: A powerful vacuum, a pH-neutral hardwood floor cleaner, a quality mop, microfiber towels, and painter’s tape are essential.
- Finishing Products: Choose a hardwood floor polish for shine or a compatible polyurethane for recoating.
- Heavy-Duty Extension Cord: Buffers draw significant power.
Preparing the Room and Floor
- Clear the Room: Remove all furniture, rugs, and decorations. Lift curtains and remove vent covers.
- Protect Baseboards: Apply painter’s tape to your baseboards to prevent scuffs.
- Vacuum Thoroughly: Go over the floor multiple times to remove all debris. A truly clean surface is vital for a dust-free floor refinishing experience.
- Deep Clean: Mop with a pH-neutral cleaner, avoiding over-wetting the floor.
- Dry Completely: Allow the floor to dry for several hours or overnight. Buffing a damp floor can cause damage.
- Inspect: Check for and hammer down any protruding nails that could catch the buffer pad.
Safety First

- Wear Safety Gear: Always use protective goggles, a dust mask (especially for screening), and gloves. Ear protection is recommended for long jobs.
- Ensure Ventilation: Open windows and doors to create airflow, which helps with fumes and drying times.
- Read the Manual: Familiarize yourself with the buffer’s operation and safety features.
- Manage the Cord: Keep the power cord behind you at all times to prevent tripping or running over it.
The Ultimate Guide on How to Buff Hardwood Floors

There are two main techniques for how to buff hardwood floors: a basic shine restoration and the more advanced “screen and recoat” method for applying a new protective layer. Choose the one that matches your floor’s needs.
Step-by-Step: How to Buff Hardwood Floors for a Basic Shine
This method restores luster to floors that are dull but otherwise in good shape.
- Attach a soft pad (white or red) to the floor buffer.
- Apply polish by pouring it in an “S” pattern on a small section of the floor. A 32-ounce bottle typically covers about 500 square feet.
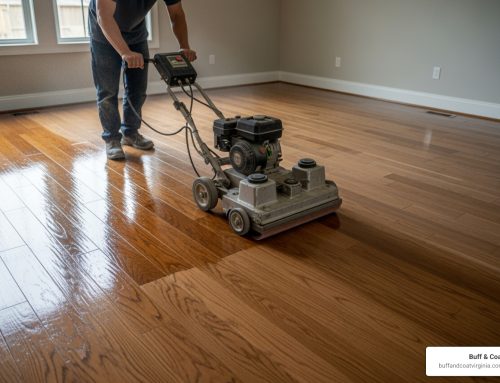
- Start in the farthest corner and work backward toward your exit, keeping the power cord behind you.
- Use a side-to-side motion, letting the machine guide you. Don’t fight its natural pull. Use light pressure and let the buffer do the work.
- Overlap each pass by about half the buffer’s width to ensure even coverage and avoid lines.
- Keep the buffer moving constantly. Letting it sit in one spot while running can burn the finish.
- Hand-buff corners and edges with a microfiber towel to blend them with the rest of the floor.
For a superior gleam, go over the floor with a clean, dry polishing pad after the polish has been worked in. This final step is part of our signature Buff and Coat process and delivers a stunning, radiant finish.
Advanced Technique: How to Buff Hardwood Floors Before Recoating
Known as “screen and recoat,” this method prepares the floor for a new coat of polyurethane, extending its life significantly.
- Attach a screening disc (120 or 220-grit) to the buffer, with a driving pad on top.
- Abrade the finish using the same side-to-side, overlapping motion. The goal is not to remove the finish, but to lightly scuff it, creating a dull surface that the new coat can adhere to.
- Vacuum all dust thoroughly. Any remaining dust will compromise the new finish.
- Wipe with a tack cloth or a microfiber cloth dampened with mineral spirits (check compatibility with your new finish) to remove any fine dust particles.
- Apply the new polyurethane coat once the floor is perfectly clean and dry. Use a lambswool applicator or mohair roller, working quickly and maintaining a “wet edge” to avoid lap marks.
For best results, apply multiple thin coats, following the manufacturer’s instructions for drying times between coats. For professional standards, consult the NWFA’s maintenance guidelines.
After the Buff: Post-Care and Maintenance
The work isn’t over once the buffer is turned off. Proper aftercare is crucial for lasting results.
How long to wait after buffing
Patience is key. Wait times depend on the products used:
- Light Foot Traffic (Socks Only): 1-2 hours for water-based products; 4-6 hours for oil-based.
- Normal Traffic, Furniture, and Rugs: Wait a full 24 hours. Moving heavy items too soon can leave permanent marks. For new polyurethane, wait up to a week for heavy furniture.
- Pets: Keep pets off the floor for at least 24-48 hours to prevent scratches from claws on the curing finish.
Common Mistakes to Avoid
Learning how to buff hardwood floors involves avoiding common pitfalls:
- Using the wrong pad: An overly aggressive pad can damage the finish, while one that’s too soft won’t be effective for screening.
- Not cleaning the floor first: Buffing over dirt grinds it into the finish, causing new scratches.
- Applying too much pressure: Let the machine do the work. Too much force can create swirl marks or burn the finish.
- Letting the buffer sit in one spot: Constant motion is essential to prevent heat damage.
- Applying wax over a urethane finish: This creates a sticky mess that’s difficult to remove.
- Skipping a test spot: Always test your products and technique in an inconspicuous area first.
Long-Term Care and Cleaning Tips
Keep your floors looking great with proper Hardwood Floor Maintenance:
- Use furniture pads: Place felt pads under all furniture legs to prevent scratches.
- Clean regularly: Dust mop daily with a microfiber cloth. Clean weekly with a pH-neutral hardwood cleaner.
- Wipe spills immediately: Don’t let liquids sit on the wood.
- Reapply polish: If you used a liquid polish, reapply it every 2-4 months in high-traffic areas to maintain the protective barrier.
Frequently Asked Questions about Buffing Hardwood Floors
Here are answers to common questions about how to buff hardwood floors.
Can buffing remove deep scratches from my hardwood floor?
No. Buffing only addresses light, surface-level scratches and scuffs within the top finish layer. If your fingernail catches in a scratch, it has likely penetrated the wood and requires sanding and refinishing, not just buffing. Buffing smooths the surface; it cannot repair deep damage.
How often should I buff my hardwood floors?
This depends on traffic and the type of buffing:
- Shine Restoration (Polishing): Every 2-4 months in high-traffic areas to maintain the gleam.
- Screen and Recoat: Every 3-5 years. This more intensive process adds a new protective layer of polyurethane, dramatically extending the life of your floors and postponing the need for a full refinishing.
What’s the cost difference between DIY buffing and hiring a professional in Richmond, VA?
- DIY: Expect to spend under $100 for a buffer rental and supplies. The main cost is your time and effort.
- Professional: Hiring an expert in the Richmond, VA area typically costs $1 to $2.50 per square foot. While more expensive, it guarantees professional, dust-free results and saves you the hassle and risk of DIY mistakes.
Restore Your Floors to Their Former Glory
You now know how to buff hardwood floors, a cost-effective way to restore shine, eliminate surface scratches, and extend the life of your floors without the cost of full sanding. By following the steps for preparation, buffing, and aftercare, you can achieve remarkable results.
Remember the key takeaways: prepare the room carefully, use the right pads for the job, and always keep the buffer moving. Regular maintenance with furniture pads and proper cleaning will keep your floors gleaming for years.
While DIY buffing is rewarding, some projects are best left to the experts. If you want guaranteed, professional results with advanced, dust-free techniques, our team at Buff & Coat is here to help. We provide free, no-obligation estimates to show you how our signature process can transform your space.
Ready for a flawless finish without the guesswork? Schedule a free inspection today and let us make your hardwood floors the envy of the neighborhood.