The Great Debate: Can You Really Put Solid Wood on Concrete?
Solid wood floor on concrete installations have long been considered a risky venture, but modern techniques and materials have changed the game entirely. Here’s what you need to know:
Can solid wood be installed on concrete?
- Yes, but only on-grade or above-grade slabs
- No, never below grade (basements, etc.)
- Requires proper moisture control and preparation
- Two main methods: direct glue-down or plywood subfloor system
Essential Requirements:
- Concrete must be fully cured (30-60 days minimum)
- Moisture content below 4% for solid hardwood
- Vapor barrier with perm rating of 0.13 or less
- Concrete strength minimum 3,000 PSI
- Perfectly flat surface (1/8″ in 6′ radius tolerance)
The dream of timeless hardwood often clashes with the reality of a concrete slab foundation, a common feature in many Richmond-area homes. For years, the answer to whether you could pair the two was a firm “no.” But today, thanks to advancements in materials and techniques from leading hardwood flooring experts, a successful professional hardwood floor installation over concrete is not just a possibility—it’s a reality, provided you follow the rules with military precision.
This isn’t a forgiving project. One mistake in moisture control or preparation can lead to warped, buckled, or moldy floors that require complete replacement. Success demands understanding the science behind wood movement, concrete curing, and vapor barriers.
As David Emmerling, President of Buff & Coat Hardwood Floor Refinishing with over 20 years of experience, I’ve seen both spectacular successes and costly failures with solid wood floor on concrete projects. The difference always comes down to preparation, patience, and using proven professional techniques that respect both materials’ unique properties.

Solid wood floor on concrete vocab to learn:
The Unseen Enemy: Mastering Moisture Before You Begin
Here’s the thing about solid wood floor on concrete projects: the biggest threat isn’t what you can see—it’s what you can’t. Concrete acts like a giant sponge, soaking up moisture from the ground and slowly releasing it over time. Meanwhile, wood is hygroscopic, which is a fancy way of saying it swells and shrinks like a living thing whenever humidity changes.
This creates a fundamental problem. You’ve got concrete constantly giving off moisture vapor, and wood that reacts to every bit of it. It’s like trying to build a stable relationship between two people who speak completely different languages. Without proper moisture control, your beautiful hardwood floor will eventually warp, buckle, or worse.
Before you even think about laying that first plank, you need to become a moisture detective. The success of your entire project depends on it.

Understanding Concrete Moisture
Think of new concrete slabs like a wet towel that takes forever to dry. We have a rule of thumb in the industry: concrete needs about a month per inch of thickness to properly cure. So if you’ve got a 4-inch slab, you’re looking at four months of waiting time before you can even start testing.
I know that sounds like an eternity, but here’s why patience pays off. Fresh concrete can hold an enormous amount of water, and rushing the process is the fastest way to end up with a flooring disaster. Minimum curing time is 30 days, but waiting 60 days gives you much better odds of success.
Once your concrete has had time to cure, it’s time to play detective with moisture testing. We use several methods, each with its own strengths:
Digital moisture meters give you quick readings right on the spot. They’re great for getting a general sense of your slab’s condition. For solid wood, you want to see moisture content below 4%. It’s like taking your concrete’s temperature—useful, but not the whole story.
The calcium chloride test goes deeper, measuring how much moisture vapor your slab is actually releasing over time. This ASTM F 1869 test involves sealing a dish of calcium chloride to your concrete and weighing it after a set period. It tells you the rate of moisture emission, which is crucial information.
But the gold standard is relative humidity (RH) testing using the ASTM F 2170 method. This involves drilling holes into your concrete and inserting probes that measure humidity inside the slab itself. It’s like getting an MRI of your concrete’s moisture content—the most accurate picture possible.
Here’s where precision becomes critical. The moisture difference between your wood flooring and concrete should stay within 2-4%, depending on your plank width. Wider planks (3 inches or more) need tighter tolerances. This isn’t just a suggestion—it’s what prevents your floor from turning into a wavy mess.
Vapor barriers are your secret weapon against moisture migration. You need a vapor retarder with a perm rating of 0.13 or less. Think of it as an invisible shield between your concrete and wood. 6-mil polyethylene film is the traditional choice, while newer liquid-applied membranes can pull double duty as both vapor barrier and part of your adhesive system.
All of this aligns with NWFA guidelines on concrete subfloors, which are basically the bible for professional installers. Following these standards isn’t optional if you want your floor to last.
Why Below-Grade is a No-Go for Solid Wood
Let me be crystal clear about something: solid wood floors and basements don’t mix. Period. It doesn’t matter how good your vapor barrier is or how confident you feel about your moisture control. Below-grade installations with solid wood are a recipe for heartbreak.
Hydrostatic pressure is the villain here—water literally pushing up from below your foundation. Even the best vapor barriers can eventually fail under this constant pressure. Add in the naturally higher humidity levels in basements, and you’re fighting a losing battle.
When solid wood gets too much moisture, it doesn’t just expand a little. It warps, buckles, and creates perfect conditions for mold and mildew. I’ve seen beautiful hardwood floors turn into health hazards because someone tried to beat the odds in a basement.
For below-grade spaces, engineered wood flooring is your friend. Its layered construction makes it much more stable when moisture levels fluctuate. You still get that gorgeous wood look, but with the peace of mind that comes from using the right material for the job.
The difference between on-grade (ground level) and above-grade installations versus below-grade is night and day. Stick to the first two, and you’ll have a much better chance of creating a floor that looks beautiful for decades to come.
Laying the Groundwork: Subfloor Preparation is Non-Negotiable
Think of your concrete slab as the canvas for a masterpiece. Just as an artist wouldn’t paint on a dirty, warped canvas, you can’t install solid wood floor on concrete over a subpar foundation. This phase separates the pros from the weekend warriors – and frankly, it’s where most DIY dreams come crashing down.
Your concrete slab needs to meet three non-negotiable standards: structural soundness, immaculate cleanliness, and perfect flatness. Miss any one of these, and you’re setting yourself up for squeaks, gaps, and potentially catastrophic flooring failure down the road.

Achieving a Flat and Clean Surface
Let’s start with the dirty work – literally. Every speck of paint, sealer, wax, oil, drywall compound, or any other contaminant must go. These substances act like invisible saboteurs, preventing proper adhesion and compromising your entire installation. We’ve seen floors fail years later because someone skipped this crucial step.
The cleaning process often involves grinding and scraping until the concrete is pristine. It’s tedious work, but there are no shortcuts here. And yes, if you’re grinding concrete, you absolutely must follow OSHA silica dust regulations – your lungs will thank you later.
Now comes the real test: flatness. Your concrete needs to be flat within 1/8 inch over a 6-foot radius (or 3/16 inch over 10 feet). To put this in perspective, that’s flatter than most people think their floors are. We use long straightedges and laser levels to check every square foot.
High spots get ground down, while low spots require self-leveling compounds to bring them up to standard. This isn’t about making your floor “pretty good” – it’s about creating a foundation that won’t stress your hardwood planks. An uneven subfloor is like forcing a puzzle piece where it doesn’t belong. Eventually, something’s going to crack.
The concrete itself must have a minimum compressive strength of 3,000 PSI. This ensures it can handle daily foot traffic, furniture, and the natural expansion and contraction of your hardwood without crumbling or developing weak spots.
Finally, we inspect every inch for cracks and hollow areas. Small hairline cracks can be filled with quality patching compound, but larger structural issues need professional evaluation before any flooring goes down. You’re only as strong as your weakest link, and in flooring, that link is usually the foundation you can’t see.
This level of preparation might seem excessive, but it’s the difference between a floor that lasts decades and one that becomes an expensive lesson in cutting corners.
Choosing Your Method: The Two Paths to Installing a solid wood floor on concrete
Once your concrete slab is prepared to perfection – dry, clean, and flat – you have two primary, professionally-accepted methods for installing a solid wood floor on concrete. Each has distinct advantages and requirements, and choosing the right one is critical for the longevity and performance of your floor.
Think of it like choosing between two different routes to the same destination. Both will get you there, but the journey and what you’ll encounter along the way are quite different.
| Feature | Direct Glue-Down Method | Plywood Subfloor (Nail-Down) Method |
|---|---|---|
| Pros | Solid feel underfoot, minimal added height, good sound insulation. | More traditional, forgiving on minor slab imperfections, excellent for nailing solid wood. |
| Cons | Requires extremely flat and clean slab, adhesive dependent, difficult to repair individual boards. | Adds significant floor height, more labor-intensive, requires precise installation of plywood. |
| Added Floor Height | Minimal (thickness of adhesive + wood) | Significant (plywood thickness + wood thickness) |
| Ideal Use Cases | Very flat slabs, height restrictions, modern aesthetic. | Slightly less-than-perfect slabs, traditional nail-down preference, basement (if engineered). |
| Subfloor Prep | Critical: Flawless flatness and moisture control. | Critical: Good flatness and moisture control, but minor imperfections are more tolerable. |
The decision often comes down to your specific situation: the condition of your concrete slab, height restrictions in your space, and your budget. Both methods can deliver stunning results when executed properly, but they each demand different levels of precision and preparation.
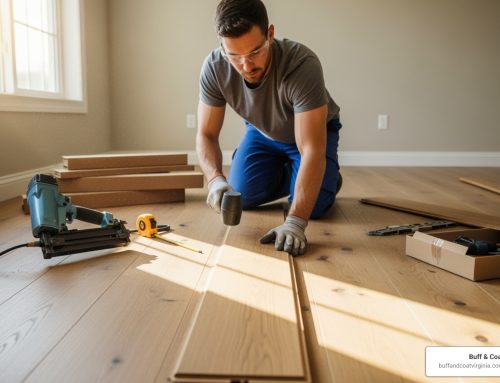
Method 1: The Direct Glue-Down Approach
The direct glue-down method is like creating a permanent marriage between your wood and concrete. When done right, it creates an incredibly solid feel underfoot – almost as if the wood planks grew right out of the concrete slab itself.

The magic happens with specialized urethane adhesives that do double duty. These aren’t your typical construction adhesives – they’re engineered specifically for wood-to-concrete bonding. Many modern adhesives are “all-in-one” products that serve as both the bonding agent and moisture barrier. It’s like getting a superhero adhesive that fights moisture while creating an unbreakable bond.
The application process requires precision. We use specific trowels that create the perfect ridged pattern, ensuring complete coverage and the right amount of adhesive. Too little, and you’ll get hollow spots that sound like drums when you walk on them. Too much, and the excess can squeeze up between planks, creating a messy nightmare.
Here’s the catch: this method is absolutely unforgiving when it comes to subfloor preparation. Your concrete needs to be flatter than a pancake and cleaner than a hospital operating room. One small imperfection, one missed contaminant, and the adhesive won’t bond properly. When that happens, you’re looking at planks that pop loose, creating gaps and hollow sounds that announce every footstep.
The payoff? Minimal added floor height – crucial when you’re dealing with existing door frames and transitions to other rooms. For detailed guidance on this technique, check out our comprehensive guide on glueing hardwood to concrete.
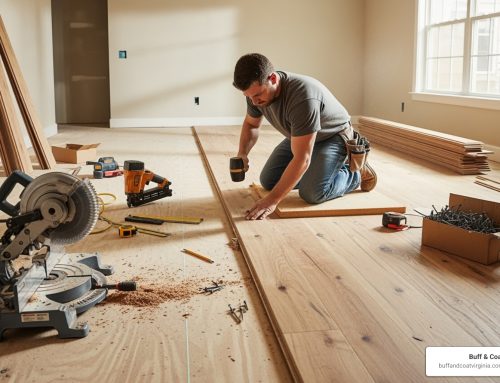
Method 2: The Plywood Subfloor System
The plywood subfloor method is the traditional approach that many flooring professionals swear by. It’s like building a proper foundation before constructing your dream home – it takes more work upfront, but it gives you a rock-solid base that can handle minor imperfections in the original concrete.

The process starts with laying down that crucial vapor barrier – usually 6mm polyethylene sheeting that acts as your first line of defense against moisture. Then comes the plywood layer, typically 5/8″ or 3/4″ thick, which gets fastened to the concrete using power-actuated fasteners or specialized adhesives.
For those who want to go the extra mile, a sleeper system creates an actual air space beneath the floor. We lay down treated 2×4 “sleepers” embedded in asphalt mastic, then attach the plywood on top. It’s like creating a raised platform for your floor – perfect if you need to run utilities underneath or want extra insulation.
The beauty of this method is its forgiving nature. Minor imperfections in your concrete slab that would doom a glue-down installation become manageable with a proper plywood subfloor. The plywood creates a perfectly flat, nail-able surface that gives you that traditional solid wood installation feel.
The trade-off? Significant added floor height. We’re talking about adding 3/4″ to over an inch to your floor level, which means potential issues with door clearances and room transitions. But for many homeowners, especially those with slightly imperfect slabs, this method provides peace of mind and long-term stability.
Once the plywood is secure, installing the hardwood becomes a traditional nail-down process – exactly what solid wood flooring was designed for. For a deeper dive into all your options, our article on the best way to install hardwood floors on concrete covers everything you need to know.
Why You Shouldn’t Float a solid wood floor on concrete
Here’s where we need to have a serious conversation about what not to do. While engineered flooring can successfully “float” over concrete (where planks lock together without being attached to the subfloor), attempting this with solid wood floor on concrete is asking for trouble.
Solid wood is a living, breathing material that expands and contracts dramatically with changes in humidity and temperature. Unlike engineered wood with its stable core, solid wood moves – a lot. When you let it float freely, that movement becomes your enemy.
Picture this: during dry winter months, your beautiful solid wood floor shrinks, creating gaps wide enough to lose your car keys in. Come summer humidity, that same floor expands with nowhere to go, leading to buckling that looks like a miniature mountain range running through your living room.
The problems don’t stop there. A floating solid wood floor will feel spongy and hollow underfoot, completely destroying that solid, luxurious feel you’re paying premium prices to achieve. Every step announces itself with sounds that range from creaking to outright drumming.
Most importantly, manufacturer warranties become worthless the moment you install solid wood as a floating floor over concrete. These companies know the science – they’ve seen the failures, and they’re not willing to stand behind installations that go against the natural properties of their product.
If you’re drawn to the simplicity of a floating installation, engineered flooring is your answer. Its layered construction and dimensional stability make it perfect for floating applications, giving you the wood look you want without the headaches that come from fighting against solid wood’s natural behavior.
The Final Countdown: Acclimation and Finishing Touches
Wood is a living material that needs to adjust to its new environment before it’s locked into place. Skipping the acclimation process is a recipe for disaster, leading to gaps in the winter and buckling in the summer. Think of it as letting your new floors get comfortable in their new home before they commit to staying put permanently.
Here’s the reality: even the most perfectly prepared concrete slab and flawless installation technique can’t overcome poor acclimation. We’ve seen beautiful solid wood floor on concrete projects fail simply because someone was in a hurry and skipped this critical step. Don’t be that person.
The acclimation period typically runs 7-10 days minimum, though some species and environmental conditions may require longer. During this time, your home needs to be “closed-in” with windows and doors installed, and your HVAC system should be running at normal living conditions. We’re talking about maintaining 60-80°F temperature and 30-50% relative humidity – basically the same conditions you’ll live with once the floor is installed.
But here’s where many people go wrong: they leave the flooring in its original packaging. That’s not acclimation – that’s just storage. Proper acclimation requires unboxing the wood and stacking it with spacers (we call them “stickers”) between each layer. This allows air to circulate around every single plank, letting the wood absorb or release moisture evenly until it reaches equilibrium with your room’s environment.
The science behind this is straightforward. We’re aiming for a stable moisture content differential between the wood and subfloor. For planks less than 3 inches wide, the moisture difference should stay within 4%. For wider planks (3 inches or more), we need that difference within 2%. This precision isn’t perfectionism – it’s practical prevention of future movement problems.
Expansion gaps are your floor’s breathing room. During installation, we always leave proper gaps around the room’s perimeter and around fixed objects like cabinets or columns. These gaps, which get hidden later by baseboards and trim, give the wood space to expand and contract naturally without buckling or pushing against walls.
Wood will continue to move throughout its entire life. Seasonal humidity changes, temperature fluctuations, and even day-to-day weather patterns will cause subtle movement. The acclimation process and proper expansion gaps work together to ensure your beautiful solid wood floor on concrete handles these changes gracefully, maintaining its stunning appearance for decades to come.
This final step might seem like just waiting around, but it’s actually the foundation of a successful, long-lasting installation. Patience here pays dividends in performance later.
Your Verdict: A Beautiful but Demanding Project
So, can you really put solid wood floor on concrete? Absolutely—but this isn’t your typical flooring project. It’s one of the most technically demanding installations in our industry, requiring precision that would make a Swiss watchmaker proud.
The truth is, there’s zero margin for error. One oversight in moisture testing, a shortcut in surface preparation, or choosing the wrong installation method can transform your dream floor into a warped, buckling disaster that costs thousands to fix. We’ve seen beautiful installations fail spectacularly because someone skipped the vapor barrier or rushed the acclimation process.
Success demands three non-negotiables: bulletproof moisture control, surgical precision in subfloor preparation, and selecting the right installation method for your specific situation. The concrete must be bone-dry, perfectly flat, and stronger than a bodybuilder’s handshake. Your wood needs time to adjust to its new home through proper acclimation. And every step must follow professional standards to the letter.
This absolutely isn’t a weekend warrior project. While YouTube might make it look straightforward, the reality involves specialized moisture meters, industrial grinding equipment, and years of experience reading concrete slabs like a favorite book. One small mistake can void warranties and create problems that won’t show up until months later when it’s too late.
For Richmond area homeowners dreaming of hardwood over concrete, partnering with experienced professionals protects your investment and your sanity. At Buff & Coat, we’ve successfully completed countless solid wood floor on concrete installations using proven techniques and professional-grade materials. Our team knows how to read concrete slabs, control moisture, and execute flawless installations that last for decades.
We believe in doing things right the first time. That means thorough moisture testing, meticulous surface preparation, and following every manufacturer specification. When the job’s done, we’ll even protect your new floor with our signature dust-free refinishing process to ensure it looks stunning from day one.
Ready to explore whether your concrete slab is a good candidate for solid hardwood? Contact Buff & Coat today to schedule your free inspection and get a no-obligation estimate. We’ll assess your specific situation and recommend the best approach for your floor installation project.