Replacing Tile with Hardwood: Your Ultimate Guide
Are you considering replacing tile with hardwood? It’s a common home improvement project that adds timeless warmth and value. The short answer is yes, you can replace your old tile with beautiful hardwood. As Virginia’s trusted hardwood flooring specialists, we’ve helped many homeowners, including those in the Richmond area, steer this big update. You have two main choices:
- Remove the existing tile: This gives you a clean base. It allows for the best finish and avoids height issues. It’s often the recommended way for solid hardwood.
- Install hardwood directly over the tile: This can save time and mess. It works well for floating engineered wood floors. But, you must ensure your existing tile is solid and level. This method will also raise your floor height.
Many homeowners dream of the elegance that hardwood floors bring. This change can truly transform your living space. With guidance from experienced wood floor contractors, you can achieve this classic look.
I’m David Emmerling, President and Owner of Buff & Coat Hardwood Floor Refinishing. My team and I are passionate about bringing new life to floors through projects like replacing tile with hardwood.

The Big Decision: Remove Tile or Install Hardwood Over It?
So, you’re dreaming of beautiful new hardwood floors, but your current tile is standing in the way. It’s a common dilemma! The first big question you’ll face is whether to remove the old tile completely or to install your new hardwood right over it. Both options have their good points and their challenges. Don’t worry, we’re here to help you understand each path, so you can pick the best one for your home and your peace of mind.
The “Clean Slate” Approach: Removing Tile First
Choosing to remove your old tile first is often seen as the ideal way to go. Think of it as preparing a clean slate for your gorgeous new floors. This approach allows for the best finish because we can properly prepare the subfloor. A perfectly flat and stable base means your new hardwood will look amazing and last for ages. You won’t have to worry about bumps or uneven spots showing through from the old tile.
One huge benefit is no height issues. Old tiles and the glue holding them down can add quite a bit of depth – usually between 1/2 inch and 3/4 inch. By taking them out, you prevent making your floor noticeably higher. This is super important for your doors to open freely, for smooth steps between rooms, and for your appliances to fit just right. No more doors dragging or awkward trips!
Removing the tile also gives us a chance for a thorough subfloor inspection. It’s like getting a peek behind the curtain! We can check for any hidden water damage, weak spots, or other issues. Finding and fixing these problems before we put down your new floor saves you headaches and costly repairs later on. Our professional hardwood floor installation process always includes this critical step to ensure the foundation is solid before building your dream house.
Finally, this method offers the best long-term stability. Especially for solid hardwood, which often needs to be nailed down, removing the tile gives us direct access to the wood subfloor. This ensures the best possible hold and stability for your new floors. You’ll have fewer worries about creaks, squeaks, or gaps developing over time.
Cons of Removing Tile:
Now, let’s talk about the downsides of going the removal route. First off, it’s a messy demolition. We won’t sugarcoat it – pulling up old tile can be a dusty, noisy, and quite dirty job. Dust seems to find its way everywhere, and there will be a lot of debris. If your tile is stuck down with thick mortar, it becomes even more challenging, sometimes needing heavy-duty tools like a rotary hammer. Prepare for a bit of a construction zone in your home!
This option is also very labor-intensive. It’s not a quick weekend DIY project. Tile removal, especially if it’s set in a thick mortar bed, takes a lot of physical effort, specialized tools, and time. It truly requires a lot of ‘elbow grease.’
Because of the extra work involved, there’s a higher initial cost. While it can prevent bigger problems later, the upfront expense for demolition, labor, tool rentals, and getting rid of the debris can add up. But remember, this investment often pays off by avoiding future headaches. To get a better idea of what to expect, you can check out our flooring installation cost guide.
Finally, it’s more time-consuming. The whole process, from tearing out the old tile to getting the subfloor ready, adds a good chunk of time to your overall project. If you’re on a tight schedule, this is definitely something to keep in mind.
The “Overlay” Approach: Installing Hardwood Over Tile
Sometimes, the thought of demolition is just too much to handle. In those cases, installing hardwood directly over your existing tile can be a great alternative, especially with engineered hardwood.
Pros of Installing Hardwood Over Tile:
One of the biggest perks is cost savings. By skipping the demolition, you save money on labor, renting tools, and getting rid of all that old tile debris. This can really lower the upfront price tag of your project.
It’s also very time-saving. Without all the demolition and subfloor prep, the installation can happen much faster. This means you get to enjoy your beautiful new floors a lot sooner!
You’ll also notice less mess. While we’ll still make some dust from cutting the new wood, you completely avoid the huge dust clouds and mess that come with tearing out tile. This can be a huge relief, especially if you’re living in your home during the renovation.
And here’s a neat bonus: the existing tile can actually help with noise reduction. It acts as an extra sound barrier, which can make your home feel quieter, especially if you’re choosing a floating engineered floor with a built-in pad.
Cons of Installing Hardwood Over Tile:
However, installing over tile isn’t without its challenges. The most important thing to consider is increased floor height. Remember how we talked about tile adding depth? Well, putting new hardwood on top means your floor will be notably higher – often by an inch or more! This can create little steps at doorways, stop doors from opening properly, and mean you’ll need to trim the bottom of every door in the room. Some doors, especially hollow ones, might not even be trim-able.
This leads directly to door clearance issues. Get ready to cut down or plane the bottoms of all doors that swing into the room. This can be a fiddly and sometimes expensive job, especially if you have custom or solid wood doors.
There’s also a potential for an uneven surface. While engineered hardwood can handle small bumps, if your existing tile isn’t perfectly flat, if tiles are loose, or if the grout is cracked, these problems can show through your new floor. You might end up with an uneven or even “bouncy” feel. For a smooth result, your existing tile needs to be very level.
Another risk is trapped moisture. If there’s any moisture problem hiding under your current tile, installing new flooring over it can trap that dampness. This could lead to mold, mildew, or even damage to your new hardwood over time. That’s why proper moisture testing is absolutely essential before starting.
Finally, think about future renovation challenges. If you or a future homeowner ever decide to change the flooring again, removing multiple layers (the new hardwood and the old tile) will be much more complicated and costly than just removing tile alone. You’ll essentially be tackling a double demolition!
Key Considerations Before You Start Replacing Tile with Hardwood
Before you dive headfirst into your replacing tile with hardwood project, let’s pump the brakes for a moment. I’ve seen too many homeowners get excited and skip the planning phase, only to run into expensive surprises later. Trust me, a little detective work upfront will save you both money and headaches down the road.
Think of this phase as getting to know your home’s quirks before making any big changes. Every house has its own personality, and understanding what you’re working with is crucial for success.
Assessing Your Existing Tile Floor
Your existing tile is going to tell you a story – you just need to know how to listen. Whether you’re planning to remove it or install over it, understanding its condition is absolutely essential.
Start by getting down on your hands and knees for a thorough inspection. Look for cracks in the tiles themselves – hairline cracks might not be dealbreakers, but larger ones signal potential problems. Next, check for loose tiles by tapping around with a coin or small hammer. You’re listening for that telltale hollow sound that means the tile isn’t properly adhered anymore.
Levelness is another critical factor. Run a long straight edge across your floor to identify any dips or high spots. Even small variations can cause big problems with your new hardwood installation. Don’t forget to examine the grout integrity – crumbling or missing grout often indicates moisture issues or movement in the subfloor.
Here’s where things get really important: the moisture check. This isn’t optional, folks. Trapped moisture under your beautiful new hardwood can lead to warping, cupping, and even mold growth. We use specialized moisture meters to test both the tile surface and the subfloor beneath. If we find liftd moisture levels, we need to address the source before moving forward.
The type of tile you’re dealing with also matters. Ceramic tiles are the most common and generally the easiest to work with. Porcelain tiles are denser and may require different preparation techniques if you’re installing over them. Natural stone tiles like marble or travertine can be more challenging due to their irregular surfaces and potential for moisture retention.
Choosing the Best Hardwood for the Job
Now comes the fun part – picking your new hardwood! But before you fall in love with that gorgeous oak sample, let’s make sure you’re choosing the right type for your specific situation.

Engineered hardwood is usually my go-to recommendation for tile replacement projects. It’s like the Swiss Army knife of hardwood flooring – versatile, stable, and forgiving. The construction is clever: a real hardwood veneer sits on top of multiple layers of plywood, creating a product that’s much more dimensionally stable than solid wood. This means it won’t expand and contract as much with humidity changes, making it perfect for installing over existing tile or in challenging environments.
Solid hardwood, while absolutely beautiful, is a bit more demanding. It’s made from a single piece of wood, which gives it that authentic feel and the ability to be refinished multiple times over decades. However, solid hardwood typically requires nail-down installation directly to a wood subfloor. This usually means your tile has to go – no shortcuts here.
When it comes to installation methods, floating floor installation is often the most practical choice for engineered hardwood over tile. The planks click together and literally “float” over your existing surface, allowing for natural expansion and contraction as one unit. It’s forgiving and relatively quick to install.
Glue-down installation is another option for engineered hardwood, creating a very solid feel underfoot. This method requires high-quality adhesives specifically designed to bond with non-porous surfaces like tile. It’s more permanent than floating but can work beautifully when done right.
You’ll also need to decide between prefinished and site-finished flooring. Prefinished comes ready to walk on immediately after installation – no dust, no fumes, no waiting. Site-finished flooring gets sanded and finished in your home, allowing for custom stain colors and that seamless, no-bevel look that screams quality craftsmanship.
Managing Floor Height, Doors, and Transitions
Here’s where reality meets aspiration, and honestly, it’s the part that catches most homeowners off guard. That existing tile isn’t just sitting on your subfloor – it’s adding significant height to your room.
Let’s talk numbers: your existing tile and its adhesive typically add 1/2″ to 3/4″ to your floor height. Add new hardwood on top, and you’re looking at a pretty substantial increase. This might not sound like much, but trust me, your doors will notice.
Door clearance becomes the immediate challenge. Those doors that swing into the room? They’re probably going to drag on your beautiful new floor. Trimming doors is usually necessary, but here’s the catch – not all doors can handle extensive trimming. Hollow-core doors have limited material to work with, and some specialty doors might need complete replacement.
Your baseboards and trim will also need attention. They’ll suddenly look too short relative to your new floor height. For the cleanest look, we prefer removing and refitting baseboards so the new flooring tucks neatly underneath. Fair warning though – removing trim in older homes can damage plasterwork, potentially requiring some wall touch-ups.
Transitions to other rooms require careful planning. Where your new hardwood meets existing flooring in adjacent spaces, you’ll have a height difference to manage. We use various transition strips like T-moldings and reducers to create smooth, safe connections that look intentional rather than awkward.
Don’t forget about stairways if your project extends to them. The increased floor height at the top step needs careful consideration for both safety and building codes. And in kitchens, check how the new floor height might affect appliance height – your dishwasher might need some adjustments to fit properly under the counter.
The key is planning for all these details upfront. It’s much easier to address them in the planning stage than to scramble for solutions once installation is underway.
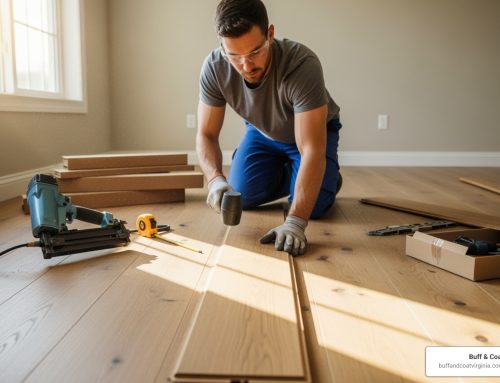
The Step-by-Step Installation Process
Now that we’ve covered the crucial considerations, let’s walk through the two main approaches to replacing tile with hardwood. While we always recommend professional installation for the best results, understanding the process can empower you as a homeowner.
Option 1: How to Replace Tile with Hardwood by Removing It
This method provides the most stable and long-lasting foundation for your new hardwood floors.

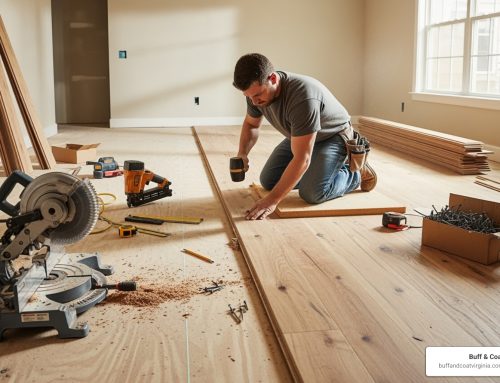
Tools Needed for Tile Removal:
- Pry bar and hammer: Essential for glued-down tiles.
- Chisel and mallet: For breaking up individual tiles.
- Rotary hammer with chisel bit: A lifesaver for mortar-set tiles. You can often rent this from home improvement centers.
- Floor scraper/stripper: For removing adhesive or thin-set residue.
- Shop vacuum: For dust and debris cleanup.
- Safety gear: Goggles, gloves, dust mask, knee pads.
The Process:
- Tile Removal:
- Glued-Down Tile: If your tile is merely glued down with adhesive, removal can be relatively easy. Once one tile is dislodged (often with a crowbar and hammer), the others tend to come up without much difficulty.
- Mortar-Set Tile: This is the tougher beast. If the tile is set in mortar, the job becomes significantly more complex. Mortar beds can be up to 4 inches thick! This necessitates a rotary hammer to chip away the tile and the thick mortar bed. It’s physically demanding and creates a lot of dust and debris.
- Near Cabinets: For precise cuts close to cabinet bases without removing the cabinets, specialized tools like a flush cut saw (e.g., a 3-3/8″ blade toe-kick saw) or an oscillating tool can be invaluable. A toe-kick saw can help with removal near cabinets.
- Subfloor Preparation: Once all the tile and adhesive/mortar is removed, we thoroughly clean the subfloor. This involves sweeping, vacuuming, and scraping away any remaining debris.
- Leveling: The subfloor must be flat and stable. We inspect for any dips, humps, or loose sections. We use self-leveling compounds or patching materials to create a perfectly flat surface, which is critical for preventing squeaks, gaps, and unevenness in your new hardwood.
- Moisture Barrier: Depending on your subfloor type (especially concrete) and local humidity, we may install a vapor barrier or underlayment to protect the hardwood from moisture.
- Installing the New Hardwood:
- Acclimation: Hardwood planks need to acclimate to your home’s humidity and temperature for several days before installation to prevent warping and gapping.
- Layout: We plan the layout carefully to minimize waste and ensure an aesthetically pleasing pattern.
- Installation: Whether it’s a nail-down, glue-down, or floating installation, we follow manufacturer guidelines and industry best practices. This includes leaving proper expansion gaps around the perimeter of the room to allow for natural wood movement.
- Finishing (if site-finished): If you’ve chosen unfinished hardwood, this is where our expertise truly shines. We sand the raw wood smooth, apply your desired stain, and then protect it with multiple coats of durable finish. Our signature “buff and coat” process, using advanced, dust-free techniques, ensures a flawless, long-lasting shine.
Option 2: How to Replace Tile with Hardwood by Installing Over It
This method can be a fantastic time and mess-saver, provided your existing tile floor is in excellent condition and you choose the right type of hardwood. This usually means engineered wood.
The Process:
- Surface Preparation:
- Cleaning and Degreasing: The existing tile surface must be impeccably clean, dry, and free of any dust, grease, wax, or debris. We thoroughly clean it to ensure proper adhesion of any primers or leveling compounds.
- Addressing Imperfections: Any loose or significantly cracked tiles should be repaired or removed and patched. While minor imperfections might be tolerable with a floating engineered floor, major ones will telegraph through.
- Etching or Grinding Tile: For glue-down installations over non-porous tiles, we may need to roughly grind or “etch” the tile surface. This creates a texture (sometimes called “keying”) that helps mechanical bond primers and adhesives adhere better.
- Applying Primer: For non-porous tile surfaces, we often apply a suitable mechanical bond primer. This improves the adhesion of leveling compounds or adhesives.
- Using a Leveling Compound: If the tile surface has minor undulations, we apply a fiber-reinforced or latex-based self-leveling compound (such as Mapei Ultraplan Renovation). This creates a smooth, flat surface for the new flooring. We ensure the compound is appropriate for non-porous substrates like tile.
- Installing a Floating Engineered Floor:
- Underlayment: A foam or cork underlayment is often laid over the prepared tile. This provides cushioning, sound dampening, and a moisture barrier.
- Installation: We then install the engineered hardwood planks, typically using a click-and-lock system. The planks are not directly attached to the tile below, allowing them to expand and contract as a single unit.
- Maintaining Expansion Gaps: Just like with any hardwood installation, it’s crucial to leave proper expansion gaps (typically 10-15mm) around the perimeter of the room and at any fixed edges. This allows the floating floor to move naturally with changes in humidity without buckling or gapping.
Cost, Durability, and Aesthetics: Hardwood vs. Tile
The decision to choose between tile and hardwood often comes down to more than just looks. Its about practicality, longevity, and what makes sense for your lifestyle and budget. Lets break down how these two popular flooring options compare.
When thinking about durability, tile flooring often comes to mind as the champion. It’s incredibly tough against scratches, dents, and heavy foot traffic. However, tile’s Achilles’ heel can be its grout lines, which can crack, stain, or crumble over time, requiring diligent cleaning and occasional re-grouting. Hardwood, on the other hand, is also very durable, especially certain species like oak or maple. While it can scratch or dent, the beauty of hardwood is that it can be refinished multiple times over its lifespan, bringing it back to life and looking brand new. This ability to renew gives hardwood incredible longevity.
In terms of maintenance, both require regular cleaning. Tile is easy to wipe down, but again, those grout lines can be a hassle to keep spotless. Hardwood is also relatively simple to clean with regular sweeping and occasional damp mopping. The key for hardwood is to protect it from excessive moisture and spills, which can cause damage.
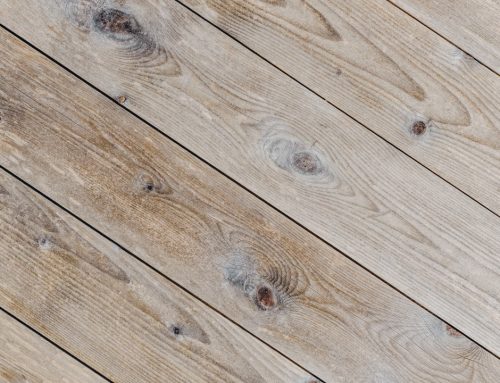
Visually and experientially, there’s a big difference in aesthetics. Hardwood offers a timeless, warm, and inviting look that many homeowners adore. It adds a natural elegance and can complement almost any decor style. Tile tends to have a cooler, more modern or utilitarian feel. While it comes in countless patterns and colors, it doesn’t offer the same natural warmth as wood. This leads us to comfort and warmth. Tile floors are notoriously cold to the touch, which can be a shock on chilly mornings. Hardwood, being a natural material, feels much warmer and softer underfoot, making your home feel cozier and more comfortable.
When it comes to moisture resistance, tile is the clear winner. It’s highly resistant to water and humidity, making it perfect for bathrooms, kitchens, and basements. Hardwood, however, is vulnerable to moisture. Excessive water can cause it to warp, swell, or buckle. This is why proper installation, moisture barriers, and quick cleanup of spills are crucial for hardwood.
Finally, let’s talk about home value and installation cost. Hardwood floors are widely considered a premium feature that significantly adds to a home’s resale value and appeal. Many buyers prefer hardwood for its classic look and durability. Tile’s impact on home value can vary; while functional, it doesn’t always have the same universal appeal as hardwood. For installation cost, hardwood can range from $5 to $15 per square foot, depending on the wood type, installation method, and labor. Tile installation costs can be quite similar, but can fluctuate greatly based on the complexity of the tile and grout work.
Ready to start your own floor change? We provide free estimates—simply schedule a free inspection through our contact page and let our team guide you every step of the way.