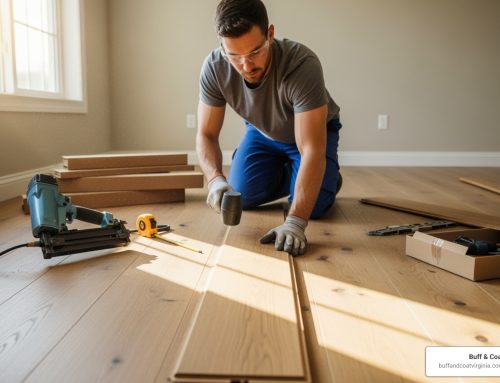
When One Bad Board Ruins the Whole Floor
Replacing wood floor planks doesn’t have to mean tearing up your entire floor. A single damaged plank from water, scratches, or cracks can be an eyesore, but you can fix just that one board. While it’s a manageable DIY project, many homeowners trust our professional hardwood floor services for perfect results without the hassle. For specific damage like this, professional hardwood floor repair is an excellent option.
Quick Answer for Replacing Wood Floor Planks:
- Remove the damaged plank: Cut parallel lines, make relief cuts, and chisel out the pieces.
- Prepare the replacement: Match the wood species and dimensions, trimming the tongue or groove as needed.
- Install the new plank: Apply adhesive, fit it into place, and secure it with weights for 12-20 hours.
Most DIY replacements cost $100-$500 in tools and materials, saving you $400-$1,400 compared to hiring a pro. The project takes about 4-6 hours of active work, plus drying time.
I’m David Emmerling, owner of Buff & Coat Hardwood Floor Refinishing. With over 20 years in hardwood restoration, I’ve helped many Richmond homeowners with replacing wood floor planks. This guide will walk you through the process.

Terms related to replacing wood floor planks:
When to Repair vs. When to Replace a Plank
When you spot a damaged board on your hardwood floor, you have to decide: can it be repaired, or does it need to be replaced? A DIY replacement can save you $400 to $1,400 compared to hiring a contractor, but first, you need to assess the damage. Minor cosmetic issues can often be repaired, but significant structural damage usually requires a full plank replacement.
| Issue Type | Repair (Minor Issues) | Replace (Major Issues) |
|---|---|---|
| Scratches | Light surface scratches, scuffs, minor abrasions | Deep gouges, unfixable scratches that penetrate the wood |
| Discoloration | Minor fading, small surface stains | Severe pet stains, extensive water marks, chemical damage |
| Cracks/Splits | Hairline cracks, small chips | Large structural cracks, splits, significant splintering |
| Water Damage | Superficial water marks (if caught early) | Warping, buckling, swelling, black stains, mold growth |
| Structural Integrity | Minor squeaks (often fixable with fasteners) | Loose boards, significant bowing, cupping, rotting wood |
| Aesthetics | Fading that can be addressed with buffing and recoating | Boards that drastically detract from the floor’s appearance |
Common Reasons for Plank Replacement
After two decades in the hardwood business, I’ve seen that certain issues almost always lead to replacing wood floor planks. Here are the most common culprits:
- Water damage: This is hardwood’s worst enemy. Moisture from spills or leaks can cause warping, buckling, and black stains that can’t be cleaned. For more on this, see our guide on Hardwood Floor Damage Repair.
- Deep scratches and gouges: Unlike light scuffs, deep grooves from dragging furniture or dropping heavy objects expose the raw wood to dirt and moisture.
- Cracks and splits: Significant cracks compromise the board’s integrity and can be a safety hazard.
- Warping and cupping: When boards bow or twist due to uneven moisture, they rarely return to their original shape, making replacement the best option.
- Severe stains: Pet urine stains can penetrate so deeply that even sanding won’t remove the persistent dark spots.
Can I Just Repair the Plank Instead?
Before you start cutting, consider if a repair is possible. Many issues that seem serious can be fixed without replacing wood floor planks.
- Surface-level scratches that haven’t broken the finish can often be fixed with the right products. Our Hardwood Floor Scratch Repair guide details several effective methods.
- Finish wear across multiple boards may just be a worn-out protective coating. A professional buff and coat can restore the look without replacing any wood.
- Minor discoloration from sun or light water marks can sometimes be improved with specialized cleaners or light refinishing.
- Wood filler is excellent for small chips, dents, or nail holes. It can be shaped, sanded, and stained to blend in.
If the damage is cosmetic and doesn’t affect the wood’s structure, a repair is usually sufficient. But for deep damage or structural issues, replacement is the smarter choice.
Gearing Up: Tools and Materials for the Job
Before you begin replacing wood floor planks, gathering your tools and supplies is essential for a smooth project. A tool investment of $100-$500 makes this a budget-friendly DIY alternative to professional installation. Always wear safety glasses, gloves, and hearing protection when using power tools.

Here’s a list of what you’ll need:
- Replacement plank
- Measuring tape and pencil
- Painter’s tape
- Dust sheets or drop cloths
- Circular saw or track saw
- Oscillating multi-tool
- Wood chisel
- Rubber mallet or hammer
- Pry bar
- Utility knife
- Shop vacuum
- Wood flooring glue
- Heavy weights (e.g., books, buckets of sand)
- Nail gun and wood putty (optional, for face-nailing)
Choosing the Right Tools
While a standard circular saw works, a track saw is highly recommended for replacing wood floor planks due to its precision and dust control. A track saw connects to a shop vacuum to minimize airborne dust, allows for precise depth control to avoid cutting the subfloor, and ensures straight, clean cuts guided by the track. This helps prevent damage to adjacent planks. The Makita track saw is a great example. If using a circular saw, be extra careful with depth and straightness. An oscillating multi-tool is also invaluable for making precise cuts in tight corners.
How to Select the Correct Replacement Plank
Finding a perfectly matched plank is crucial for an invisible repair. Pay close attention to the following:
- Wood Species: This is non-negotiable. Oak must be replaced with oak, maple with maple, etc. Different species have unique grain patterns and colors.
- Width and Thickness: Measure precisely. Even a millimeter difference can create gaps or raised edges.
- Grain Pattern: Try to find a plank with a similar grain to the surrounding boards for a better blend.
- Finish: For prefinished floors, source a plank from the same manufacturer if possible. For site-finished floors, you’ll need an unfinished plank that you can stain and finish to match. Test stains on scrap pieces first.
- Discontinued Flooring: If your flooring is no longer available, you may need to use unfinished wood and stain it to match, or “borrow” a board from an inconspicuous area like a closet.
- Acclimation: Let the new plank sit in the room for at least 48 hours before installation. This allows the wood to adjust to the temperature and humidity, preventing future warping or gapping.
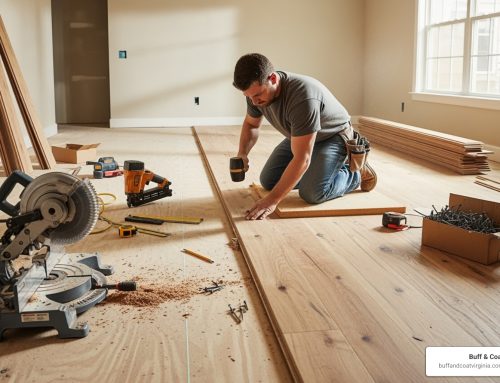
The Step-by-Step Guide to Replacing Wood Floor Planks
Replacing wood floor planks takes about 4-6 hours of active work, plus drying time. Patience and precision are key. Before starting, clear the area and protect the surrounding floor with painter’s tape and dust sheets. For a visual walkthrough, see our tutorial on How to Replace a Hardwood Floor Board.
Step 1: Removing the Damaged Plank
The goal is to remove the damaged board without harming its neighbors or the subfloor.
- Mark the Plank: Draw a rectangle about 3/4 inch inside the edges of the damaged plank.
- Set Saw Depth: Adjust your saw’s cutting depth to be just slightly more than the flooring’s thickness (usually around 3/4 inch). This is critical to avoid damaging the subfloor.

- Make Parallel Cuts: Cut along the long sides of the plank inside your marked rectangle. Use a track or a clamped straight edge as a guide. Stop about 4 inches from each end.
- Make Relief Cuts: From the ends of your parallel cuts, make diagonal cuts toward the corners. This creates smaller, manageable sections for removal.
- Chisel Out Pieces: Insert a chisel into the cuts and gently tap with a mallet to break out the center pieces. Work from the center outward to avoid damaging adjacent boards.
- Remove Edges: Carefully use your chisel and pry bar to remove the remaining tongue and groove edges. Pry up any face nails you encounter.
- Clean the Subfloor: Scrape away any old adhesive or debris and vacuum the area thoroughly for a clean foundation.
Step 2: Preparing the New Plank for Installation
Proper preparation ensures a professional-looking result.
- Dry-Fit the Plank: Test the fit of the new board. It should be snug but not so tight that it bows.
- Modify the Groove: Since you can’t slide the plank in from the side, you must modify it for a “drop-in” fit. Use a utility knife or chisel to carefully remove the bottom lip of the groove on the long side.
- Trim the Tongue (If Needed): Depending on the flooring, you may need to trim the tongue slightly. Dry-fit again to check.
- Adjust as Needed: Continue to dry-fit and make small adjustments until the plank sits perfectly flush with the surrounding floor. For larger projects, consider our Wood Floor Installation Midlothian VA services.
Step 3: Securing the New Plank
With the prep work done, installation is straightforward.
- Apply Adhesive: Apply wood flooring adhesive to the clean subfloor in a zigzag pattern. A thin, consistent layer is best. You can also add a bead of glue to the adjacent tongue.
- Insert the Plank: Angle the board to engage the groove, then press it down into the adhesive.
- Set the Plank: Use a rubber mallet and a tapping block to gently tap the plank until it is flush and level. Immediately wipe away any excess glue with a damp cloth.

- Secure with Weights: Place heavy weights (at least 90 pounds) on the plank to ensure a strong bond as the adhesive cures.
- Allow Drying Time: Let the glue cure for 12-20 hours. Do not walk on the board or place furniture on it during this time.
- Finish Up: If you face-nailed the plank, fill the nail holes with matching wood putty once the glue is dry.
Navigating Challenges and Professional Help
Replacing wood floor planks is a manageable DIY project, but challenges can arise. Knowing what to expect and when to call for help can prevent a small repair from becoming a major headache.
Differences in Replacing Solid, Engineered, and Laminate Planks
The type of flooring you have affects the replacement method.
- Solid Hardwood: These thick, real wood planks are what this guide focuses on. They are typically tongue-and-groove, requiring careful cutting to remove and modify for re-installation.
- Engineered Wood: These planks have a thin top layer of real wood over a core. You must be extra careful with your saw depth to avoid cutting through the veneer. If the wear layer is thick enough, refinishing might be an option. Learn more in our Refinishing Engineered Wood Floors: Complete Guide.
- Laminate Flooring: This synthetic product often uses a click-lock system. Replacing a plank in the middle may require disassembling the floor from the nearest wall to the damaged board and then reassembling it, which can be very challenging.
Potential Challenges in Replacing Wood Floor Planks
Even with careful preparation, you might encounter these issues:
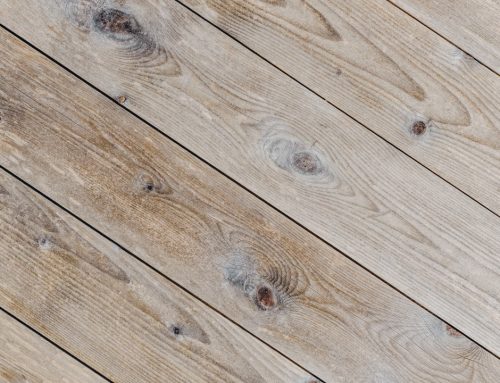
- Matching Aged Wood Color: A new plank will likely look brighter than your existing floor, which has aged with time and sun exposure. Achieving a perfect match can be difficult.
- Discontinued Flooring: If your flooring is no longer produced, finding a replacement can be a hunt. You might have to use a board from a closet or stain an unfinished plank to match.
- Hidden Surprises: Older floors can hide extra nails or staples, complicating the removal process.
- Damaging Adjacent Boards: A slip of the saw or pry bar can easily turn a one-plank job into a multi-plank repair. Patience is crucial.
- Subfloor Issues: You might uncover rot or unevenness in the subfloor, which must be addressed before installing the new plank.
When to Hire a Professional for Hardwood Floor Plank Replacement
While DIY is empowering, sometimes calling a professional for replacing wood floor planks is the wisest choice.
- Multiple Damaged Boards: The complexity increases significantly with more than one board.
- Subfloor or Moisture Issues: Warped or cupped boards may signal underlying problems that require an expert diagnosis.
- Lack of Tools or Experience: If you’re not comfortable with the tools or process, it’s best to hire a pro. Some experts rate this repair as nearly impossible for beginners.
- Perfect Finish Match: Professionals have the experience and tools to blend new planks seamlessly, making the repair virtually invisible.
- Valuable or Unique Flooring: With antique or custom flooring, the risk of a costly mistake is too high.
If you’re in the Richmond area and want peace of mind, professional help ensures a flawless result. For complex jobs, a full floor installation service might be more cost-effective. The National Wood Flooring Association can also help you find certified professionals.
Frequently Asked Questions about Replacing Wood Floor Planks
Homeowners often ask these questions about replacing wood floor planks. Here are some straightforward answers.
How long does it take to replace a single wood floor plank?
The hands-on work for a single plank typically takes about 4-6 hours. However, you must also account for the glue’s drying time. The adhesive needs 12-20 hours to fully cure before you can walk on the board or move furniture back. So, if you do the work on a Saturday morning, plan to keep the area clear until Sunday evening.
Can I replace a board in the middle of the floor?
Yes, absolutely. The method described in this guide is specifically for replacing a plank in the middle of a floor without having to tear up boards from the wall inward. The process involves carefully cutting out only the damaged piece and fitting a modified new one into its place, leaving the surrounding healthy boards untouched.
How do I match the color of the new plank to my old floor?
This is often the most challenging part of the project. A perfect color match is key to an invisible repair.
- Best Case: Use a leftover plank from the original installation if you have one.
- Site-Finished Floors: If you don’t have a spare, buy an unfinished plank of the same wood species. Experiment with different stains on scrap pieces until you find a close match.
- Prefinished Floors: This is more complicated. You may need to contact the original manufacturer or a flooring specialist. Another strategy is to “borrow” a board from an inconspicuous area, like a closet, and use that for the visible repair.
Achieving a perfect match takes patience and some trial and error, but it’s what makes for a truly professional-looking DIY repair.
Conclusion
Replacing wood floor planks is a project you can tackle to restore your floor’s beauty without the cost of a full replacement. With the right tools, patience, and the steps outlined in this guide, you can fix that one eyesore board and make your floor look seamless again. This DIY approach can save homeowners $400-$1,400 and provides the satisfaction of a job well done.
Remember the key steps: precise removal, careful preparation of the new plank, and patient installation with adequate drying time. These fundamentals are the foundation of a professional-looking result.
However, some jobs are more complex, or you may simply prefer an expert’s touch. If you encounter unexpected issues or want a guaranteed flawless finish, the team at Buff & Coat is here to help. We have over 20 years of experience with every type of hardwood floor repair in Richmond, VA, from single-board replacements to complex color matching.
Ready to get that plank fixed for good? We offer free, no-obligation estimates. Contact us today to schedule your free inspection and let us restore the beauty of your hardwood floors.