
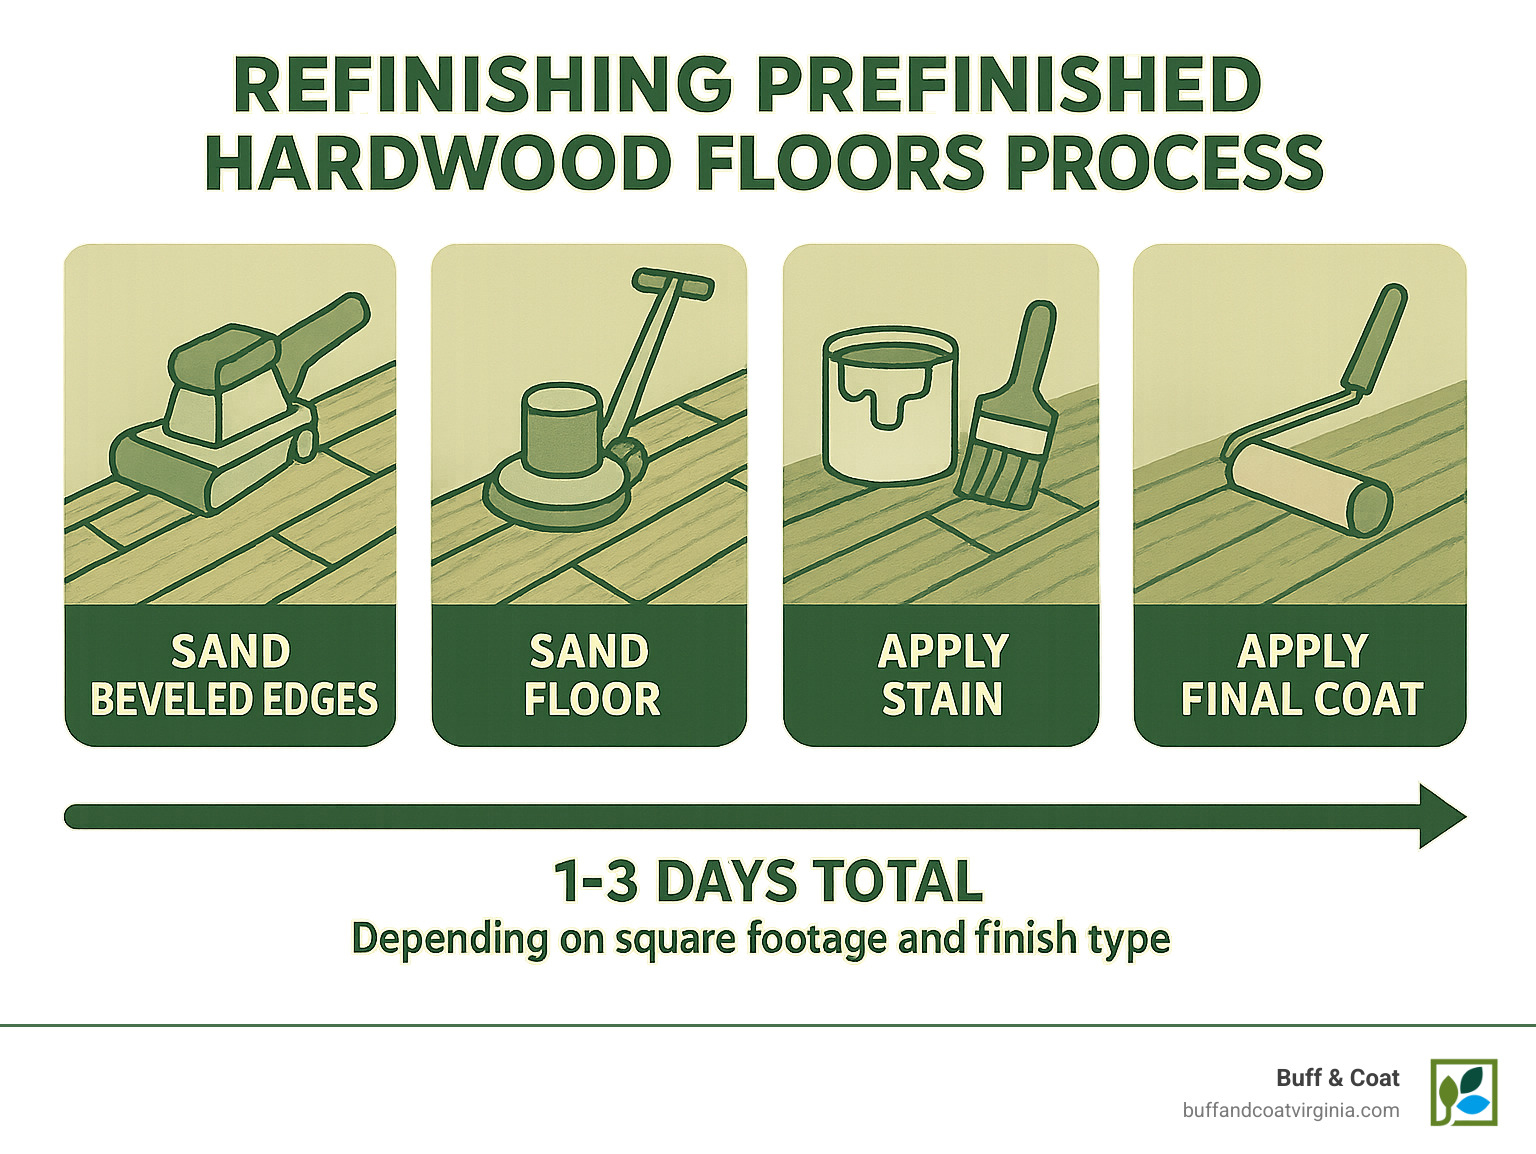
Understanding the Refinishing Process for Factory-Finished Floors
Yes, you can refinish prefinished wood floors, but the process requires special techniques due to their factory-applied finishes and beveled edges. Here’s what you need to know:
- Refinishing is possible: Despite tough aluminum oxide finishes, prefinished floors can be successfully refinished
- Challenges: Factory bevels between boards require special sanding techniques
- Frequency: Most prefinished hardwood can be refinished 2-5 times over their lifespan
- Cost-effective: Refinishing costs significantly less than replacement ($3.50-$6.50 per square foot for professional services)
- Options available: Full sanding or less-invasive screen-and-recoat depending on wear level
Prefinished hardwood floors don’t last forever. Those beautiful factory-finished planks that once gleamed throughout your home eventually show scratches, wear patterns, and dated colors just like any other flooring. The good news? You don’t need to rip them out and start over.
When considering refinishing prefinished wood floors, many homeowners worry about those micro-beveled edges and ultra-hard factory finishes. These unique characteristics do make the refinishing process different from traditional site-finished hardwood, but with the right approach, your floors can look brand new again without the mess and expense of replacement.
I’m David Emmerling, founder of Buff & Coat Hardwood Floor Refinishing in Richmond, Virginia, with over two decades of experience changing worn prefinished hardwood floors into stunning showpieces using our proprietary dust-free refinishing techniques.
Prefinished Hardwood vs Site-Finished: Know Your Floor
Before we roll up our sleeves and talk about refinishing prefinished wood floors, let’s take a moment to understand what makes your factory-finished flooring special. Trust me—knowing your floor’s unique characteristics will help you make smarter decisions when it comes time to restore those beautiful planks.
When you walk across a prefinished hardwood floor, you’re stepping on boards that received their color and protection in a controlled factory environment before they ever arrived at your home. These precision-crafted planks typically feature:
A super-tough aluminum oxide finish that laughs at everyday scratches and scuffs. This isn’t your grandma’s floor finish—it’s industrial-grade protection designed to stand up to real life.
Those distinctive micro-beveled edges—the slight angles along each board’s perimeter—which help installers create seamless floors despite minor subfloor irregularities. These bevels also give prefinished floors their characteristic defined-plank appearance.
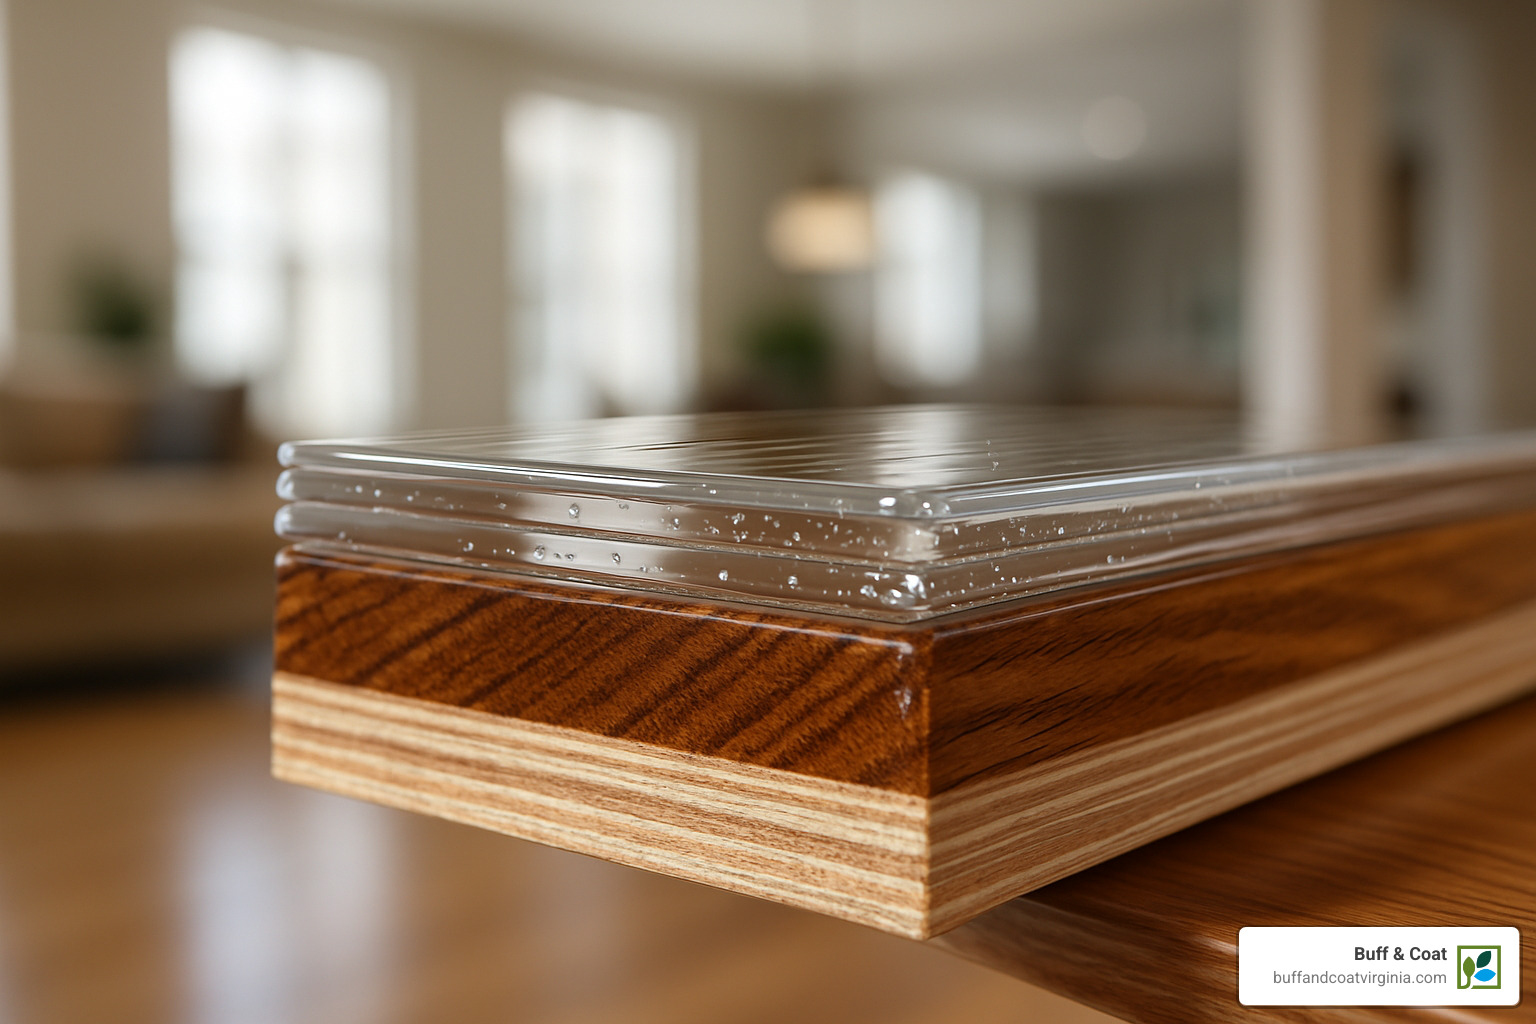
Your average prefinished floor boasts 5-7 layers of UV-cured polyurethane, creating a shield that traditional site-finished floors simply can’t match. This multi-layer armor is why many homeowners go decades before needing to consider refinishing.
Site-finished floors tell a different story. These are raw wood planks installed first, then sanded, stained, and sealed right in your living room. The result? A completely flat surface without those beveled edges between boards.
| Feature | Prefinished Hardwood | Site-Finished Hardwood |
|---|---|---|
| Finish Type | Aluminum oxide with UV-cured poly | Typically polyurethane (oil or water-based) |
| Finish Layers | 5-7 factory-applied layers | 2-3 on-site applied layers |
| Edge Profile | Micro-beveled | Flush/flat |
| Durability | Extremely scratch-resistant | Varies by finish type |
| Refinishing Complexity | More challenging | Straightforward |
| Lifespan Before Refinishing | Up to 25 years | 10-15 years |
| Wear Layer Thickness | Varies (check manufacturer specs) | Depends on wood species thickness |
Pay special attention to that wear layer thickness when you’re thinking about refinishing prefinished wood floors. If you have solid hardwood prefinished floors, you’ll typically have enough thickness for multiple refinishes over the decades. Engineered prefinished floors, however, have a thinner veneer of real wood on top, which might limit your refinishing options to just one or two cycles.
Want to learn more about the specific sanding techniques we use for different floor types? Check out our floor sanding services for a deeper dive into the process.
Why Factory Finishes Are Tougher
There’s a reason prefinished floors can withstand years of foot traffic, pet claws, and furniture dragging without looking worse for wear. Their factory-applied finishes are engineering marvels compared to traditional site-finished alternatives.
While your local floor finisher might apply 2-3 coats of polyurethane in your living room, factory-finished floors receive seven or more protective layers in a dust-free, temperature-controlled environment. Each layer is perfectly cured using powerful UV light systems that create molecular bonds far stronger than what’s possible with air-dried finishes.
The secret weapon in these finishes is aluminum oxide—yes, the same abrasive material used in sandpaper. Manufacturers embed these incredibly hard particles throughout the finish layers, creating a surface that can laugh off daily wear that would scratch traditional finishes. This is why many prefinished floors can go 25 years before needing refinishing, while site-finished floors typically need attention after 10-15 years.
This extraordinary durability is both a blessing and a challenge. The same rock-hard finish that protects your floors for decades also requires special equipment and techniques when it’s finally time for refinishing. Those aluminum oxide particles don’t surrender easily to standard floor sanders!
For the science-minded among you, there’s fascinating research on aluminum-oxide durability that explains why these finishes outperform traditional polyurethane by such a wide margin.
Can You Refinish Prefinished Wood Floors? Challenges & Solutions
Yes, you absolutely can refinish prefinished wood floors! While these beautiful floors are designed for longevity, they aren’t immune to life’s scratches, scuffs, and the occasional wine spill. The good news is that with the right approach, your prefinished floors can look stunning again – though the process does come with some unique challenges.
Challenge 1: Ultra-Hard Aluminum Oxide Finish
That factory-applied aluminum oxide finish that’s kept your floors looking great for years? It’s incredibly resistant to everyday wear – and equally resistant to sanding equipment.
Breaking through this super-tough finish requires some special tactics. We typically start with more aggressive 36-40 grit sandpaper, which helps cut through the finish more efficiently. You’ll need professional-grade sanders with enough power to handle the job, and it’s wise to expect a bit more sanding time compared to traditional site-finished floors. At Buff & Coat, we often use a cross-cut sanding technique for the initial pass, which effectively breaks the aluminum oxide barrier without damaging the wood beneath.
Challenge 2: Those Distinctive Micro-Bevels
One of the most recognizable features of prefinished floors are those small V-grooves between boards. While they add character, they also create a unique refinishing challenge.
Micro-bevels require special attention because standard drum sanders simply glide over these recessed areas. To properly refinish these floors, we use specialized edge sanders to reach into those bevels. You’ll need to decide whether to maintain the bevels (preserving the floor’s original character) or sand them flat (creating a more contemporary look). If you choose to keep them, those bevels need careful hand-scraping to remove years of built-up finish and trapped dirt.
Challenge 3: Veneer Thickness Considerations
Not all prefinished floors are created equal, especially when it comes to engineered products with their thin top layers of real wood.
Checking your floor’s veneer thickness is critical before starting any refinishing project. Ideally, you want at least 3mm of hardwood veneer for a full sanding. If you’re unsure, check your manufacturer’s specifications or have a professional assess your floors. With thinner veneers, we often recommend a less aggressive screen-and-recoat approach that refreshes without removing significant material.
Most solid prefinished hardwood floors can be refinished 2-5 times throughout their lifespan, depending on how aggressively they’re sanded each time. The key is removing just enough material to eliminate damage without unnecessarily reducing the board thickness.

For floors with light wear or surface scratches, a full sand-and-refinish might be overkill. This is where our specialty – the screen-and-recoat process – really shines as a less invasive alternative that extends your floor’s life while refreshing its appearance.
More info about buff and coat technique
When a Screen & Recoat Beats Full Sanding
Not every tired-looking prefinished floor needs aggressive sanding. If your floors have light surface scratches that haven’t penetrated to the wood, a dulled finish but no deep damage, or you’re happy with the current color, a screen and recoat offers tremendous benefits.
This gentler approach costs significantly less (typically $3.50–$6.50 per square foot for professional service) and creates minimal dust compared to full sanding. Most screen-and-recoat projects can be completed in a single day with just a 24-hour cure time before you can walk on your refreshed floors. Best of all, this process preserves those original bevels between boards while extending the time before a full refinishing becomes necessary.
The process is straightforward but requires attention to detail: thorough cleaning, careful abrasion of the existing finish with a floor buffer and screening pad, meticulous dust removal, and application of 1-2 fresh polyurethane coats. This method works wonderfully when the existing finish is still intact with no bare wood showing through.
Red Flags That Require Board Replacement
Sometimes, even the most skilled refinishing can’t solve certain problems. Watch for these warning signs that suggest board replacement might be necessary:
Extremely thin veneer layers (under 1/16″) simply don’t have enough material for sanding. Deep water damage that has caused cupping or warping often won’t sand out evenly. Splits or cracks that extend through the board thickness compromise structural integrity. Extensive pet urine damage that has penetrated deep into the wood can leave permanent discoloration and odor. Severe cupping that would require removing too much material to flatten isn’t a good candidate for refinishing.
In these situations, we often recommend selective board replacement followed by refinishing the entire floor for a cohesive look. At Buff & Coat, we take pride in our ability to match new boards to your existing floor and integrate them seamlessly during the refinishing process.
Want to know if your prefinished floors are good candidates for refinishing? Our Richmond-based team offers free assessments and estimates. Call us today to schedule your appointment and find how we can bring new life to your beloved hardwood floors.
DIY Step-By-Step: Refinishing Prefinished Wood Floors Without Losing Your Mind
Ready to tackle refinishing prefinished wood floors yourself? I won’t sugarcoat it—this is a big project that requires some serious elbow grease, but with the right approach, you can transform those worn boards into stunning floors again. Let’s walk through how to do this without tearing your hair out along the way.
Refinishing Prefinished Wood Floors: Preparation Checklist
The success of your refinishing project hinges on thorough preparation—skipping these steps is like building a house on sand.
First, clear everything out. I mean everything—furniture, rugs, wall hangings, and even baseboards if possible (label them for easier reinstallation). This isn’t the time for shortcuts like trying to work around heavy pieces.
Next, inspect every inch of your floor. Those loose boards? Secure them with finish nails. Small cracks? Fill them with a quality wood filler. Take time to mark problem areas with painter’s tape so you don’t miss them during sanding.
A deep clean comes next. Use a pH-neutral hardwood cleaner to remove years of accumulated grime. That stubborn sticky spot from a juice spill three years ago? It needs to go before sanding begins. Allow your floor to dry completely—usually overnight.
Dust containment might sound optional, but trust me, it’s not. Seal off doorways and vents with plastic sheeting, cover remaining fixtures, and turn off your HVAC system. Your lungs (and the rest of your house) will thank you. Consider renting a HEPA air filtration system for an extra layer of protection.
Finally, gather your safety gear. This includes a proper respirator mask (not just a dust mask), eye protection, ear protection, knee pads, and work gloves. Sanding floors is tough on your body—protect it.
Essential tools for this job include a drum sander, edge sander, random orbital sander for corners, floor buffer with screening pads, shop vacuum with HEPA filter, various sandpaper grits, tack cloths, application tools, stain (if changing color), and polyurethane finish. Rent the big equipment—buying is rarely cost-effective for a one-time project.
Refinishing Prefinished Wood Floors: Sanding & Sealing
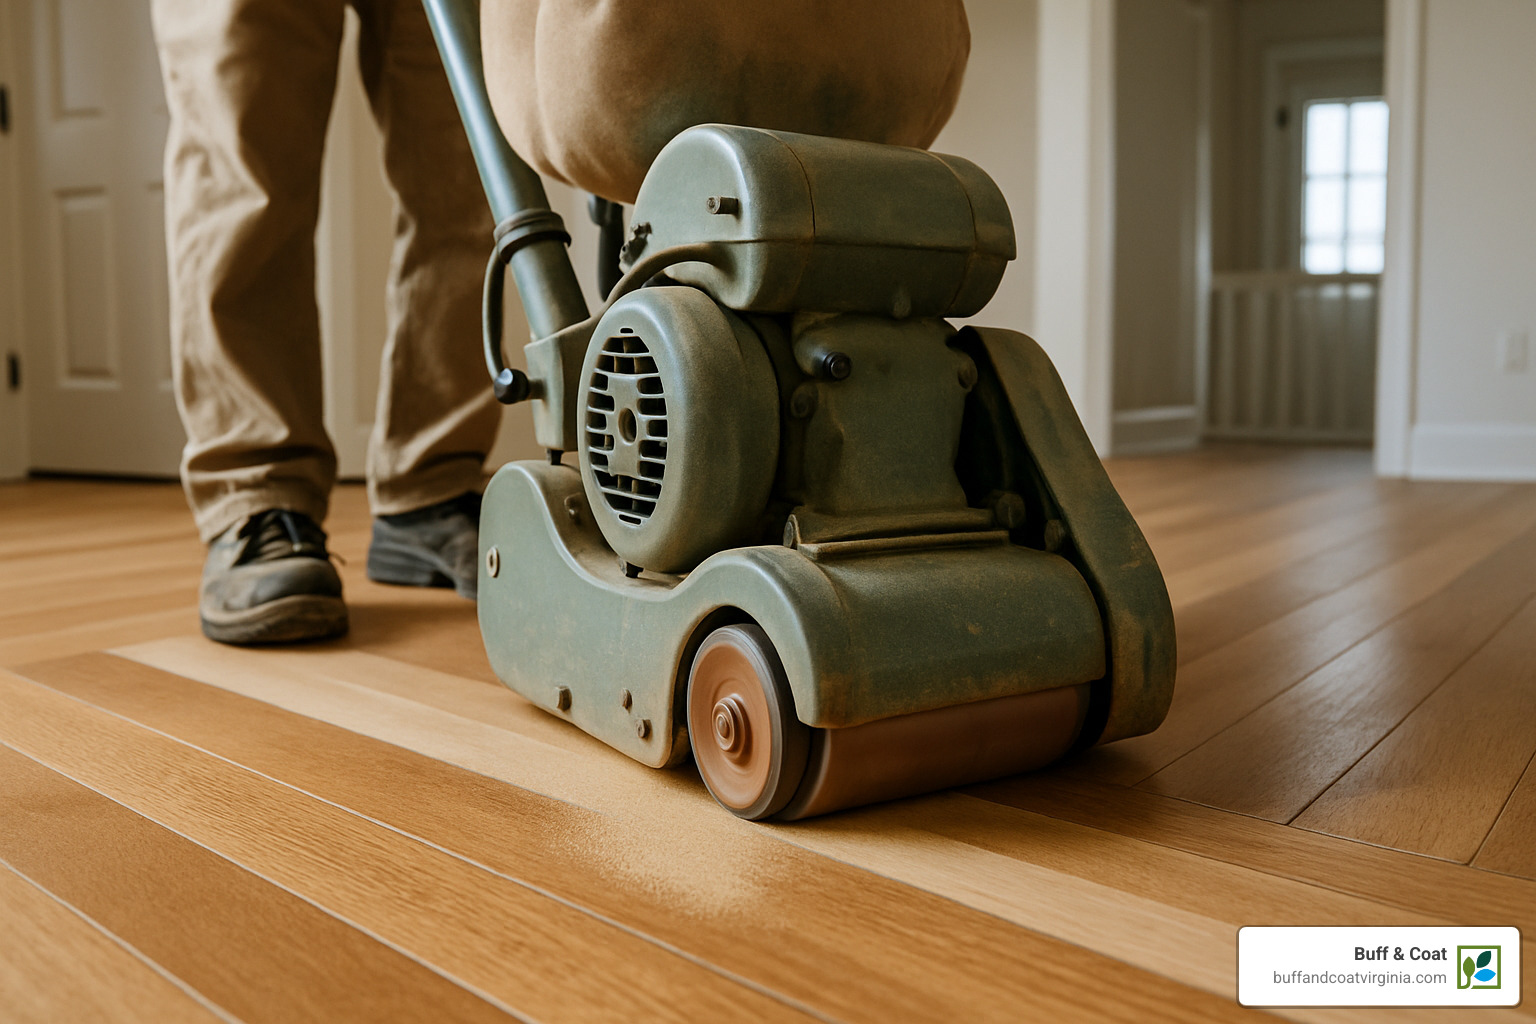
The sanding process is where many DIYers get intimidated, but breaking it down into manageable steps helps tremendously.
Start with edge sanding. Those beveled edges on your prefinished floors need special attention, so begin by addressing them with an edge sander. This creates a more uniform surface for the drum sander to work with.
For your first drum sander pass, use 36-40 grit sandpaper. The aluminum oxide finish on prefinished floors is incredibly tough, so don’t be surprised if progress seems slow at first. Many pros recommend cross-cutting (sanding perpendicular to the boards) for this initial pass to break through the finish more effectively.
After breaking through that factory finish, progress through finer grits with the grain: 60 grit for the second pass, 80 grit for the third, and 100 grit for the final pass. Take your time and keep the sander moving—staying in one spot too long creates dips that are hard to fix.
Don’t forget corners and edges. Use the edge sander and orbital sander to ensure these areas match the smoothness of the main floor. These details make the difference between an amateur and professional-looking job.
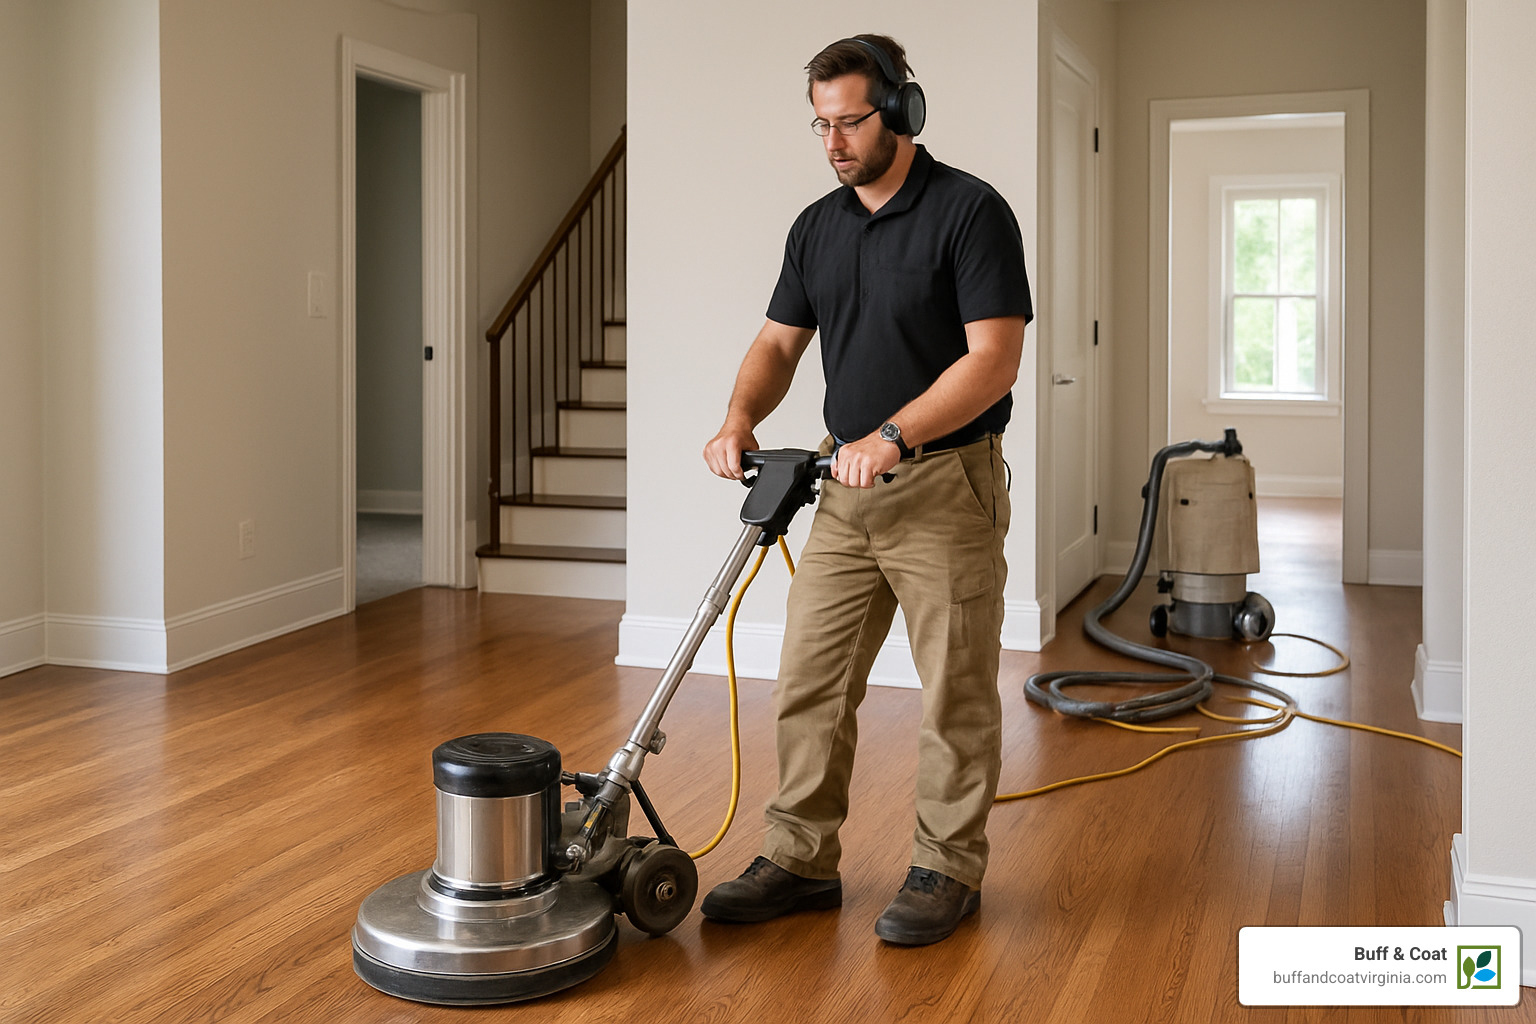
Once the main sanding is complete, screen the entire floor using a floor buffer with a 120-150 grit screening pad. This creates a uniform surface and removes any sanding marks left by the drum sander.
Thorough dust removal is critical between each step. Vacuum with a HEPA-filtered vacuum after each grit change and especially after your final sanding. Follow up by wiping the entire floor with tack cloths to capture any remaining dust particles—even tiny specs can ruin your finish.
If you’re changing your floor’s color, consider water-popping the wood by lightly misting it with water to raise the grain for better stain absorption. Always test your chosen stain in a closet or other inconspicuous area first. Apply stain evenly using a foam or lamb’s wool applicator, following the wood grain, and promptly wipe away excess with clean cloths. Allow the manufacturer’s recommended drying time—usually 24-48 hours—before proceeding.
For the finishing process, start with a sealer coat if you’re using water-based products. This prevents grain raise and ensures even finish absorption. Then apply your finish coats using a lamb’s wool applicator or T-bar, keeping these tips in mind:
– Apply thin, even coats rather than thick ones
– Maintain a wet edge to prevent visible lap marks
– Allow proper drying time between coats
– Lightly screen between coats with a 180-220 grit pad for better adhesion
Take extra care with your final coat, working toward an exit door so you don’t paint yourself into a corner. While the floor may feel dry within hours, full curing takes 7-14 days. Avoid heavy furniture, area rugs, and pet traffic during this time.
Should You Flatten the Micro-Bevel? Pros & Cons
One of the biggest decisions when refinishing prefinished wood floors is whether to sand those beveled edges flat or preserve them.
Flattening the bevels creates a smooth, continuous surface similar to site-finished floors. This modern look eliminates dirt-trapping grooves, making your floors easier to clean. It also potentially allows for more future refinishes since you’re not starting with existing depressions. However, this approach requires more aggressive sanding that removes more of the wear layer. It may also reveal inconsistencies in board heights that the bevels were designed to hide.
Maintaining the bevels preserves your floor’s original character and requires less aggressive sanding, which preserves more of the wear layer for future refinishes. Those grooves can also hide minor subfloor irregularities and make the refinishing process faster with less dust. The downside? The grooves continue to trap dirt and debris, making cleaning more challenging, and hand-scraping bevels is time-consuming.
The National Wood Flooring Association (NWFA) advises against filling gaps larger than a quarter-inch, as the filler will crack and peel within months. This guidance applies to micro-bevels too—filling them with wood putty generally doesn’t hold up long-term.
In our experience at Buff & Coat, most homeowners in Richmond prefer to maintain the beveled look for its character, but both approaches can yield beautiful results when done properly. Not sure which option is right for your home? We’re happy to provide a free assessment and recommendation—just give us a call!
Pro-Level Advice: Equipment, Costs & Maintenance
Taking on the challenge of refinishing prefinished wood floors requires not just elbow grease, but the right tools for the job. Let me walk you through what separates a professional-grade refinishing job from a DIY weekend warrior project.
Equipment Considerations
The quality of your sanding equipment can make or break your refinishing project. When we tackle prefinished floors at Buff & Coat, we rely on professional-grade dust containment systems that capture up to 98% of dust right at the source. This isn’t just about keeping your home cleaner—it’s about protecting your family’s health and preventing fine dust from settling into every nook and cranny of your home.
If you’re going the DIY route, don’t skimp on HEPA vacuums. Those aluminum oxide particles are no joke when airborne. Consider installing temporary dust barriers between rooms too—your lungs (and spouse) will thank you.
When it comes to sanders, you’ve got options. Drum sanders provide the aggressive cutting power needed to tackle those tough factory finishes, while orbital sanders offer more forgiveness but might take twice as long. For those tricky edges and corners, a variable-speed edge sander gives you the control you need without gouging your baseboards.
Thinking about renting versus buying? For most homeowners, renting makes financial sense. Just be picky about the equipment condition—inspect those sanders carefully before leaving the rental shop. If you’re a woodworking enthusiast planning multiple projects, professional-grade equipment runs $1,000-$5,000 but will deliver superior results every time.
Cost Breakdown
Let’s talk dollars and cents. DIY refinishing prefinished wood floors typically costs around $2.50 per square foot when you factor in equipment rental ($150-$300 per day), sandpaper and supplies ($100-$200), and finish materials ($150-$300).
Professional services cost more but eliminate the learning curve and physical labor. At Buff & Coat, our screen and recoat services run $3.50-$6.50 per square foot, while full sand and refinish projects typically range from $4-$8 per square foot. If your floor needs board replacement, expect to add $8-$15 per square foot for those sections.
The difference? We bring decades of experience, professional-grade equipment, and the confidence that comes from having refinished thousands of floors throughout Richmond. Plus, we offer free, no-obligation estimates so you’ll know exactly what you’re getting into before we begin.
Post-Refinish Maintenance
Once your floors are beautifully refinished, proper maintenance becomes your best friend. The first two weeks are critical—this is when your finish is still curing and at its most vulnerable. Avoid shoes on the floor, wait 24 hours before normal foot traffic, and a full 72 hours before replacing furniture (with felt pads, of course). Hold off on area rugs for at least two weeks, and maintain indoor humidity between 35-55% to prevent wood movement.
For ongoing care, stick with pH-neutral hardwood cleaners and avoid wet mopping or steam cleaning, which can damage even the toughest finishes. Regular sweeping or vacuuming with a soft brush attachment prevents grit from scratching your new finish. And those felt pads under furniture? Check and replace them regularly—they’re your floor’s best defense against scratches.
One of our pro tips: consider a maintenance coat every 3-5 years. This simple refresh can double the life of your refinished floors without the mess and expense of a full sanding. At Buff & Coat, we specialize in these maintenance services that keep Richmond homes looking beautiful year after year.
More info about hardwood floor maintenance
Frequently Asked Questions
How many times can solid prefinished floors be sanded?
Most solid prefinished hardwood floors can be sanded and refinished 2-5 times during their lifetime. The exact number depends on several factors: the thickness of the wear layer above the tongue and groove, how aggressively each sanding removes material, whether you flatten those beveled edges, and even the wood species itself.
Each refinishing typically removes 1/32″ to 1/16″ of material. With proper technique, you’ll get at least one full refinishing from your prefinished floors, and often several more before replacement becomes necessary.
Can I change a cherry-orange tone to a gray-wash?
Yes! One of the joys of refinishing prefinished wood floors is the opportunity to completely transform their color. To convert those dated cherry-orange tones to a trendy gray-wash, you’ll need to sand completely down to bare wood, removing all traces of the original stain.
After thorough sanding, apply a wood conditioner to ensure even absorption, then use a gray or “weathered” stain. Always test in a closet or inconspicuous area first—some wood species like oak take gray stains beautifully, while maple can be more challenging to stain evenly. Finish with a water-based polyurethane to maintain the true color without the amber tint that oil-based products develop.
Is painting prefinished floors ever smart?
While technically possible, I rarely recommend painting prefinished hardwood floors. Paint simply doesn’t adhere well to factory finishes without extremely aggressive sanding, and painted surfaces show wear much more quickly than properly finished wood. Most importantly, painting eliminates the natural beauty and value that make hardwood floors so desirable in the first place.
If you’re determined to dramatically change the color, proper sanding and staining will give you better, longer-lasting results. Save painting for truly damaged floors where appearance is the only concern—and understand that painted floors typically need maintenance more frequently than a proper refinish.
At Buff & Coat, we’re Richmond’s dust-free refinishing specialists. We’d be happy to provide a free estimate for your prefinished floor refinishing project—just give us a call today to schedule an appointment with one of our local experts. More info about Richmond hardwood floor services
Conclusion
Breathing new life into your prefinished hardwood floors isn’t as daunting as it might seem. Throughout this guide, we’ve walked through the unique challenges and practical solutions that make refinishing prefinished wood floors a completely doable project. Whether you’re leaning toward tackling it yourself or bringing in the pros, understanding what makes these factory-finished floors special helps ensure you’ll get results you’ll love for years to come.
Here in Richmond, we’ve helped countless homeowners transform their worn, scratched prefinished floors into stunning showpieces they’re proud to show off. Our team at Buff & Coat has fine-tuned our approach specifically for these durable factory-finished floors, developing dust-free techniques that minimize disruption to your daily life while maximizing beautiful results.
The best part? You don’t have to guess whether refinishing makes sense for your specific floors. We’re happy to visit your home, assess your floor’s condition, and provide honest recommendations – whether that’s our gentle screen-and-recoat process or a more comprehensive sand-and-refinish service. And unlike many contractors, we’ll take the time to explain our reasoning so you can make an informed decision about your investment.
Living with beautiful hardwood floors shouldn’t be complicated. Our Richmond neighbors appreciate our straightforward approach and transparent pricing – no surprises, just gorgeous floors that lift your home’s beauty and value.
Ready to fall in love with your hardwood floors again? Visit our website or contact us today to schedule your free, no-obligation estimate with Richmond’s dust-free refinishing specialists. Your floors (and your lungs) will thank you!
More info about Richmond hardwood floor services


