Why Hardwood Floor Replacement Matters for Your Home
Hardwood Floor Replacement is a major home improvement that transforms your space and boosts property value. When floors have severe damage, extensive wear, or structural issues beyond refinishing, replacement is the best option.
Quick Answer: Your hardwood floor replacement options include:
- Solid hardwood – Traditional choice, can be refinished multiple times
- Engineered hardwood – More stable, better for basements and radiant heat
- Pre-finished hardwood – Faster installation, consistent factory finish
- Partial replacement – Replace only damaged sections when possible
- Full replacement – Complete floor overhaul for severely damaged floors
The decision between repair, refinishing, or replacement depends on your floor’s condition. As one Reddit user noted when buying a 1929 home: “My house was built in 1929…some 85 years later they are in terrible shape. They squeak like crazy, many boards are broken and splintered, there are gaps, they are uneven.”
Common signs you need replacement instead of repair:
- Soft or spongy wood indicating structural damage
- Severe water damage with black stains or cupping
- Floors that have been refinished multiple times already
- Widespread gaps, movement, or exposed nails
- Extensive splintering that goes beyond surface scratches
I’m David Emmerling, owner of Buff & Coat, with over 20 years of experience in Hardwood Floor Replacement in the Richmond area. My team helps homeowners steer the repair-versus-replace decision to maximize their flooring investment.

To Repair or Replace? How to Assess Your Current Hardwood Floors
Before choosing new flooring, it’s important to assess your current floors. Sometimes a repair service or professional refinishing is enough to restore them, but other times, a full hardwood floor replacement is necessary.
A proper assessment involves examining the overall condition, identifying damage types, and checking the floor’s structural integrity. While repairing a single board for $20-$50 is cost-effective for isolated issues, widespread or deep damage often requires replacement.

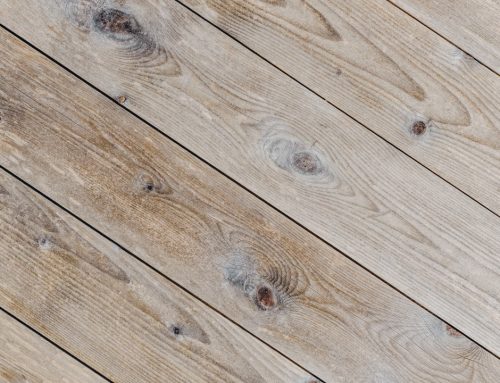
Common Signs of Irreparable Damage
Certain warning signs clearly indicate that a floor needs replacement, and refinishing won’t solve the underlying problems.
-
Severe water damage and black stains: When water penetrates deep into the wood, it causes black stains that signify internal decay. This damage is not just on the surface and cannot be sanded away. Damage from contaminated water requires immediate replacement for health reasons.
-
Soft or spongy wood: If your floor feels like it’s giving way, the wood and potentially the subfloor are decaying due to moisture, pests, or rot. This structural failure requires replacement.
-
Cupping and crowning: These are moisture-related deformations where boards become concave (cupping) or convex (crowning). While minor issues can sometimes be sanded flat, severe cases mean the floor’s structure is compromised.
-
Widespread movement or gaps: While some seasonal movement is normal, large, persistent gaps or floors that shift underfoot point to installation failure or structural issues that refinishing cannot fix.
-
Exposed nails: Seeing nail heads means the floor has been sanded down too many times. The wood is now too thin for another refinishing and would be compromised.
-
Extensive splintering: Widespread splintering, especially on board edges, indicates the wood has become brittle and lost its structural strength, a common issue in very old or poorly maintained floors.
-
Thinning from multiple refinishes: Solid hardwood can typically be refinished 4-6 times. If your floors have reached this limit, they are likely too thin to survive another sanding without cracking.
Partial Hardwood Floor Replacement: Is It an Option?
Yes, for isolated issues like a localized stain or a single gouged board, replacing only the damaged section is a practical and financial solution. However, the main challenge is seamlessly matching the new boards to the old floor.
Matching is difficult due to variations in wood species and grain, changes in stain color and finish sheen from age and UV exposure, and the unique patina of older wood. Weaving in new boards requires staggering the joints to create a natural, blended look. When a perfect match is impossible, we often recommend refinishing the entire room after the repair to ensure a uniform appearance and avoid a patchwork effect.
Choosing Your New Flooring: Types of Hardwood Explained
Once you’ve decided on hardwood floor replacement, you can choose new flooring that aligns with your lifestyle, home traffic, and budget. Wood floors are also a sustainable choice, as they can last for several generations, contributing to reduced waste in landfills.

Solid vs. Engineered vs. Pre-finished Hardwood
Understanding the main types of hardwood is key to your hardwood floor replacement decision.
-
Solid hardwood is the traditional choice, made from a single piece of wood (typically 3/4-inch thick). Best for above-ground levels with stable humidity, its main advantage is longevity, as it can be refinished 4-6 times.
-
Engineered hardwood has a real wood veneer over a layered core, making it more stable in areas with fluctuating moisture, like basements or over concrete. It can be refinished 1-3 times, depending on the veneer’s thickness.
-
Pre-finished hardwood can be solid or engineered but comes with a durable, factory-applied finish. This option speeds up installation and avoids the dust and fumes of on-site finishing.
| Feature | Solid Hardwood | Engineered Hardwood | Pre-finished Hardwood |
|---|---|---|---|
| Construction | Single piece of wood | Real wood veneer over multiple plywood/HDF layers | Solid or engineered, factory-finished |
| Durability | Very durable, can last generations | Durable, more stable than solid in varied conditions | Highly durable finish, often with multiple protective coats |
| Cost | Generally higher per square foot | Often more affordable than solid | Can be higher than unfinished, but saves on labor |
| Installation | Nail-down, staple-down | Nail-down, glue-down, floating (interlocking) | Nail-down, glue-down, floating (depending on type) |
| Areas | Above-grade, stable humidity areas | All grades (including basements), concrete slabs, radiant heat | All grades (depending on type) |
| Refinishing | Multiple times (4-6+) | 1-3 times, depending on wear layer thickness (2mm+ needed) | 1-3 times (engineered), multiple (solid) |
| Moisture Res. | Prone to expansion/contraction with humidity swings | More stable, less prone to moisture issues | Good, due to factory-applied sealants |
| DIY Friendly | Less so, requires specific tools & expertise | More so, especially floating click-lock systems | More DIY friendly due to no on-site finishing |
How to Choose the Right Hardwood Species and Finish
The wood species and finish will define your floor’s look, durability, and maintenance.
- Oak: The most popular choice, oak is durable, affordable, and has a classic grain. Both red and white oak are excellent for most homes.
- Hickory: One of the hardest domestic woods, hickory is ideal for high-traffic homes with kids and pets. It has a rustic, varied grain.
- Maple: Durable with a clean, uniform look, maple is great for modern styles. It can be tricky to stain, so natural finishes are popular.
- Cherry: Known for its rich reddish-brown color that deepens over time, cherry is a softer wood that offers an neat look.
- Walnut: Prized for its rich, dark color and sophisticated grain, walnut provides a luxurious, upscale appearance.
The Janka hardness scale measures a wood’s resistance to denting; higher numbers mean harder wood. For finishes, polyurethane is the most common and durable. Oil-based versions add a warm, amber tone, while water-based options stay clear and have less odor. Sheen levels range from matte (hides scratches), to satin (most popular), to glossy (high-shine, shows imperfections). Our “buff and coat” process can restore and protect your chosen finish.
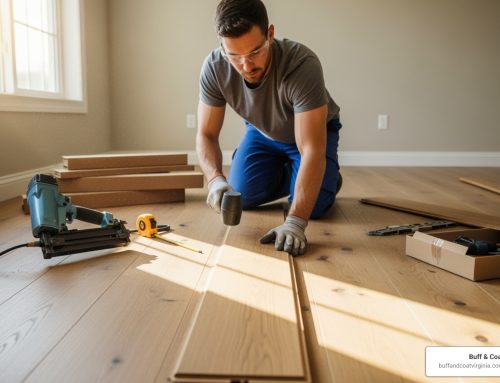
The Hardwood Floor Replacement Process: A Step-by-Step Guide
A hardwood floor replacement project is more manageable when broken into steps. While DIY is possible for small repairs, a full replacement is complex and often best left to professionals. Safety is paramount, so always use gear like gloves, knee pads, and eye protection.
Before installation, new hardwood must acclimate in your home for 3-7 days. This allows the wood to adjust to your home’s temperature and humidity, preventing future gaps or buckling.

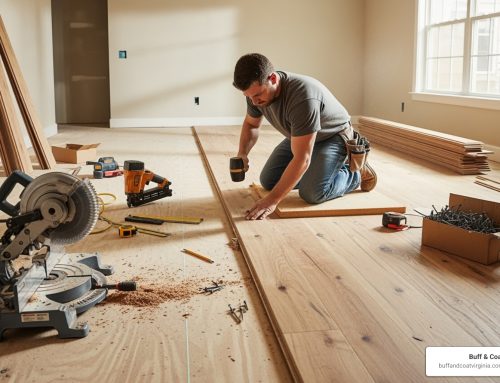
Essential Steps and Tools for Replacement
A successful replacement requires the right tools and a clear process. Key tools include a pry bar, hammer, circular saw, flooring nailer, tapping block, jigsaw, shop vacuum, moisture meter, level, and safety gear.
The process follows these key steps:
- Remove Old Flooring: Carefully pry up old planks, using a circular saw for relief cuts on nailed-down floors. The subfloor must be cleared of all old fasteners.
- Prepare the Subfloor: Inspect the subfloor for damage, rot, or moisture. Secure any loose panels and thoroughly clean the surface.
- Level the Subfloor: The subfloor must be flat to prevent squeaks and gaps. Sand down high spots and use a leveling compound to fill in low spots.
- Install New Flooring: After the wood has acclimated, install the new planks using the appropriate method, staggering joints for stability and appearance.
- Finishing Touches: Reinstall baseboards and transition pieces, then perform a final, thorough cleaning.
Can Existing Hardwood Be Used as a Subfloor?
Yes, but only if the old floor is structurally sound, level, and properly prepared. The existing floor must be free of rot or significant movement. Any loose boards must be screwed down securely. Be aware that this will raise the overall floor height, which can affect doors and transitions. If the old floor has severe damage, it must be removed entirely.
Understanding Hardwood Floor Installation Methods
Different installation methods suit different flooring types and subfloors.
- Nail-down: Planks are nailed to a wooden subfloor. This traditional method creates a very stable floor and is best for solid hardwood over plywood.
- Staple-down: Similar to nailing but uses staples. It is also suitable for solid and engineered wood over a plywood subfloor.
- Glue-down: Engineered planks are glued directly to the subfloor, which is ideal for concrete slabs. This method provides a solid feel and helps with sound dampening.
- Floating (interlocking): Planks lock together and “float” over an underlayment without being attached to the subfloor. This is a fast, DIY-friendly method for engineered wood, suitable for most subfloors and radiant heat systems.
For more details, you can read about our installation process.
Budgeting and Hiring: Costs and When to Call a Professional
Understanding the costs of hardwood floor replacement helps you make smart decisions for your home and budget. The total price depends on materials, labor, and the condition of your existing floors. We believe in transparency and can provide more info on flooring installation costs.

Understanding the Costs of Hardwood Floor Replacement
The total cost of a hardwood floor replacement includes several factors:
- Material Costs: These typically range from $5 to $15 per square foot. Common species like oak cost $5-$10/sq ft, while exotic woods can be $8-$15/sq ft or more. Engineered wood is often less expensive than solid, but high-end options can be comparable in price.
- Labor and Removal: Professional labor rates in our Richmond, Glen Allen, and Midlothian service areas typically range from $3 to $8 per square foot. This does not include the cost of demolishing and disposing of the old flooring.
- Subfloor Repairs: Unforeseen issues like an uneven or damaged subfloor will add to the cost, as these problems must be fixed before installation.
- Additional Materials: Don’t forget to budget for underlayment, adhesives, fasteners, and new trim or baseboards.
In our Virginia service areas, total project costs for materials and installation typically range from $8 to $20 per square foot.
DIY vs. Hiring a Pro: Making the Right Choice
Deciding between DIY and hiring a professional depends on your skill, time, and the project’s complexity.
DIY is feasible for small repairs, like replacing a single board. However, a full room replacement is a complex job requiring specialized tools (which can be expensive to rent or buy) and advanced skills. Mistakes like poor subfloor preparation or incorrect board spacing can lead to squeaks, gaps, and buckling, resulting in costly fixes down the line.
Hiring a professional ensures expertise, efficiency, and quality. A pro team works faster, handles unexpected challenges, and provides a warranty on their workmanship. At Buff & Coat, we use advanced, dust-free techniques to minimize mess and disruption. For a major home investment like hardwood floors, professional installation protects your investment and ensures a beautiful, long-lasting result.
Frequently Asked Questions about Hardwood Floor Replacement
How long does a hardwood floor replacement take?
For a typical 200-300 sq ft room, a professional hardwood floor replacement usually takes 3 to 7 days. This timeline includes a mandatory 3-7 day acclimation period for the new wood to adjust to your home’s environment before installation. The total time can vary based on the room’s size, the complexity of demolition (e.g., removing old, glued-down flooring), and the condition of the subfloor. If you choose unfinished hardwood, allow extra days for on-site sanding, staining, and finishing.
How many times can a hardwood floor be refinished before it needs replacement?
This depends on the type of flooring.
-
Solid hardwood can typically be refinished 4 to 6 times. It needs replacement when the wood is too thin to sand further, which is often indicated by exposed nail heads.
-
Engineered hardwood can usually be refinished 1 to 3 times. Its refinishing capacity depends entirely on the thickness of its top wood layer (the wear layer). Once this layer is sanded away, the floor cannot be refinished again and must be replaced.
When you can no longer refinish a floor, hardwood floor replacement is the best solution.
How do you match new hardwood to an existing floor for a partial replacement?
Matching new wood to an aged floor is one of the trickiest parts of the job. The goal is to make the repair invisible.
Our first choice is to use leftover planks from the original installation. If none are available, we can sometimes source planks from a hidden area, like a closet, use them for the visible repair, and install the new wood in the closet.
Next, we custom-mix stains to match the aged color of your existing floor. To blend the repair seamlessly, we use a technique called “weaving,” where new boards are staggered in with the old ones to avoid a hard patch line.
For a truly perfect result, sanding and refinishing the entire room is the ultimate solution. This ensures a completely uniform color and finish across both old and new boards. Our professional expertise and dust-free techniques make this process clean and efficient.
Conclusion
Deciding on hardwood floor replacement is a major investment in your home’s value and beauty. Understanding when to repair, refinish, or replace is key. By assessing damage and weighing your options, you can make the best choice for your home.
A proper hardwood floor replacement adds significant long-term value and timeless beauty. Whether you choose solid hardwood for its longevity or engineered hardwood for its versatility, you’re investing in a floor that can last for generations.
The installation process can be complex, which is why professional installation is often the smartest choice. From subfloor preparation to the final finish, every step is crucial for a lasting result.
At Buff & Coat, we have helped Richmond area homeowners with these decisions for over 20 years. We specialize in understanding wood, preparing subfloors correctly, and achieving seamless repairs. Our signature “buff and coat” process and advanced, dust-free techniques ensure your project is completed efficiently and with minimal disruption.
Serving Richmond VA, Glen Allen VA, Midlothian VA, and the surrounding areas, we are committed to delivering professional results you’ll love. Every project is backed by our dedication to quality craftsmanship.
Ready to give your home the beautiful, long-lasting hardwood floors it deserves? Schedule your professional floor installation today!