That One Eyesore Board Doesn’t Have to Ruin Your Beautiful Floor
Hardwood floor board replacement might seem overwhelming, but it’s a manageable DIY project that can save your entire floor’s appearance. Whether you’re dealing with water damage, deep scratches, or warping, replacing individual boards is often the perfect solution. The good news is you don’t need to replace your entire floor or live with the damage, and with the right guidance, you can restore your hardwood flooring to its seamless look.
Quick Answer for Hardwood Floor Board Replacement:
- Tools needed: Circular saw, chisel, pry bar, wood glue, rubber mallet
- Time required: 4-6 hours for one board
- Cost: $20-50 for materials vs. $500+ for professional service
- Difficulty: Beginner to intermediate (9/10 for middle-of-room boards)
- Best for: Single damaged boards, especially near room edges
As one expert puts it: “It’s frustrating to see a beautiful floor with that one eyesore of a board.” Thankfully, you don’t have to live with it.
Common reasons for single board replacement include:
- Water damage from leaks or spills
- Deep gouges from dropped objects
- Pet stains that have soaked into the wood
- Warping or cupping from moisture
- Cracks and splits from heavy impacts
The key is knowing when a board can be repaired versus when it needs full replacement. While professional floor restoration can handle extensive damage, single board replacement is a cost-effective DIY solution for isolated problems.
I’m David Emmerling of Buff & Coat. With over 20 years of experience in hardwood floor board replacement and restoration in the Richmond area, I’ve seen how replacing just one damaged board can transform an entire room.

Terms related to hardwood floor board replacement:
Why and When to Replace a Single Hardwood Board
Picture this: you’re admiring your beautiful hardwood floors when you spot it – that one damaged board. Before you panic about replacing the entire floor, know that hardwood floor board replacement for a single piece is often the perfect solution.
Understanding what causes damage—and when replacement is your best option—can save you time and money.
Water damage is a top cause. A leaky appliance or spill can make boards swell, warp, or stain. If water causes significant cupping (curled edges) or dark discoloration that sanding can’t fix, replacement is necessary. While light stains may be fixable, deep water damage requires a new board. Our guide on Hardwood Floor Water Damage covers this in detail.
Deep scratches and gouges from dropped objects are another common issue. Minor scratches can often be buffed out, but deep gouges that penetrate the finish and wood require replacement. If you can feel a noticeable depression, the board probably needs to go. For smaller issues, check our Hardwood Floor Scratch Repair guide first.
Warping or cupping in isolated boards often results from moisture. If just one or two boards are out of alignment, replacement can solve it. Widespread warping, however, might signal a larger subfloor issue needing professional attention.
Cracks and splits from heavy impacts can compromise a board’s integrity. While small hairline cracks can be filled, significant splits that affect stability call for replacement.
Pet stains are a stubborn challenge. When accidents soak deep into the wood, the stains and odors often resist cleaning. Even sanding may not eliminate the problem, making replacement the only way to truly restore your floor.
The key question is: can the damage be repaired, or is it too deep? If you see permanent discoloration or structural compromise, hardwood floor board replacement is your answer.
Deciding Between DIY and Professional Help
“Can I do this myself?” The answer depends on a few factors.
Damage location plays a huge role. Boards near room edges are much easier to replace than those in the middle of the floor.
Your skill level with power tools matters. If you’re comfortable with a circular saw and have patience for detail, you can likely handle this. If not, it might be time to call the pros.
Tool availability is another consideration. You’ll need a circular saw, chisel, and other tools. Rental costs can add up if you don’t own them.
Here’s how DIY compares to professional replacement:
| Factor | DIY Replacement | Professional Replacement |
|---|---|---|
| Cost | $20-50 per board in materials | $500-1,500 for typical repairs |
| Time | 4-6 hours per board | Usually completed same day |
| Complexity | Beginner to intermediate skill | Expert-level results |
| Quality | Good with careful work | Excellent, seamless finish |

Mistakes can be costly. As one flooring expert puts it, “The money you save doing it yourself gets eaten up quickly if you make an error and need professional help to fix your fix.”
For complex situations—like matching unique grain patterns, fixing subfloor issues, or replacing boards in high-traffic areas—professional help ensures the best results. If you’re in the Richmond area and want a seamless finish for extensive damage, our professional flooring contractors can provide an expert assessment and flawless work.
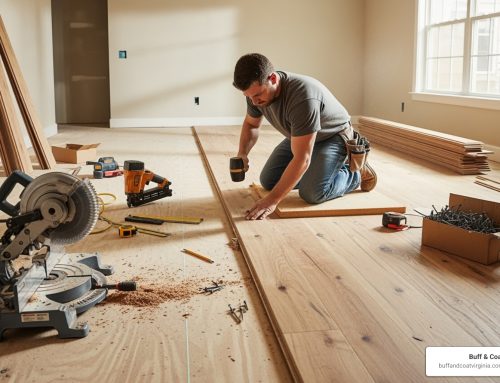
Gathering Your Tools and Materials
Getting halfway through a project and realizing you’re missing a tool is frustrating. Before starting your hardwood floor board replacement, let’s ensure you’re fully equipped for success.

Here is your checklist of essential tools and materials:
Essential Tools:
- Safety First: Safety glasses are non-negotiable to protect your eyes from flying debris.
- Measuring & Marking: Tape measure, pencil, and painter’s tape for precise cuts and protecting adjacent boards.
- Cutting Tools: A circular saw or track saw is your primary tool. A track saw is highly recommended for its straight cuts and dust containment. An oscillating multi-tool is invaluable for precise finishing cuts in tight spaces.
- Removal Tools: A sharp wood chisel, hammer, and pry bar will help you remove the damaged board. A shop vacuum is crucial for cleaning the subfloor.
- Installation Tools: A rubber mallet gently taps the new board into place without damage. A 23-gauge pin nailer is optional but recommended for discreetly securing the board.
Essential Materials:
- Replacement Plank: The star of the show. If you don’t have leftover boards, you may need to source one from a hidden area like a closet.
- Adhesives & Finishers: Use wood flooring glue for a strong bond. You may also need matching wood stain and polyurethane finish to blend the new board. Always test stains on scrap wood first.
- Miscellaneous: Wood filler for nail holes, scrap wood for protection during installation, and dust sheets to keep your workspace clean.
Having all these items ready will help your hardwood floor board replacement go smoothly from start to finish.
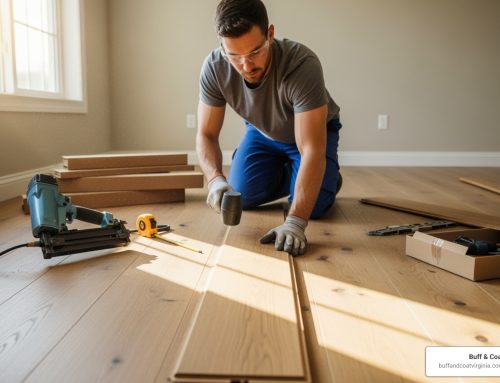
Your Step-by-Step Guide to Hardwood Floor Board Replacement
It’s time to transform that damaged eyesore into a seamless part of your floor. Precision and patience are key for a successful DIY hardwood floor board replacement.

Step 1: Removing the Damaged Board
This step is critical. You must remove the damaged board without harming its neighbors.
- Prepare Area: Clear furniture and apply painter’s tape to the edges of adjacent boards to protect them.
- Mark Board: Draw a rectangle on the damaged board, about ¾-inch inside its edges, to create a safe cutting margin.
- Set Saw Depth: Adjust your circular saw blade to be just slightly deeper than the flooring’s thickness to avoid cutting the subfloor.
- Drill Relief Holes: Drill a hole at each end of the section you plan to remove to prevent over-cutting.
- Make Relief Cuts: Use your circular saw to make two parallel cuts down the length of the board, about an inch apart. Use an oscillating multi-tool to finish the cuts at the ends where a circular saw can’t safely reach.
- Chisel and Pry: Use a chisel and hammer to split the center strip you just cut. Carefully pry out the pieces with a pry bar.
- Clean Out Edges: Chisel out the remaining tongue-and-groove edges of the old board. Remove any leftover splinters or nails.
- Clean Subfloor: Use a shop vacuum to thoroughly clean the exposed subfloor of all debris.
Step 2: Preparing the New Board for Installation
The new board needs modification to fit into the middle of a floor.
- Acclimate Board: Let the new plank acclimate to your home’s temperature and humidity for at least 48 hours to prevent future warping.
- Cut to Length: Measure the opening and cut the replacement board to the exact length with a square cut.
- Modify Groove: Carefully cut off the bottom lip of the groove on the new board. This allows it to drop straight down over the adjacent board’s tongue.
- Dry-Fit: Test-fit the new board. It should be snug but not forced. Make minor adjustments if needed.
Step 3: Installing the New Board

- Apply Glue: Apply a thin bead of wood flooring glue to the tongues of the existing boards and in a zig-zag pattern on the underside of the new board.
- Install Board: Insert the tongue side first, then press the modified groove side down over the adjacent tongue.
- Tap into Place: Use a rubber mallet and a scrap wood block to gently tap the board until it’s flush with the surrounding floor.
- Wipe Excess Glue: Immediately wipe away any squeezed-out glue with a damp cloth.
- Secure Board: Use a 23-gauge pin nailer to drive pins along the edges for extra stability. Alternatively, pre-drill and use finishing nails, sinking the heads with a nail set.
- Allow Drying Time: Let the glue cure for at least 12-20 hours before walking on the board.
Step 4: Matching the New Board: The Final Step in Hardwood Floor Board Replacement
Blending the new board’s finish with the existing floor is the final touch.
- Sand (if needed): If you used an unfinished board, lightly sand it, being careful not to scuff adjacent boards.
- Apply Stain: Match the new board’s color to your existing floor. Always test your stain on scrap wood of the same species first to find the perfect match.
- Apply Polyurethane: Apply at least two coats of polyurethane finish, matching the sheen (e.g., satin, semi-gloss) of your existing floor. Allow proper drying time between coats.
- Feather Edges: To help blend the repair, you can lightly scuff the edges of the surrounding boards and apply a thin, overlapping coat of finish to minimize the transition.
- Consider a Full Refinish: For a perfect match, especially on older floors, sanding and refinishing the entire room is the best option. Our “buff and coat” process creates a uniform appearance with advanced, dust-free techniques.
Potential Challenges and When to Call a Pro
While hardwood floor board replacement is a doable DIY project, it can have its challenges. Knowing what to expect can help you decide if it’s a job you want to tackle.
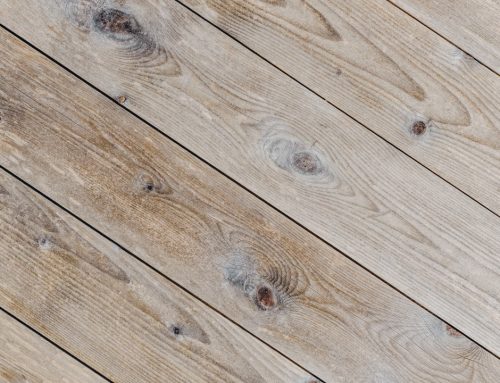
Matching Older Floors: This is often the biggest headache. Your existing floor has aged with a unique patina from sunlight and use. A new board will look different, and matching this color difference from wood aging and sun fading is a major challenge.
Sourcing Matching Boards: If your flooring is old or discontinued, finding an exact match can be difficult. Sometimes, the only option is to “borrow” a board from a closet or under furniture.
Stain and Finish Matching: Even with the right wood, getting the stain and finish to blend perfectly is an art form that requires experience.
Subfloor Surprises: You might remove the damaged board only to find moisture, rot, or other structural issues underneath. This turns a simple swap into a much larger repair.
Solid vs. Engineered Flooring: These materials require different approaches. Engineered floors have a thin top layer, limiting how much they can be sanded, and may have complex interlocking systems.
When should you call us?
If you’re facing extensive damage across multiple boards, it’s often more cost-effective to hire a professional. Any structural concerns like sagging or widespread buckling require an expert assessment immediately.
For high-traffic areas where a repair will be highly visible, professional installation ensures a seamless finish. Our dust-free techniques and specialized tools make the investment in professional flooring contractors worthwhile.
If you lack the right tools or feel overwhelmed, there’s no shame in calling for backup. A botched DIY repair can cost much more to fix than hiring a pro from the start. When hiring, look for contractors with National Wood Flooring Association (NWFA) certifications, which indicate a commitment to quality.
Restore Your Floor’s Beauty
Stepping back to admire your work is deeply satisfying. The eyesore board is gone, seamlessly blended into your floor as if the damage never happened.
Hardwood floor board replacement is an achievable project that can save your floor from a costly complete overhaul. By following these steps, you can tackle the problem at its source with some elbow grease and patience.
You now know how to safely remove a damaged board, prepare a new one for a perfect fit, and blend it with your existing floor’s character.
But sometimes, a project is bigger than you thought, or you simply want a flawless, professional finish. That’s where we come in.
At Buff & Coat, we’ve helped Richmond-area homeowners restore their floors for over two decades. Our signature buff and coat process doesn’t just fix boards—it transforms your entire floor with advanced, dust-free techniques that protect your home.
Whether you need help with a tricky replacement or are ready for a complete floor installation service, we’re here to help. We always provide a free, no-obligation estimate.
Ready to bring your floors back to life? Contact us today to schedule your free inspection and let’s discuss how we can restore your floor’s original beauty. Sometimes the best DIY decision is knowing when to call in the pros!