Why Restoring Scratched Wood Floors Matters for Your Home
Learning how to restore scratched wood floors is essential for maintaining the timeless elegance of your home. While daily life inevitably leaves its mark, from pet claws to furniture scuffs, the good news is that most damage doesn’t require expensive floor replacement. With the right approach, you can restore the original beauty of your hardwood flooring, as modern floors are surprisingly resilient. This guide will walk you through everything you need to know.
Quick Restoration Guide:
- Surface scratches – Use walnut oil, stain markers, or wood wax sticks.
- Minor scratches – Apply wood filler, sand smooth, then stain to match.
- Deep gouges – Requires sanding, wood filler, staining, and refinishing.
- Extensive damage – Consider professional buff and coat services for a complete restoration.
The key is understanding the type of damage you’re dealing with. A simple fingernail test can tell you whether you need a five-minute fix or a more involved repair. Surface-level damage often requires nothing more than household items, while deeper scratches are still manageable with proper techniques.
I’m David Emmerling, and with over 20 years of experience, my team at Buff & Coat has helped thousands of Richmond-area homeowners bring their floors back to life. We’ve seen every type of floor damage imaginable and have developed proven methods for restoration.

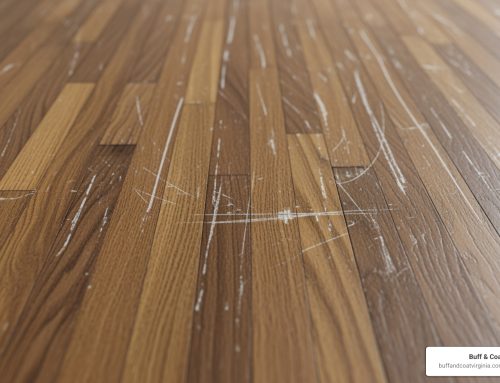
First, Assess the Damage: Identifying Your Floor’s Scratches

Before you can figure out how to restore scratched wood floors, you must assess the damage. Not all scratches are equal, and the wrong treatment can cause more harm. The fingernail test is a simple way to identify the scratch type:
- Superficial Scratch: If your fingernail glides smoothly over the mark, it’s a surface scuff affecting only the protective finish.
- Minor Scratch: If your nail catches slightly in a groove, the scratch has broken through the finish and touched the wood.
- Deep Scratch or Gouge: If your nail sinks into a distinct groove, the raw wood is exposed. This often comes from moving heavy furniture.
This test determines which repair method is best, from a quick fix to a more involved restoration.
Understanding Your Floor’s Finish
Your floor’s finish is crucial in determining the right repair method. Using the wrong product can make things worse.
- Polyurethane: The most common finish, it creates a durable top layer. Light buffing works for minor scratches, but never use wax products on polyurethane, as it complicates future repairs.
- Wax: Found in older homes, these finishes are forgiving. Scratches often buff out or can be fixed by applying more wax.
- Oil-Based: These finishes penetrate the wood. Scratches can often be fixed with a dab of matching oil, which blends seamlessly.
Before you begin, identify your finish to avoid costly mistakes. For more detailed guidance, see our guide on Hardwood Floor Scratch Repair.
Site-Finished vs. Prefinished Floors
This distinction affects how repairs will look.
- Site-finished floors are sanded and finished in your home, creating a seamless surface where repairs blend in easily.
- Prefinished floors are finished at the factory and have beveled edges between planks. Their incredibly hard factory finish can make spot repairs difficult to blend, sometimes leaving a noticeable patch.
Understanding your floor type helps set realistic expectations for your repair project. Learn more about these differences in our article on Finished Wood Floor.
Easy DIY Fixes for Superficial Scratches

For superficial damage, many effective DIY methods can show you how to restore scratched wood floors without spending a lot of money. Before starting, always clean the area with a wood-specific cleaner and a soft cloth, then let it dry completely.
You might need these materials:
- Soft cloths (microfiber is best)
- pH-neutral wood cleaner
- Walnuts, olive oil, or baking soda
- Wood stain markers
- Wax sticks or crayons
Natural and Household Remedies
For minor scratches, these household remedies can be surprisingly effective:
- The Walnut Trick: Rub a shelled walnut firmly along a light scratch. The natural oils and pigments help hide the mark. Buff with a soft cloth afterward.
- Coconut Oil: Apply a small amount to a microfiber cloth and massage it into very light scuffs to moisturize the wood and reduce the scratch’s appearance.
- Olive Oil & Vinegar: A 50/50 mix of olive oil and white vinegar can clean and reduce light blemishes. Apply with a cloth, let it sit, then buff clean.
- Baking Soda Paste: For stubborn surface scratches, a paste of baking soda and olive oil can help. Apply, let it sit for five minutes, then gently buff with a damp cloth.
These Green Cleaning tips are great for light damage.
Using Stain Markers and Wax Pencils
When the finish is nicked but the scratch isn’t deep, these tools are excellent:
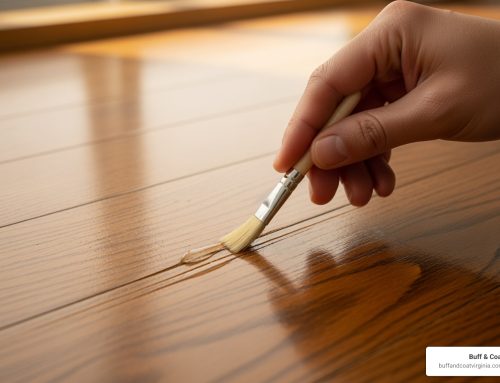
- Stain Markers: Perfect for coloring in minor scratches where the wood is exposed. Always test the color on an inconspicuous area first. Apply carefully along the grain and wipe away any excess immediately.
- Wood Fill Blending Pencils & Wax Sticks: These fill shallow indentations while adding color. Rub the Wood fill blending pencils or wax sticks into the scratch, then buff with a soft cloth to blend the repair. Wax may need to be reapplied periodically.
These products are easy to use and can make a big difference. Find more tips in our guide on how to Fix Scratched Wood Floors.
How to Restore Scratched Wood Floors with Deeper Damage

When scratches penetrate the wood, it’s time for a more serious restoration. Learning how to restore scratched wood floors with deeper damage is manageable with the right approach. Instead of just hiding the scratch, you’ll be filling the void to create a permanent repair.
How to restore scratched wood floors with Wood Filler
For gouges and deep scratches, wood filler is your best tool. It rebuilds the damaged area, making it strong again.
- Clean the Gouge: Use a vacuum to remove loose debris, then wipe with a damp cloth and let it dry completely.
- Apply Wood Filler: Using a plastic putty knife, press a color-matched filler firmly into the gouge. Overfill it slightly, as most fillers shrink as they dry.
- Sand Smooth: Once the filler is completely dry, sand the area with fine-grit (220-grit) sandpaper, always working with the grain, until it’s flush with the floor.
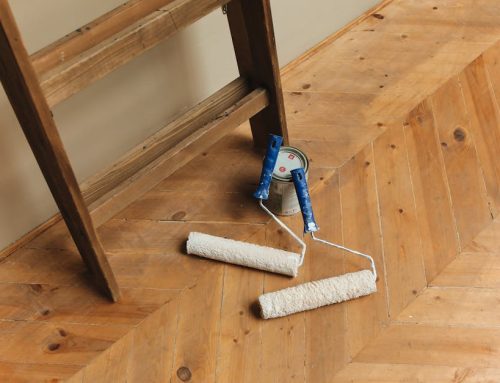
- Stain and Seal: Clean away dust with a tack cloth. Apply a matching stain to the repair, wiping away excess. Finally, seal the area with a thin coat of a matching finish like polyurethane, feathering the edges to blend it in.
For extensive damage affecting multiple boards, you might need board replacement. If you’re in the Richmond area, our team specializes in wood floor repair throughout Richmond, VA.
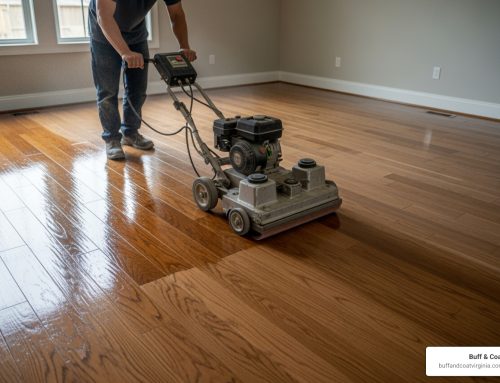
The Role of Buffing for Surface Restoration
If your floors have numerous scuffs and a generally dull appearance, buffing can be a great solution. Unlike full sanding, which removes a layer of wood, buffing (or screening) is a gentler process that smooths out surface imperfections in the finish.
Buffing is excellent for removing widespread, surface-level damage and restoring your floor’s shine. It also improves durability by preparing the surface for a fresh, protective coat of finish.
Our signature Buff and Coat process perfects this with dust-free technology, restoring your floors with minimal disruption. It’s the ideal middle ground between living with damage and the cost of a full refinishing. Learn more about buffing a hardwood floor to see if it’s right for you.
Professional Help vs. DIY: Making the Right Choice

While many DIY methods for how to restore scratched wood floors work well, some situations require professional help. Knowing when to call an expert can save you from costly mistakes.
DIY has its limits, especially with deep scratches, widespread damage, or when you’re unsure of your floor’s finish. Red flags like water damage, warping, or cupping indicate it’s time to call a pro. If a repair seems overwhelming, it’s smart to seek help from experienced Hardwood Floor Repair Contractors.
Cost Considerations for Restoring Scratched Wood Floors
Budget is a major factor. While DIY materials are cheap, professional services offer value through expertise and efficiency. Repair is almost always more cost-effective than full replacement.
| Cost Aspect | DIY Repair (Estimated) | Professional Services (Estimated) |
|---|---|---|
| Materials (e.g., markers, fillers, oils) | $10 – $50 | Included in service cost |
| Tools (e.g., sander, buffing machine) | $20 – $100 (for basic tools) | Included in service cost (specialized equipment) |
| Minor Repairs (spot fixes) | $10 – $50 | $100 – $300 |
| Extensive Damage (e.g., large area, deep gouges) | $50 – $200 (for materials) | $500+ (for extensive repairs) |
| Full Refinishing (per sq. ft.) | Not typically DIY; requires pro tools | $2 – $5 per square foot |
| Total Refinishing (larger spaces) | N/A | $1,000 – $3,000+ |
| Professional Assessment Fee | N/A | $50 – $100 (often waived with service) |
| Professional Hourly Rate | N/A | $75 – $150 per hour |
For detailed cost breakdowns, HomeAdvisor’s hardwood floor repair cost data offers excellent insights.
The Benefits of Professional Refinishing
When DIY isn’t enough, professional refinishing offers a complete solution. The difference is night and day.
- Advanced Techniques: Professionals use dust-free equipment that you can’t replicate with rentals, preventing a mess that infiltrates your entire home.
- Expert Color Matching: Achieving a seamless finish, especially on stained floors, requires years of experience and professional-grade products.
- Superior Equipment: High-grade buffers and tools ensure a smooth, even finish that rental equipment can’t match, saving you time and delivering better results.
- Guaranteed Results: With a professional, you get peace of mind knowing the job is done right, preserving your floor’s longevity.
Prevention is the Best Medicine: Keeping Your Floors Scratch-Free

While knowing how to restore scratched wood floors is useful, preventing damage is the best strategy. A little proactive care can save you money and headaches. Most damage happens gradually from daily activities, but these simple steps can protect your investment.
- Use Furniture Pads: Apply felt pads to the legs of chairs, tables, and any other furniture. Check them every few months and replace them when worn.
- Place Rugs and Mats: Use area rugs in high-traffic zones like hallways and living areas. Place doormats at every entrance to trap dirt and grit that can act like sandpaper.
- Clean Regularly: Sweep or vacuum daily with a soft-bristled broom or a hardwood-safe vacuum to remove abrasive particles that dull your floor’s finish.
- Trim Pet Nails: Keep your pet’s nails trimmed to prevent scratches. Place mats under food and water bowls to stop them from sliding.
- Implement a No-Shoes Policy: High heels are especially damaging, as they concentrate weight and can dent the wood. If a no-shoes rule isn’t practical, provide house slippers for guests.
- Control Humidity: Maintain indoor humidity between 30% and 50% to prevent wood from expanding and contracting, which makes it more susceptible to damage.
- Lift, Don’t Drag: Always lift furniture when moving it. Sliding heavy items can cause deep gouges that are difficult to repair.
These measures preserve your investment and maintain your home’s beauty. For more tips, see our guide on High-Traffic Floor Protection.
Frequently Asked Questions about Restoring Wood Floors
After two decades of helping homeowners with how to restore scratched wood floors, I’ve answered thousands of questions. Here are the most common ones.
How does the type of wood finish affect scratch repair?
The finish type dictates the repair method.
- Polyurethane sits on top of the wood. Minor scratches in this protective layer often respond well to buffing. Never use wax on polyurethane.
- Oil finishes soak into the wood. Scratches are fixed by re-oiling the area, which blends seamlessly.
- Wax finishes are softer and more forgiving. Scratches can often be buffed out or fixed with a fresh application of wax.
Always identify your finish before starting a repair to avoid making the problem worse.
Can you just refinish one part of a hardwood floor?
Technically yes, but it’s rarely a good idea. It is extremely difficult to match the color and sheen of the surrounding floor, which has aged with sun and foot traffic. The repaired patch will likely stand out and age differently. For a seamless, uniform look, refinishing the entire room is almost always the best choice.
How to restore scratched wood floors on prefinished boards?
Prefinished floors are durable but tricky to repair due to their hard, factory-applied finish.
- For minor scratches, use color-matched stain markers or wax putty sticks to conceal the damage.
- For deeper gouges, spot sanding is often ineffective and can create an uneven patch. In these cases, replacing the entire damaged board is usually the best solution. This is precise work, and calling a local hardwood floor company is recommended to ensure it’s done correctly.
Restore Your Floors to Their Former Glory
You now have a roadmap for how to restore scratched wood floors, from minor scuffs to deep gouges. Many repairs, like using a walnut for surface scratches or wood filler for minor ones, are simple DIY fixes. Even deep gouges can often be repaired without replacing boards.
However, prevention is always the best strategy. Using furniture pads, cleaning regularly, and controlling humidity will protect your investment for years to come.
When DIY isn’t enough or the damage is extensive, professional help is the best choice. For homeowners in the Richmond area, our signature dust-free buff and coat process can bring tired, scratched floors back to life without the mess of traditional sanding.
Your hardwood floors are a stunning feature of your home. Don’t let scratches diminish their beauty. Whether you choose a DIY repair or call in the pros, taking action is the most important step.
Ready to see your floors shine again? Contact us to get your free estimate and schedule a free inspection today.