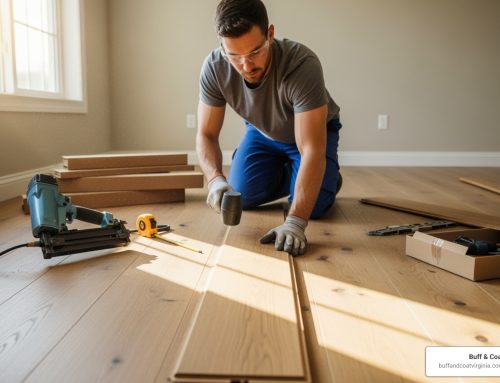
When Your Beautiful Hardwood Floor Has That One Problem Board
Learning how to replace a hardwood floor board is a valuable skill for any homeowner. Whether you’re facing water damage, deep scratches, or gouges, replacing a single board can restore your floor’s beauty without the cost of a full replacement. At Buff & Coat, we believe in empowering homeowners with the knowledge for proper hardwood floor care. This repair is more manageable than you might think and can often be done in a single day.
Quick Answer: How to Replace a Hardwood Floor Board
- Prepare: Gather tools and find a matching replacement board.
- Remove: Make relief cuts and carefully pry out the damaged board.
- Install: Modify the new board, apply adhesive, and tap it into place.
- Finish: Sand, stain, and seal the board to match the existing floor.
For extensive damage or when you want guaranteed professional results, our professional floor installation services can ensure a flawless repair.
I’m David Emmerling, owner of Buff & Coat Hardwood Floor Refinishing. For over 20 years, I’ve helped Richmond-area homeowners restore their floors. While our specialty is dustless refinishing, understanding how to replace a hardwood floor board is essential knowledge I share with clients. This guide will walk you through each step to get your floor looking whole again.
, Remove (making relief cuts and prying out damaged board), Install (modifying new board and securing with adhesive), and Finish (sanding, staining and sealing to match existing floor) - how to replace a hardwood floor board infographic")
Relevant articles related to how to replace a hardwood floor board:
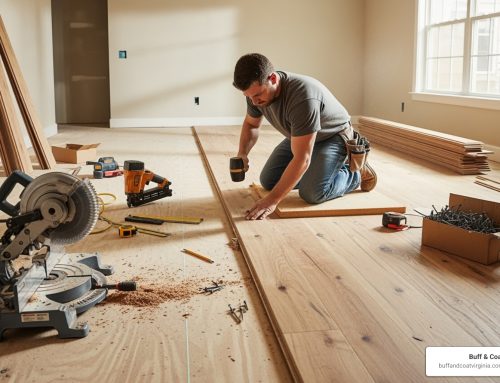
Preparing for the Replacement: Tools, Materials, and Safety
Before you learn how to replace a hardwood floor board, proper preparation is key. Having all your tools and materials ready makes the process flow smoothly.
Most homeowners already have many of the necessary tools. A circular saw and oscillating multi-tool are essential for precise cuts. You’ll also need a chisel, pry bar, and wood glue. Don’t forget safety glasses and gloves.
For measuring, grab a tape measure and pencil. A shop vacuum is vital for cleanup, and painter’s tape protects surrounding boards. If you plan to face-nail the new board, you’ll need a nail gun or finishing nails with a nail set.
Your primary material is the replacement board, but you’ll also need hardwood flooring adhesive and possibly wood stain and polyurethane to match the finish. Having scrap wood for tapping blocks is also helpful.
For more detailed guidance, check out Hardwood Floor Damage Repair for additional tips.
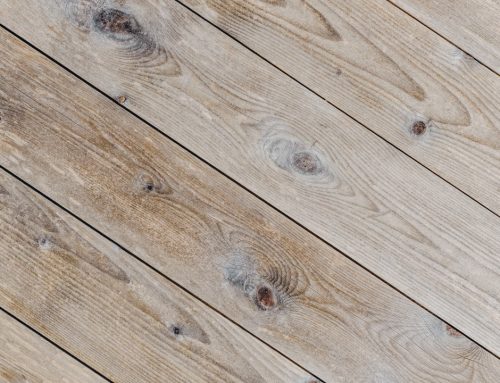
How to Choose the Right Replacement Board
An invisible repair starts with the perfect replacement board.
- Wood Species: Match the species first (e.g., oak, maple, cherry). If unsure, take a sample to a lumber yard for identification.
- Grade: Hardwood grades vary based on knots and imperfections. Match the grade for consistency.
- Width and Thickness: These must be exact. Most hardwood is 3/4-inch thick, but widths vary. Even a small difference will cause problems.
- Finish: Prefinished boards are convenient but harder to match with aged floors. Unfinished boards offer full control over the final look.
- Sourcing: Leftover planks from the original installation are ideal. If you don’t have any, consider pilfering from a closet or under furniture. You can use the original board for the visible repair and a close match for the hidden spot.
Key Safety Precautions to Take
Working with power tools requires attention.
- Circular Saw: Set the blade depth to just 1/16-inch deeper than your flooring to avoid cutting the subfloor.
- Protect Adjacent Boards: Use painter’s tape to prevent accidental scratches during removal.
- Ventilation: Open windows and use fans when working with adhesives and finishes to dissipate fumes.
- Personal Protection: Always wear safety glasses and gloves.
- Read Manuals: Before starting, review your tool manuals for specific safety features. A Makita track saw for precision can make this job safer and easier.
How to Replace a Hardwood Floor Board: The Removal Process
Now it’s time to remove the damaged board. The key is to work methodically to extract the board without damaging its neighbors or the subfloor. The tongue-and-groove system makes this tricky, but the right approach simplifies the process.

Step 1: Mark and Protect the Area
First, create clear boundaries. Clean the damaged board and the surrounding area. Apply painter’s tape along the edges of the adjacent undamaged boards to protect them from scratches. Use a straightedge and pencil to mark the exact boundaries of the board or section you are removing.
Step 2: Make the Relief Cuts
Relief cuts weaken the board for easier removal. Fasteners are typically driven through the tongue side, so you’ll need to sever them.
Set your circular saw depth to 1/16-inch deeper than the flooring thickness to protect the subfloor. Make your first cut along the tongue side, about 1/4 to 3/8 inch from the edge, to cut through the hidden fasteners.
Make a parallel cut along the groove side. Then, make two parallel cuts down the center to create a removable strip. Use an oscillating multi-tool to finish the cuts in the corners where the circular saw can’t reach. A Makita track saw for precision can provide straighter cuts and better dust containment.
Step 3: Pry Out the Damaged Board
With the cuts complete, begin extraction. Start with the center strip. Insert your chisel into a cut and tap it with a hammer to loosen the piece. Use a pry bar to carefully lift and remove the central section.
The remaining tongue and groove portions should now come out more easily. Use your chisel and pry bar to work them loose, being careful not to damage the adjacent boards.
After removing all pieces, inspect the subfloor. Remove any leftover nails, staples, or adhesive. A clean subfloor is essential for a flat, professional repair.
Installing the New Board for a Seamless Fit
With the old board gone, it’s time to install the new one. This phase is all about precision fitting to make the replacement an indistinguishable part of your floor.

Step 4: How to Prepare the Subfloor and the New Board
A clean foundation and a properly modified board are critical. Use a scraper to remove any old glue or debris from the exposed subfloor, then thoroughly vacuum the opening to ensure it’s completely clean.
Next, modify the new board. Since you’re dropping it into an existing space, you must adjust it for the tongue-and-groove system. Turn the board upside down and carefully cut off the bottom lip of the grooved edge with a utility knife or sharp chisel. This allows the board to drop flat over the tongue of the adjacent board. For easier installation, you can also trim the tongue of the new board at a slight angle.
Step 5: How to Cut and Fit the New Hardwood Floor Board
Accuracy is key to avoiding gaps. Precisely measure the length of the opening in a few spots, as floors can settle unevenly. Use a miter saw for the cleanest, most accurate cuts.
Before using adhesive, always perform a dry-fit test. Carefully slide the new board into the opening. It should fit snugly without excessive force. Check that it sits flush with the surrounding boards. If it’s too high, shave a tiny amount off the modified edge. If it’s too low, use thin strips of kraft paper as shims. It’s much easier to fix fit issues now than after applying glue. For more details, see these Details on Hardwood Floor Replacement.
Step 6: Secure the New Board in Place
Now, make the repair permanent. Apply hardwood flooring adhesive in a zig-zag pattern across the subfloor. Also, apply a thin bead of glue along the exposed tongue of the adjacent board and the modified edge of your new board.
Carefully lower the new board into place, angling it to engage the tongue into the existing groove, then press it down. Place a scrap wood block over the board and gently tap it with a rubber mallet or hammer until it’s fully seated and flush.
Immediately wipe away any excess glue that squeezes out with a damp cloth. To ensure a strong bond, place heavy objects on the board overnight. Allow at least 12-20 hours for the glue to set.
For extra security, consider face-nailing the board. Pre-drill small pilot holes and drive 6d finishing nails, using a nail set to sink the heads below the surface. A 23-gauge pin nailer is an excellent tool for this, creating a virtually invisible hold.
Finishing Touches and Common Mistakes to Avoid
This is where your repair transforms from obvious to invisible. The finishing touches separate a decent DIY job from a professional-looking result.

Step 7: Finishing the New Board to Match
The goal is to make the new board look like it’s always been there.
Lightly sand the new board with 220-grit sandpaper, following the grain. Be careful not to sand the finish on adjacent boards. Staining is the make-or-break moment. Always test your stain on a scrap piece first to find the perfect match. You might need to mix shades. Consider pre-staining the board before installation for a cleaner process.
Once the stain is dry, apply two coats of polyurethane that matches your floor’s sheen (matte, satin, or glossy). Lightly sand between coats for the smoothest finish.
For more tips, see our guide on Tips to Fix Scratched Wood Floors.
Common Mistakes to Avoid
Learning from common pitfalls can save you headaches.
- Poor Color Matching: This is the biggest giveaway of a repair. Take your time testing stains.
- Damaging Adjacent Boards: Work slowly and use painter’s tape to protect the surrounding floor.
- Cutting the Subfloor: Double-check your saw blade depth to avoid this.
- Skipping the Dry-Fit: A test fit reveals problems when they are still easy to fix.
- Using Too Much Adhesive: This creates a mess and can interfere with the finish.
- Rushing the Process: Good hardwood repair takes time. Don’t cut corners on drying times.
Successfully learning how to replace a hardwood floor board is about patience and attention to detail as much as it is about tools.
Frequently Asked Questions about Board Replacement
Here are answers to the most common questions I hear from Richmond homeowners about how to replace a hardwood floor board.
Can I replace a board in the middle of the floor?
Yes. The process is the same whether the board is against a wall or in the middle of a room. A middle-of-the-floor repair requires more precision with your cuts to avoid damaging surrounding boards. If it’s your first time, you might want to start with a board near a wall. For highly visible central areas, professional help can ensure a seamless result.
Do I need to sand the entire floor after replacing one board?
It depends. For a perfectly uniform finish, especially on an older, faded floor, sanding and refinishing the entire room is the best approach. However, if your floor is newer or the damage is in a less prominent area, you can often get excellent results by just finishing the new board to match. Careful stain and sheen matching can make the repair nearly invisible.
What if I can’t find an exact match for my flooring?
This is a common challenge, especially with older floors. Here are a few strategies:
- The “Closet Trick”: Find a matching board inside a closet or pantry. Use that board for your visible repair and replace the hidden board with a close-but-not-perfect match.
- Consult Experts: Take a sample of your flooring to a specialized hardwood supplier. They have extensive inventories and can often find a match or offer custom milling. This is a frequent need for historic homes in areas like Richmond.
- Accept “Close Enough”: If a perfect match is impossible, a close option will often blend in over time with foot traffic and sunlight exposure. What looks slightly off today might be unnoticeable in a few months.
Restore Your Floor’s Flawless Look
Stepping back to see a seamless repair where a damaged board once was is deeply satisfying. Learning how to replace a hardwood floor board is an achievable DIY project that restores your floor’s beauty and can save you money.
By following these steps, you can turn an eyesore into an invisible part of your floor. The sense of accomplishment from a successful repair is genuinely rewarding.
When to call in the professionals is an important consideration. For extensive water damage, rare wood species, or the guarantee of a completely invisible repair, professional expertise is invaluable.
Our team at Buff & Coat brings over 20 years of experience to every hardwood flooring challenge. Whether it’s a single board replacement or a complete professional floor installation, we have the tools and knowledge to handle it. Our dustless refinishing process can also blend repairs seamlessly with your existing floor.
Ready to get started? We offer free, no-obligation estimates to help you achieve that flawless look. Contact us today to schedule your free inspection, and let’s bring your hardwood floors back to their stunning best!