For many Richmond homeowners, floors with minor scuffs or a finish that's lost its shine don't need a massive, invasive sanding job. The perfect middle ground is knowing how to screen hardwood floors. This process, which we at Buff & Coat call a 'buff and coat,' is a professional method of lightly abrading the surface to refresh the protective top layer, bringing back your floor's luster without the time, expense, or dust of a full refinish.
What Is Floor Screening, Really?
Think of screening as a professional-grade exfoliation for your floors. It's a maintenance procedure, not a deep restoration. Instead of stripping away wood, we use a professional floor buffer fitted with a specialized abrasive screen. This screen gently scuffs up the existing polyurethane finish, creating the perfect surface for a new coat of finish to grab onto and form a strong chemical bond. The result? A durable, beautiful new protective layer.
For folks in Chesterfield and Glen Allen, this has become the smartest way to revive floors that are still in great shape structurally but just look a little tired. It’s a fast, efficient fix for everyday wear and tear before it turns into a much bigger headache.
Screening vs. Full Sanding: Which Is Right for Your Floors?
The biggest difference comes down to what's being removed. Screening only touches that top layer of finish. A full sanding, on the other hand, is a much more aggressive process that grinds away the entire finish and even a sliver of the wood itself. That's why sanding is the right call for floors with deep gouges, ugly water stains, or those grayed-out high-traffic paths where the finish has been completely worn away.
So, when is a screen and recoat the perfect solution?
- When your finish is dull: It brings back that original sheen and clarity you loved.
- For minor surface scuffs: Light scratches that are just in the finish will vanish.
- To extend the life of your floors: Think of it as preventative care that protects the actual wood from damage.
To make it even clearer, here’s a quick breakdown to help you decide what your floors really need.
Screening vs. Full Sanding: Quick Comparison
This table should help you quickly figure out whether a simple screen and recoat is enough or if you need to go all-in with a full sand and refinish.
| Factor | Screen & Recoat (Buff & Coat) | Full Sanding & Refinishing |
|---|---|---|
| Goal | Refresh a dull finish, remove light scuffs, and add a new protective coat. | Remove deep scratches, stains, and old finish; change stain color. |
| Process | Lightly abrades the existing topcoat of finish with a buffer and screen. | Sands away the entire finish and a thin layer of wood down to the bare grain. |
| Best For | Floors with surface-level wear, minor scratches, and a hazy or dull appearance. | Floors with deep gouges, water damage, graying, or significant wear-through. |
| Time | Typically completed in 1 day. | Usually takes 3-5 days due to sanding, staining, and multiple finish coats. |
| Cost | Significantly more affordable. | More expensive due to intensive labor, equipment, and materials. |
| Dust & Mess | Minimal, especially with modern dustless systems. | Very dusty, though professional dustless sanding systems contain it. More disruptive to the home. |
| Color Change? | No. You are refreshing the existing finish. | Yes. You can choose a completely new stain color. |
Ultimately, a screen and recoat is your best friend for maintenance. If you're looking to fix serious damage or completely change the look of your floors, then a full sanding is the only way to go.
Why This Matters for Your Home
Taking care of your floors with a regular screening is a savvy investment that pays off in more ways than one. The global hardwood flooring market hit USD 51.38 billion in 2024 and is still climbing, which tells you just how valuable these floors are as a home asset.
A professional screen and recoat every 3-5 years can head off up to 70% of common wear issues, saving you a ton of money on a much costlier full refinish later on.
At Buff & Coat, our dustless screening process brings back that like-new shine in just a single day. Better yet, well-maintained floors can boost your home’s value by an estimated 2-5%. You can discover more insights about the growing hardwood market and its value.
Is Screening the Right Move for Your Hardwood Floors?
Before you even think about renting a buffer, it's crucial to figure out if your floors are actually a good candidate for a screen and recoat. Making the wrong call here is a recipe for disappointment. You could waste a lot of time and money on a process that was never going to give you the results you wanted.
Screening is a fantastic, cost-effective solution for floors with the right kind of wear, but it's not a miracle cure. It all comes down to one key question: is the damage just on the surface finish, or has it penetrated down to the bare wood?
Signs Your Floor Is a Perfect Candidate
If you look at your floors and see the following, you're likely in a great position for a screen and recoat:
- A Dull or Hazy Finish: The floor just doesn't shine like it used to. It might look clean, but it lacks that depth and clarity, almost like there’s a cloudy film over it.
- Minor Surface Scratches: We’re talking about those light scuffs that are only in the polyurethane topcoat. A good rule of thumb is if you run your fingernail over the scratch and can't feel an indent, screening can probably take care of it.
- Scuffs from Furniture: The marks left behind from sliding a chair or an ottoman are usually just blemishes on the finish itself. These are prime candidates to be buffed away.
Think of it this way: screening is for floors that are structurally sound but cosmetically tired. The finish is worn, but the wood beneath is still sealed and protected.
Deal-Breakers That Require a Full Sanding
On the other hand, some types of damage are immediate red flags. They tell you that your floor needs a more intensive hardwood floor refinishing service. A simple screen and recoat won't fix these issues; in fact, putting a fresh, glossy coat of finish over them will only make the problems stand out more.
Be on the lookout for these deal-breakers:
- Deep Gouges and Dents: This is any damage where you can clearly see the raw wood underneath.
- Gray or Black Stains: This is the classic sign of water damage. Once water gets through the finish, it reacts with the wood's tannins and causes a dark stain that only sanding can remove.
- Widespread Bare Wood: In high-traffic zones like hallways or in front of the kitchen sink, you might see patches where the finish is completely gone. The raw wood is exposed and often looks gray and weathered.
- Previous Use of Waxy or Oily Soaps: If the floor has been cleaned for years with products like Murphy’s Oil Soap, Mop & Glo, or Orange Glo, you're in for trouble. These products leave behind residues that will cause a new coat of polyurethane to peel and bubble—a disaster known as "finish rejection."
This decision tree gives you a quick visual on whether you're looking at a light screening or a full sanding job.
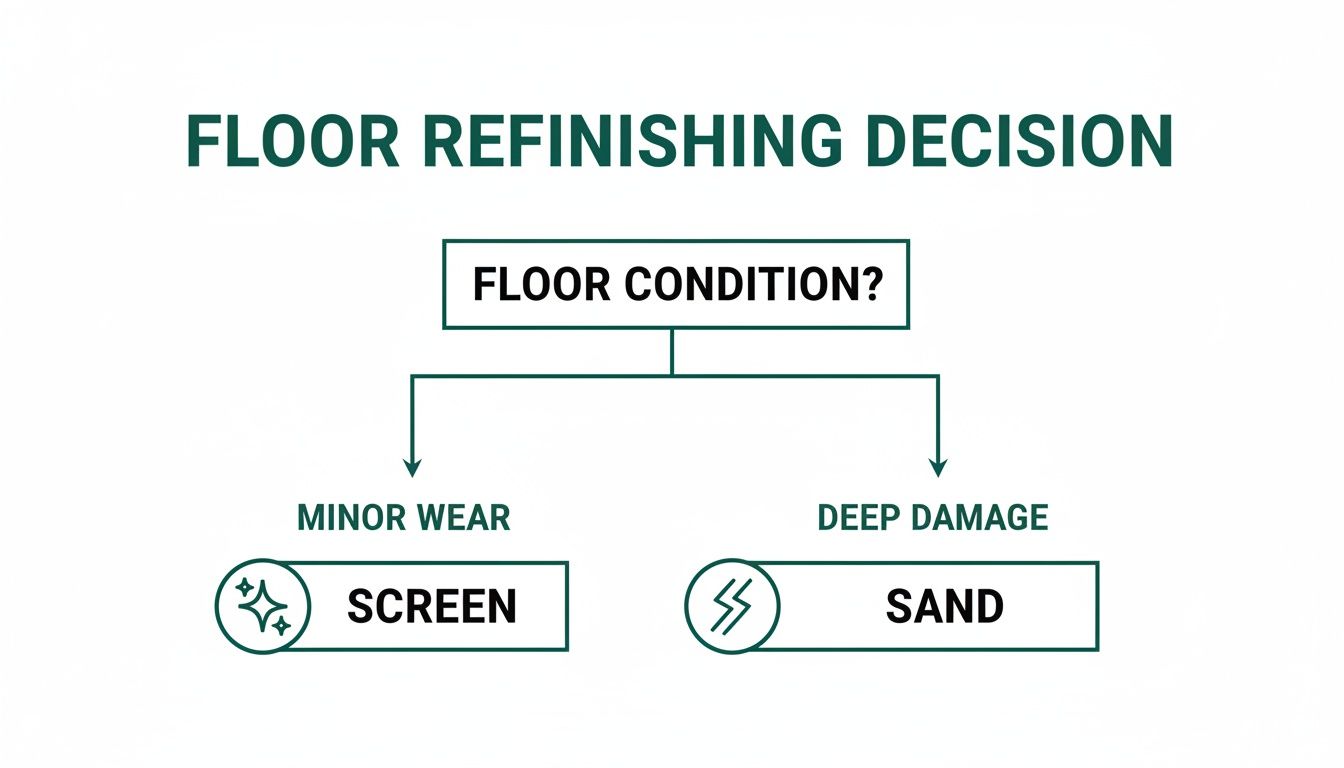
As you can see, it really boils down to how deep the damage goes.
The Decisive Water Drop Test
Still on the fence? There’s a simple, tried-and-true test you can perform right now. Find a worn-looking area of your floor and place a single drop of water on it.
Watch that drop of water closely. If it beads up and just sits there on the surface for a few minutes, your finish is probably still intact. Screening is a solid option. But if the water soaks in quickly and darkens the wood, it means the protective seal is gone. The floor will need to be completely sanded and refinished.
If your floors are showing any of the major deal-breakers, don't try to cut corners. It's time for a professional assessment.
Essential Tools and Materials for Screening Floors
Getting a screen-and-coat project right really boils down to having the right gear. If you try to cut corners on the tools, you're setting yourself up for an uneven finish, a house full of dust, and a final look that just doesn't meet expectations. Whether you're a dedicated DIYer or a Richmond-area homeowner who wants to know what kind of professional equipment we bring to a job, this list covers the must-haves.

The star of the show is the floor buffer, which you might also hear called a floor polisher. This isn't a lightweight machine; it's the heavy-duty workhorse that spins an abrasive screen to gently scuff up the old polyurethane. That weight and power are crucial for creating a uniformly abraded surface that the new finish can grab onto.
Choosing the Right Abrasives
The screening discs that attach to the buffer are far from one-size-fits-all. They come in different grits, just like sandpaper, and the one you pick depends entirely on the current condition of your floor's finish.
- 120-Grit Screen: This is our go-to for most floors with average, everyday wear. It’s got enough bite to scuff up a durable finish without being so aggressive that it leaves behind noticeable swirl marks.
- 150-Grit Screen: If your floors are just a little dull but otherwise in pretty good shape, a 150-grit screen usually does the trick. It offers a much lighter touch for a more delicate scuffing.
- 180-Grit or Higher: We reserve these finer grits for a final, super-light pass to knock down any grain raise or for screening between coats of new finish to get that perfectly smooth feel.
At Buff & Coat, we don’t guess. We carefully inspect your floors to select the perfect grit. Using a screen that's too coarse is a classic mistake that creates swirl marks, while a screen that's too fine won't rough up the surface enough for the new finish to bond properly. Nailing this detail is a non-negotiable part of a professional wood floor recoating job.
Dust Containment and Cleanup
Let's be honest, the biggest headache for homeowners in Midlothian and Henrico is dust. A DIY screening job can kick up a shocking amount of fine dust that gets into everything. This is where professional-grade equipment truly shines.
A DIYer might grab a shop vac and hope for the best. We, on the other hand, hook a powerful, HEPA-filtered vacuum system directly to our buffer. This is the heart of our dustless sanding promise. It captures the dust right at the source, stopping it from ever going airborne and keeping your home environment clean and healthy.
Once the screening is done, the floor has to be surgically clean. We follow up with high-powered vacuums, then go over the entire surface with microfiber mops and special tack cloths to snatch up any lingering microscopic dust. Even a tiny bit of leftover grit can ruin the final coat, leaving it feeling rough and uneven.
Finish and Application Tools
With the floor perfectly abraded and spotlessly clean, it's time for the new topcoat. The quality of the polyurethane and the application tools are just as critical as the screening itself.
We work exclusively with professional-grade, water-based finishes. They're low in VOCs (Volatile Organic Compounds), which means they have very little odor and dry significantly faster than old-school oil-based poly. This lets you get back to living on your floors much sooner.
To apply it, we use a T-bar applicator or a lambswool applicator. These tools are designed to lay down a beautifully thin, even coat without leaving behind streaks, lines, or bubbles. A common DIY mistake is using a paint roller, which almost always results in a blotchy, amateur-looking finish. This professional process ensures the smooth, durable finish that Richmond homeowners deserve.
Our Professional Floor Screening Process
When you understand the fundamentals of how to screen hardwood floors, the whole project seems much less intimidating. At Buff & Coat, we’ve spent over 15 years turning our method into a science—it’s clean, fast, and delivers every time.
This isn’t just about making floors look pretty. It's a proven system that guarantees a durable, beautiful finish. Let's pull back the curtain and show you how our pros handle a professional wood floor recoating job from start to finish.
Meticulous Preparation: The Foundation of a Flawless Finish
The success of a screen and recoat is decided long before the buffer ever gets turned on. Seriously, the prep work is everything. First thing's first: we carefully move all furniture and rugs out of the room to create a wide-open workspace.
Next up is protecting your home. We meticulously apply painter's tape along every baseboard and piece of trim to prevent any scuffs from our equipment. We also seal off doorways with plastic sheeting. Even with our dustless systems, this ensures the rest of your home stays completely pristine.
The final—and most critical—prep step is a deep, thorough cleaning. We bring in professional-grade vacuums to get every last bit of dust, pet hair, and debris. After that, we use a specialized cleaning solution to lift any unseen oils or grime that could prevent the new finish from bonding. A perfectly clean surface is simply non-negotiable.
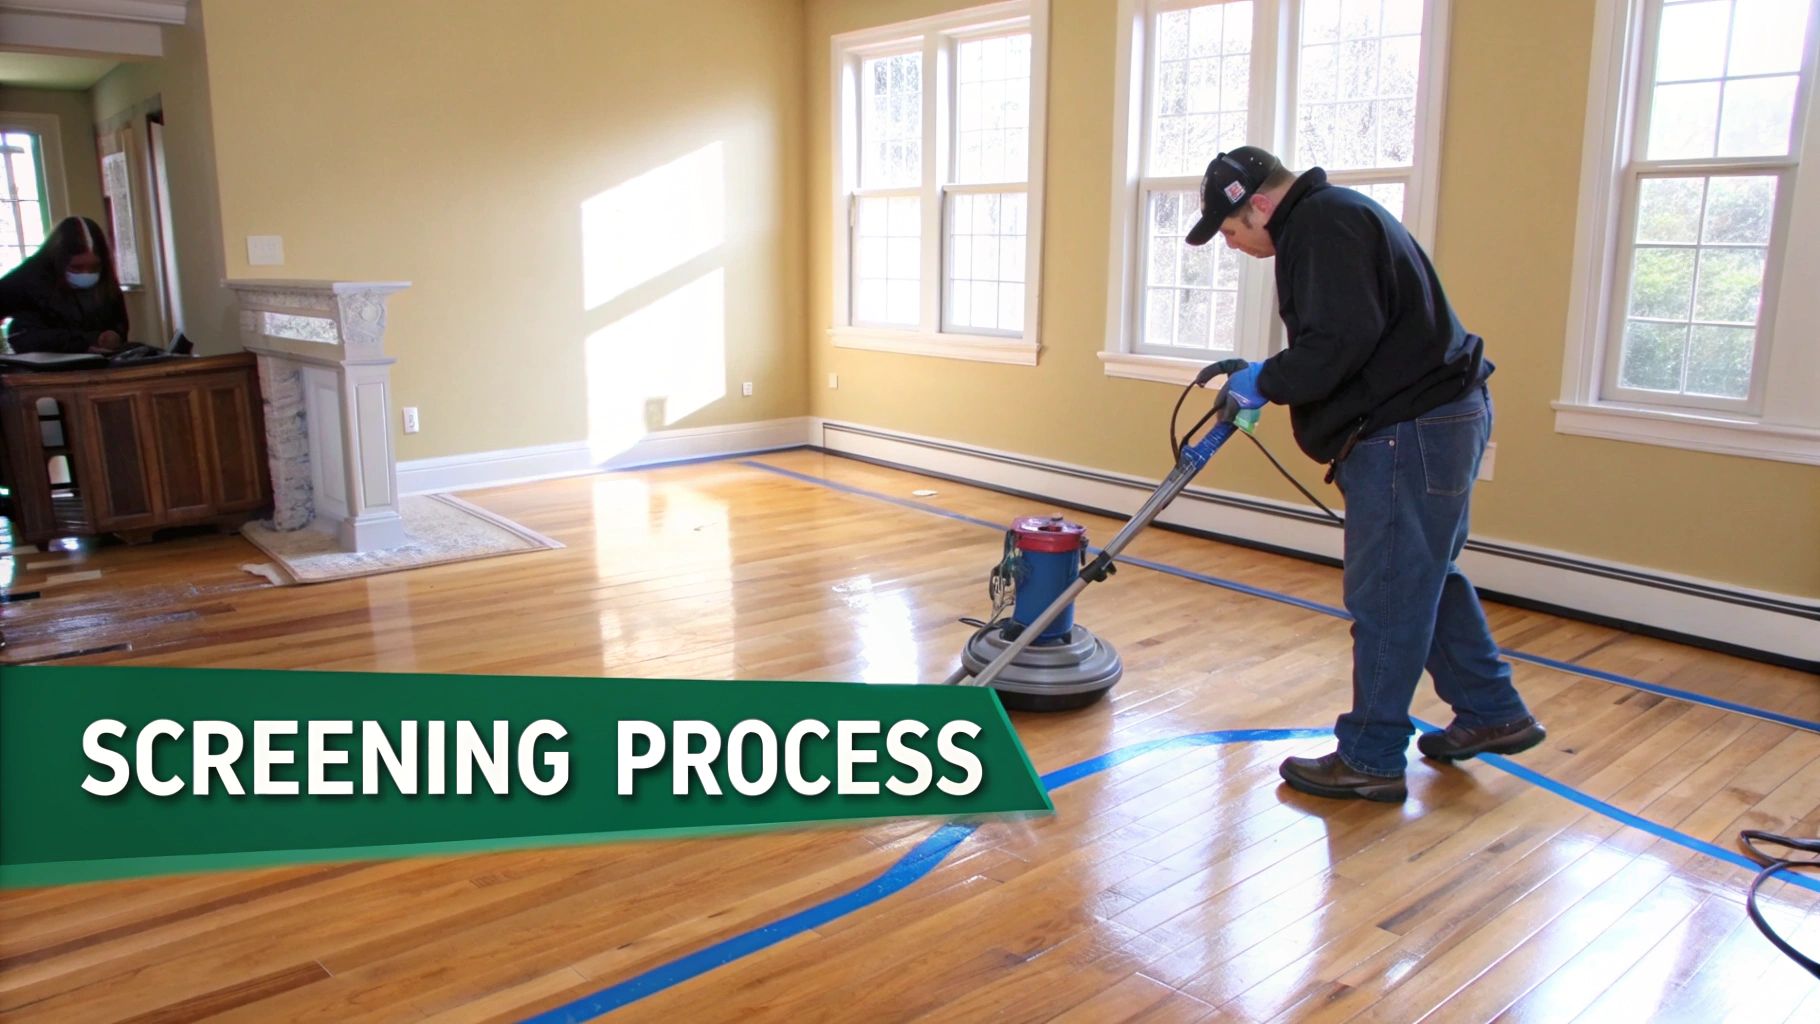
The Art of Screening: Even Abrasion for a Perfect Bond
With the floor prepped and spotless, the real work begins. This is where expertise truly shows. We attach the right grit screen to our professional floor buffer—a heavy, powerful machine that applies consistent pressure across the entire floor.
Technique is everything here. We guide the buffer along the grain of the wood, making smooth, overlapping passes. This methodical approach ensures the whole surface is evenly abraded, creating a uniform "tooth" for the new polyurethane to grab onto.
A classic DIY mistake is letting the buffer sit in one spot too long or using a jerky motion. That’s how you get those ugly swirl marks that show up under the new finish. Our technicians are trained to handle the machine with a light, controlled touch for a perfectly scuffed surface that never harms the wood.
For tricky spots like corners, stair landings, and tight edges where the big buffer can't reach, we switch to smaller, specialized tools. We carefully abrade every single square inch by hand to make sure the final finish is seamless from wall to wall.
If you’re unsure whether your hardwood floors need screening or full refinishing, Buff & Coat can take a look and give you honest recommendations. Get a free estimate for your Richmond-area home today.
Post-Screening Cleanup: The Dustless Difference
As soon as the screening is done, we start another intensive cleanup. This is where our commitment to a dustless sanding process really shines. The vacuum systems hooked up to our buffers capture most of the dust right at the source, but we don't stop there.
We go over the entire floor with a multi-step vacuuming process to pick up any fine particles that might have settled. Then, we use special tack cloths—sticky cloths designed to grab microscopic dust—to wipe down the whole surface. The goal is to get the floor as clean as a surgical theater because any speck of dust left behind can become a permanent, gritty flaw in the final coat.
Applying the Polyurethane Finish
With the floor perfectly prepped, abraded, and cleaned, it’s finally time to lay down the new protective coat. We exclusively use high-quality, water-based polyurethanes. These modern finishes are incredibly durable, low-odor, and fast-drying, which makes the whole process much more convenient for homeowners.
Using a professional T-bar applicator, we apply a thin, even layer of finish across the entire floor, always moving with the grain. This tool is specifically designed to lay down a smooth, bubble-free coat that self-levels beautifully. We almost always apply two full coats to ensure maximum durability and a rich, clear sheen that will stand up to years of foot traffic.
Here in Richmond, we’re always mindful of the local climate. Humidity can affect how a finish dries and cures. On a muggy summer day, we make sure there's plenty of air circulation to help the finish set correctly, preventing any cloudiness or tackiness. It's a simple but crucial detail for getting the best possible result on your hardwood floor restoration.
Common Screening Mistakes to Avoid
Even if you follow all the steps for how to screen hardwood floors, a few common pitfalls can trip you up. A seemingly small mistake can lead to a finish that looks awful or, worse, starts failing a few months down the road. After 15+ years of refinishing floors here in Richmond, VA, we’ve seen just about everything that can go wrong—and we know exactly how to prevent it.
By getting ahead of these common errors, you can sidestep a ton of frustration and make sure your project ends with the beautiful, durable results you’re hoping for.
Overlooking Hidden Surface Contaminants
This is, without a doubt, the number one reason a screen and recoat job fails. Over the years, your floors get exposed to all sorts of household products: cleaners, furniture polishes, air fresheners, and even airborne cooking oils. Many of these products contain waxes, silicones, or acrylics that leave behind an invisible residue.
If you pour a fresh coat of polyurethane over that residue, it simply won't stick. The new finish will pull away from the contaminated spots, creating ugly little craters known as "fish eyes" or "cissing." In really bad cases, the new finish can peel off in sheets later on.
Expert Tip: We always perform a few tests for contaminants before we even think about starting a project. This is precisely why we warn homeowners to stay away from products like Orange Glo, Mop & Glo, or any oil soaps on their hardwood floors. A cleaner you used years ago can completely ruin a new finish if it's not dealt with properly.
Creating Swirl Marks with the Buffer
A floor buffer is a beast of a machine, and it takes a practiced hand to control it. A classic DIY mistake is applying uneven pressure or letting the machine sit in one spot for too long. This carves fine, circular scratches into the old finish, which we call "swirl marks."
They might be tough to spot on a dull, scuffed-up surface, but they will stick out like a sore thumb once you apply a glossy new coat of finish. A pro keeps the buffer in constant, fluid motion, moving with the grain of the wood. The goal is to create a uniform abrasion without leaving any of those tell-tale swirls behind. This technique is the heart of a quality buff and coat service.
Rushing the Cleanup Process
Before you even think about opening a can of finish, the floor needs to be immaculately clean. I mean surgically clean. Any speck of dust, stray pet hair, or bit of debris left on the surface will become a permanent part of your new finish, leaving you with a rough, gritty texture you can feel with your socks.
Rushing this step is a recipe for a do-over. It’s a multi-stage process that starts with meticulous vacuuming, especially along the baseboards and in the corners where dust loves to hide. After that, we go over the entire floor with specialized tack cloths designed to pick up the microscopic particles that even the best vacuums miss.
Uneven Finish Application
Applying polyurethane so that it looks like glass requires the right tools and a steady hand. Grabbing a paint roller or a cheap applicator from the hardware store often leads to a blotchy, inconsistent sheen with ugly lap lines, streaks, and bubbles. You want to apply a thin, uniform coat that has a chance to self-level into a perfectly smooth film.
Our crew uses professional-grade T-bar applicators. They're specifically designed to lay down the perfect amount of finish for a flawless result, ensuring the floor has the same beautiful luster from wall to wall. Avoiding these mistakes is crucial for a successful project and highlights why hiring a professional floor refinishing service in Richmond, VA, often brings peace of mind and a far superior outcome.
Why Richmond Homeowners Choose Buff & Coat
When it’s time to bring your hardwood floors back to life, you want a local expert you can count on. Here in the Richmond, VA area, Buff & Coat has been the go-to specialist for over 15 years, delivering beautiful results with a focus on quality workmanship and customer satisfaction.
We’re a local, owner-operated business, which means you get personalized service and expert advice directly from us. Our commitment to using advanced buff and coat process and dustless sanding systems means your home stays clean and healthy during any project.
With Buff & Coat, you get:
- 15 years in business serving the Richmond community.
- Dustless sanding systems to keep your home clean.
- Local, owner-operated expertise and accountability.
- High-quality, low-odor finishes for a durable, beautiful result.
- Clear pricing and honest advice so you can make confident decisions.
- 5-star customer service because we stand behind our work.
Beyond just enjoying beautiful floors, many homeowners we work with are thinking about their property value. If you're planning to sell, refreshing your floors is a smart move. For more tips on getting your home ready for the market, AgentPulse has some great insights in A Home Seller's Guide on How to Sell a House Faster.
Ready to restore your hardwood floors? Buff & Coat makes the process fast, clean, and stress-free. Call 804-392-1114 or request your free estimate at buffandcoatvirginia.com.
Your Top Questions About Screening Floors Answered
We get a lot of questions from homeowners in Richmond and the surrounding areas about screening hardwood floors. The lingo can get confusing—"screening," "buff and coat," "sanding"—so let's clear things up. Knowing the basics will help you make the right call for your home.
How Often Should I Screen My Hardwood Floors?
This really comes down to your lifestyle. The amount of traffic your floors see is the biggest factor.
For a typical family home in a neighborhood like Midlothian or Short Pump, we usually suggest a professional wood floor recoating every 3 to 5 years. That's the sweet spot for catching minor scuffs and wear before they turn into bigger problems that require a full sanding.
But if you have a busy household—think kids, big dogs, or you love to entertain—you'll want to lean closer to every 2 to 3 years. The goal here is simple: apply a fresh, protective coat of finish before the old one wears down to the bare wood. It's preventative maintenance that saves you from a much more expensive and disruptive sanding project later on.
Can You Screen Engineered Hardwood Floors?
Absolutely! In most cases, engineered hardwood is a great candidate for screening. But there's one critical detail we have to check first: the thickness of the top layer of real wood, which is often called the "wear layer."
If you have quality engineered flooring with a nice, thick wear layer (usually 3mm or more), it can be screened several times without a problem. It’s the perfect way to buff out surface scratches and bring back that original sheen. On the flip side, some lower-cost engineered products have a veneer that's almost paper-thin, and screening those could cause damage.
At Buff & Coat, the very first thing we do is carefully inspect your engineered floors. We measure the wear layer to make sure screening is a safe and effective way to restore your floors without any risk.
What Is the Difference Between Screening and a Buff and Coat?
This is a fantastic question we hear all the time. The short answer? There's no difference at all. They are two different names for the exact same process.
- "Screening" is the more technical industry term. It refers to the physical act of using an abrasive screen disc on a floor buffer to lightly scuff up the old finish. This creates a rough surface for the new coat to bond to.
- "Buff and Coat" is just a more descriptive, easy-to-understand name for the service. We buff (or screen) the floor to prep it, then we apply a new coat of polyurethane.
So, whether a contractor says "screening," "buff and coat," or even "light sand and recoat," they're all talking about the same thing: a fast and effective way to restore the protective top layer of your hardwood floors.
How Long Does the Screening Process Take?
One of the best parts about choosing a screen and recoat is how fast it is. We can get in and out with minimal disruption to your routine.
For an average-sized home here in the Richmond, VA area, our Buff & Coat team can usually get the entire job done in just one day. That includes all the prep, the screening, a thorough cleanup, and applying two fresh coats of our durable, professional-grade finish.
The floor needs a little time to cure, but it’s still incredibly convenient. You can typically walk on the floors in your socks after about 4-6 hours. We just ask that you wait 24-48 hours before moving furniture back, and always lift—don't drag! This quick turnaround makes it a no-brainer for busy families who want beautiful floors without the headache of a long project.
If you’re still not sure if screening is the right move for your hardwood floors, let us help. Buff & Coat Hardwood Floor Refinishing can take a look and give you an honest, expert opinion. Call 804-392-1114 or request your free estimate online.