When you first notice that your hardwood floors aren't perfectly flat, it's easy to jump to conclusions. But before you can fix the problem, you need to understand what’s really going on beneath the surface. For many Richmond homeowners, the right fix is often a professional dustless sanding and refinishing, which can restore a perfectly smooth surface without turning your home into a construction zone.
Your First Step to Fixing Uneven Hardwood Floors
Uneven hardwood floors are more than just a cosmetic issue; they're often a symptom of a deeper problem that could affect your home’s safety and value. Seeing dips, slopes, or gaps pop up can be a little unsettling, especially in older Richmond homes. The good news? These problems are almost always fixable with the right approach.
The key to a lasting repair isn’t just treating the symptom—it’s diagnosing the root cause. Is it excess moisture seeping in from a humid crawlspace, a common issue in our region? Or is it something more structural, like the house settling or a subfloor that's seen better days? Once you figure out the "why," you can confidently move on to the "how."
Understanding the Language of Your Floors
To get started, it helps to know what you’re looking at. Your floors are trying to tell you something, and learning their language is the first step.
-
Cupping: This is when the edges of a floorboard are higher than its center, creating a shallow "U" shape. Cupping is almost always a sign of a moisture imbalance—specifically, the bottom of the board is wetter than the top, causing the wood to expand and curl upwards at the edges.
-
Crowning: This is the exact opposite. The center of the board is bowed upward, higher than its edges. This usually happens when the floor's surface has been exposed to moisture from something like a big spill, a leaky appliance, or even improper cleaning methods.
Just by identifying whether you have cupping or crowning, you’ve already gathered a major clue about the underlying cause. This insight is what guides you toward the right repair.
Before you go any further, here's a quick cheat sheet to help you connect the dots between what you're seeing and what might be causing it.
Quick Guide to Common Uneven Floor Issues
| Symptom | Potential Cause | Common Solution |
|---|---|---|
| Cupping (edges are high) | Moisture from below (crawlspace, plumbing leak) | Address moisture source, then sand flat once acclimated |
| Crowning (center is high) | Surface moisture (spills, improper cleaning) | Fix moisture source, sand down the high center |
| Dips or Sags | Failing subfloor, joist issues, house settling | Professional subfloor leveling or structural repair |
| Gaps Between Boards | Seasonal humidity changes (normal) or excessive dryness | Humidifier/dehumidifier; sometimes wood filler and recoat |
This table is just a starting point, but it shows how different symptoms point to very different problems—and solutions.
Why You Shouldn't Ignore Uneven Floors
Putting off a repair might seem easy, but it can lead to much bigger headaches down the road. For one, uneven surfaces are a serious trip hazard, especially for kids and older adults.
Over time, the constant stress on those warped boards can cause them to crack, splinter, or separate entirely, turning a relatively simple refinishing job into a costly board replacement project.
Uneven floors are a widespread issue, particularly in homes built before 2000. It's not just a cosmetic flaw; it’s a matter of safety and protecting your home's value. At Buff & Coat Hardwood Floor Refinishing, we've seen firsthand how tackling this problem improves not just the look but the overall function and safety of a home. For a deeper dive into industry trends, the Hardwood Floors Magazine is a fantastic resource.
Whether you're dealing with a minor dip in your Henrico home or a widespread issue across your entire first floor in Chesterfield, understanding the problem is half the battle. This guide will walk you through the next steps, helping you decide if it's a project you can tackle yourself or if it's time to call in a trusted local pro.
Diagnosing the Problem: Common Causes of Uneven Floors
Before you can even think about fixing an uneven floor, you need to put on your detective hat. The visible symptoms you see—the dips, the warped boards—are just clues pointing to a deeper issue. Nailing down the root cause is the most important step for a fix that actually lasts. If you just treat the symptom, it's like painting over a water stain without fixing the leaky pipe. The problem will come back.
The whole process kicks off with a good, old-fashioned visual inspection. Get down on your hands and knees and take a close look at the boards. Are the edges curling up, or is the center bulging? Is the problem in one small spot, or does it run across the entire room? Figuring this out is your first big step.
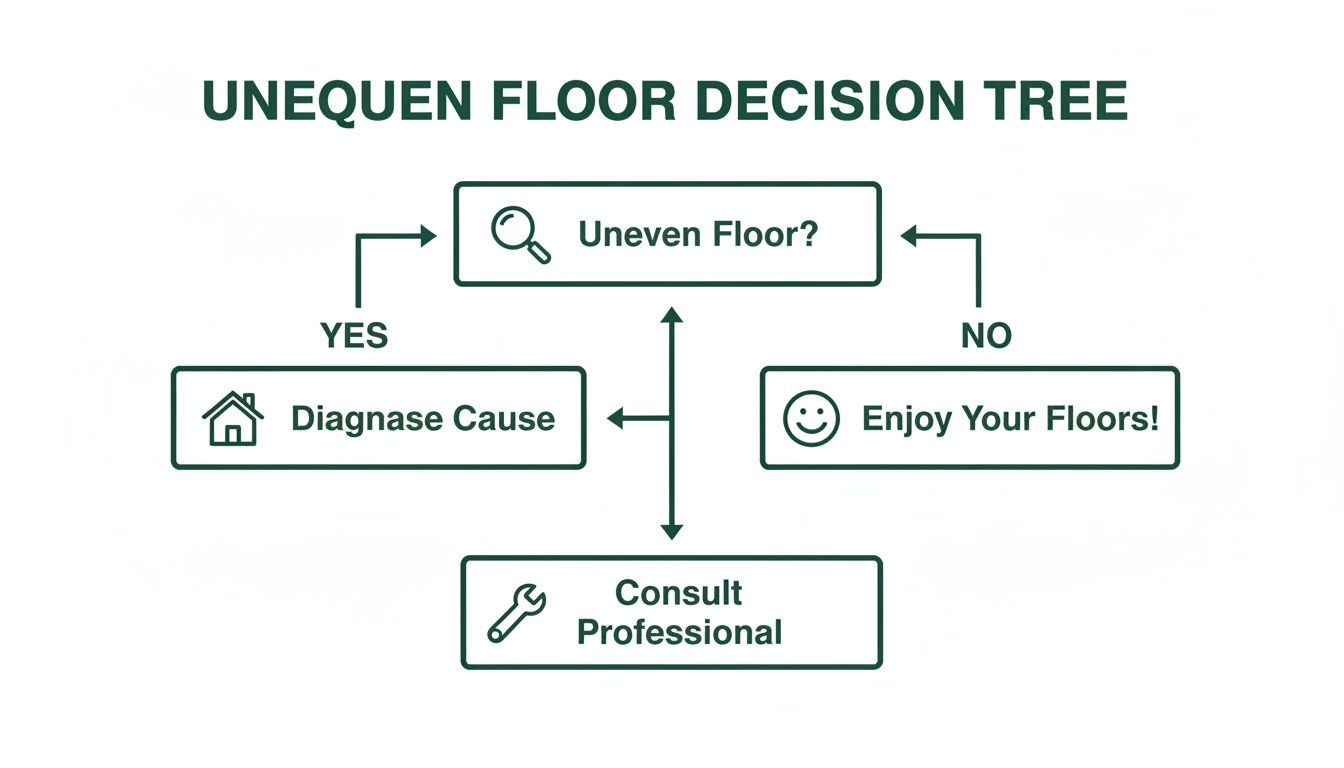
This decision tree gives you a great visual for the first moves every homeowner should make when they spot an uneven floor. At the end of the day, any sign of trouble needs a proper diagnosis before you can decide on the right repair.
Cupping: When Board Edges Rise Up
Cupping is one of the most common issues we see in homes around the Richmond area. You'll know it when you see it: the edges of your floorboards are higher than the center, creating a distinct concave or "cupped" shape.
Nine times out of ten, this is caused by a moisture imbalance. Specifically, it means the bottom of the wood is wetter than the top. As the underside of the board soaks up moisture, it swells and pushes the edges upward. Simple physics, really.
Common Causes in Richmond Homes:
- Humid Crawlspaces: This is the big one in our region. Unsealed or poorly ventilated crawlspaces let ground moisture seep right up into the subfloor and the hardwood above it.
- Leaky Pipes: A slow, hidden leak from plumbing running under the floor can create the perfect humid environment for cupping to start.
- Foundation Moisture: Water can also wick its way through a concrete slab, introducing excess moisture from below.
Crowning: When the Center Bulges
Crowning is the exact opposite of cupping. With crowning, the center of the board is bowed upward, making it higher than the edges. This happens when the surface of the floor is exposed to more moisture than the bottom, over and over again.
The top layer of the wood swells while the bottom stays stable, forcing the middle of the board to push up. This is usually the result of something happening on the surface, not from underneath.
- Surface Spills: Water left sitting for too long after a spill is a classic culprit.
- Improper Cleaning: Using a sopping wet mop is a surprisingly frequent cause of crowning.
- High Indoor Humidity: A room without good air circulation or dehumidification can sometimes be the source.
Dips, Sags, and Squeaks
If your floor feels bouncy or has a noticeable dip or sag across a larger area, the problem likely isn't your hardwood planks at all. These are classic red flags for issues with the subfloor or even the structural supports beneath it.
Squeaks often go hand-in-hand with these bigger problems. While a single squeak might just be a minor annoyance, widespread creaking often means the subfloor is loose and moving against the floor joists. We have a whole guide on what causes hardwood floors to creak if you want to dive deeper.
To really get to the bottom of structural issues, it can be incredibly helpful to understand What is a Building Consultant? and how they identify these deeper defects.
If your floor's unevenness is more than just minor board warping, it's critical to have a professional take a look. Buff & Coat can help you determine the root cause with an honest, no-pressure assessment.
Ready for a professional diagnosis? Call 804-392-1114 or request a free estimate from our team today.
Repair Solutions: From DIY Fixes to Professional Refinishing
Once you've got a good idea of what’s causing your uneven floors, it’s time to pick a game plan. Some small-scale issues are perfect for a confident DIYer, but widespread problems almost always need a professional touch to get a result that looks great and actually lasts.
Knowing the difference will save you a ton of time, money, and headaches down the road.
It all comes down to matching the solution to the scale of the problem. Fixing a single warped board from a small, resolved leak is a world away from dealing with an entire room cupping because of crawlspace humidity.
Manageable DIY Fixes for Minor Issues
If you're dealing with an isolated problem—say, just one or two boards are acting up—a DIY approach can work out just fine. When a single board is cupped, crowned, or has some localized damage, replacing it is a pretty common weekend project.
Here's the gist of what that involves:
- Careful Removal: You'll need a circular saw set to the exact thickness of the plank. The goal is to cut out the bad board without nicking the good ones around it.
- Sourcing a Match: This can be the trickiest part. Finding a replacement that matches your floor's wood species, width, and color is tough, especially in older Richmond homes with original flooring.
- Proper Installation: The new board needs to be cut perfectly to fit, then locked in with flooring adhesive and nails. After that, it has to be stained and finished to blend in.
This method is great for very specific, localized damage. It's definitely not the answer for widespread unevenness.
When Professional Hardwood Floor Repair Is Essential
When you see cupping, crowning, or general unevenness spreading across a large area, the only real solution is to treat the entire floor as one surface. This is where professional hardwood floor repair is non-negotiable. Trying to replace boards one by one will just leave you with a patchy, still-uneven mess and won't fix the root cause.
A pro comes in and treats the floor as a single, cohesive unit, guaranteeing a uniform, perfectly flat result that holds up.
Full Sanding and Refinishing: The Gold Standard
For the vast majority of widespread cupping and crowning cases, the best and most permanent fix is a full dustless sanding and refinishing. This process doesn't just hide the problem—it completely erases it.
At Buff & Coat, our dustless sanding process is all about precision. We remove just enough of the warped wood—often only a fraction of a millimeter—to bring the entire surface back to a perfectly flat plane. This restores the floor's integrity without taking years off its life.
Our advanced sanding equipment is hooked up to powerful HEPA vacuums that capture virtually all the dust. This means we can level your floors without coating your home in a fine layer of wood dust, protecting your air quality and making the whole process way less disruptive for your family.
Subfloor Leveling for Major Dips and Sags
If your floor has significant dips, sags, or feels spongy, the problem is almost certainly deeper—in the subfloor. Sanding the hardwood on top won't do a thing to fix that. In these situations, a self-leveling compound is often the answer, but it’s not a simple pour-and-go job.
Applying it correctly is a multi-step process:
- Remove the Hardwood: First, the existing flooring has to be carefully taken up to get to the subfloor.
- Prepare the Surface: The subfloor has to be meticulously cleaned, primed, and sealed before anything else happens.
- Pour and Spread: The compound is mixed and poured, then skillfully spread to create a perfectly level and smooth foundation.
Honestly, this is a job best left to the pros. A mistake here can create an even bigger, more expensive problem, and the structural integrity of your floor is riding on getting it right. Once the new, level subfloor has cured, the original hardwood (or new flooring) can be reinstalled on a rock-solid base.
Choosing between a quick patch and a comprehensive repair is a critical decision. For homeowners in Richmond, Midlothian, and the surrounding areas, our team can provide an honest assessment to help you see all your options clearly.
If you’re unsure how to fix uneven hardwood floors in your home, Buff & Coat can take a look and give you honest recommendations. Call 804-392-1114 or request a free estimate today.
When the Problem Lies Beneath Your Floorboards
Sometimes, those cupped or crowning hardwood planks are just messengers delivering bad news from below. The real culprit isn't the floor itself, but the subfloor—that hidden layer of plywood or OSB that’s supposed to be supporting your beautiful hardwood. When the subfloor gives out, your hardwood has no choice but to follow.
This is a scenario we see all too often, especially in some of Richmond's wonderful older homes. Construction methods and materials from decades ago just aren't what they are today, and many are simply reaching the end of their lifespan. Catching a subfloor issue early is the key to preventing a small headache from turning into a major structural repair.
Signs of a Failing Subfloor
Unlike the isolated cupping you might get from a recent spill, subfloor problems announce themselves on a much larger scale. You’re not just looking for one or two problem boards; you’re looking for issues that span an entire section of a room.
Here are the classic red flags we tell homeowners to watch for:
- Widespread Sagging: It’s that noticeable dip or "valley" in the floor. You can literally feel it as you walk across the room.
- A Spongy or Bouncy Feeling: The floor has an unsettling amount of give when you walk on it, almost like a mini-trampoline. This is a dead giveaway that the subfloor is no longer securely attached to the floor joists.
- Loud, Extensive Squeaking: A few creaks are normal and add character. A full-blown symphony of them across a large area, however, usually points to serious movement between the subfloor and the joists.
The Professional Approach to Subfloor Repair
If you suspect your subfloor is the root cause, this is the point where a DIY fix is completely off the table. Subfloor repair is a structural job. It demands precision, expertise, and the right tools to protect your home's integrity. Trying to patch it up yourself can lead to serious safety risks and far more expensive damage down the road.
At Buff & Coat, our process is meticulous because we believe in fixes that last a lifetime, not just a few years. We don't do cosmetic cover-ups; we get to the source. The job starts by carefully removing the hardwood planks to get access to the damaged subfloor. For those tricky boards, knowing the ins and outs of tongue and groove repair is absolutely essential to salvaging as much of your original flooring as possible.
Once the subfloor is exposed, we assess everything—the subfloor, the joists, the whole nine yards—to figure out the best way forward. For homes with crawl spaces, issues like moisture and poor ventilation often start under the house and are the direct cause of uneven floors. If you're dealing with that, a homeowner's guide to crawl space repair is a great resource for understanding those underlying problems.
Expert Insight: Subfloor issues are more common than you'd think. In our experience, they're the real culprit behind 25-35% of significant uneven hardwood problems, particularly in pre-1980s homes. A bounce of up to 1/4 inch is a clear sign of subfloor failure.
This is where our installation expertise really comes into play. We address these deep-rooted issues with precise site preparation, which might mean shimming joists to get them perfectly level or adding new plywood overlays to create a solid, flat base. We’ve honed this process over 500,000 square feet of installations right here in the Greater Richmond area since 2005.
We use modern laser levels to guarantee the new subfloor is flat to within a tolerance of 3/32 of an inch, meeting the highest industry best practices. This isn't just about looking good; it's the only way to ensure your reinstalled hardwood floor remains stable, silent, and beautiful for decades.
Tackling a subfloor problem is a big job, but it's a crucial investment in the long-term health and value of your home. It ensures any hardwood floor repair or refinishing work you do on top has a rock-solid foundation to stand on.
DIY vs Professional Floor Repair: When to Make the Call
Deciding whether to tackle a floor issue yourself or call in a professional can be tricky. Here’s a quick guide to help you make the right choice for your home and your sanity.
| Repair Task | Recommended for DIY? | When to Call Buff & Coat |
|---|---|---|
| Fixing a single squeaky board | Yes. Usually involves simple screws or shims. | When the squeak moves or affects a large area—it's likely a subfloor issue. |
| Filling minor gaps or scratches | Yes. Wood filler and touch-up pens work well for cosmetic fixes. | When gaps are wider than a dime or appear seasonally, signaling a humidity problem. |
| Replacing 1-2 damaged boards | Maybe. If you have the tools and experience, it's possible. | When the damage is extensive or you have a tongue-and-groove floor that requires expertise. |
| Addressing cupping or crowning | No. This is a symptom, not the problem. Fixing it requires diagnosing the root moisture issue. | Immediately. We can identify the moisture source and recommend the right solution, from sanding to board replacement. |
| Leveling a sagging or bouncy floor | Absolutely not. This is a structural repair that requires professional expertise. | As soon as you notice it. This is a clear sign of subfloor or joist failure that needs immediate, expert attention to prevent further damage. |
While some small jobs are perfect for a weekend project, the bigger issues affecting your floor's stability and longevity are best left to the pros. Getting it right the first time saves you money, time, and a lot of headaches.
Seeing signs of subfloor trouble in your home? Call 804-392-1114 or request a free, honest assessment from Buff & Coat.
Our Process for Restoring Your Floors
When you decide it's time to fix your uneven hardwood floors, you want a clear path forward, not a bunch of surprises. At Buff & Coat, we’ve built our business on being transparent and delivering expert work. We break down the process so you know exactly what’s happening every step of the way, from our first phone call to the final walkthrough.
Our goal is simple: to give you a perfectly flat, durable, and beautiful floor with as little disruption to your life as possible. Here’s a look at how we tackle uneven floor projects for our clients across Richmond, Midlothian, and Chesterfield.
Honest Assessment and a Free Estimate
It all starts with a conversation and a visit to your home. We’ll come out for a free, no-obligation estimate where one of our flooring experts will see the situation firsthand. We don’t just eyeball it—we bring out tools like a long level to pinpoint the severity of any cupping, crowning, or sagging.
We’ll ask you about your home’s history, poke around in the basement or crawlspace for potential moisture sources, and get to the bottom of what’s causing the problem. This diagnostic step is crucial. It ensures we’re recommending the right solution, not just a temporary band-aid. Afterward, you’ll get a clear, detailed quote with no hidden fees.
Meticulous, Dust-Free Sanding
Once we’ve settled on the best course of action—which, for most uneven floors, is a full sand and refinish—we get you on the schedule. Our team shows up on time, ready to protect your home. We prep the area carefully, but our biggest commitment is to keeping your air clean.
We use state-of-the-art dustless sanding systems. These machines are hooked up to powerful HEPA vacuums that capture over 99% of dust particles right at the source. This means no fine wood dust coating your furniture, getting sucked into your air ducts, or lingering in your home for weeks.
Our sanding process is methodical. We make several passes with progressively finer grits of sandpaper, skillfully taking off just enough of the warped wood to create a perfectly level surface. This precision is key to flattening the floor without taking years off its life.
Finishing Touches With High-Quality Finishes
After the floor is perfectly flat and smooth, we handle any remaining imperfections. We can fill gaps between boards where it makes sense and make sure the entire surface is pristine before we even think about applying the finish.
We only use high-quality, commercial-grade polyurethane finishes that are as durable as they are beautiful. These modern formulas give you incredible protection against scratches and daily wear while being low-odor or low-VOC. That makes the whole process healthier for your family and pets. You also get to choose from a range of sheens, from a modern matte to a classic semi-gloss, to get the exact look you're after.
This process is a world away from a simple screen and recoat. If you're curious about the difference, you can learn more about the Buff & Coat service and see why it’s a fantastic option for floors that only have minor surface wear.
When the job is done, we clean up everything and do a final walkthrough with you. We’ll also give you care instructions to keep your newly restored floors looking amazing for years to come.
Richmond homeowners: get a fast quote for refinishing or recoating.
Why Richmond Homeowners Choose Buff & Coat
Figuring out the best way to fix your uneven hardwood floors can feel like a huge project, but finding the right local partner makes all the difference. For over 15 years, homeowners all across Richmond—from the historic charm of the Fan District to the modern builds out in Short Pump—have trusted Buff & Coat Hardwood Floor Refinishing to get the job done right.
We're not some faceless franchise; we're your neighbors. Our reputation is built on the kind of trust and expertise you only get from a local, owner-operated business. We skip the high-pressure sales tactics and confusing industry jargon. Instead, you get clear explanations and honest advice that’s actually right for your floor’s specific issues.
- 15+ Years of Local Experience: We understand the unique challenges Richmond’s humid climate throws at hardwood floors.
- Advanced Dustless Sanding: Our systems protect your home's air quality and eliminate the frustrating, gritty cleanup.
- Owner-Operated Business: You get direct accountability and a commitment to quality workmanship on every job.
- High-Quality, Low-Odor Finishes: We use durable, commercial-grade products that are safer for your family and pets.
- Clear Pricing & Honest Advice: You’ll get a detailed estimate with absolutely no hidden fees or sales pressure.
- 5-Star Customer Service: We treat your home with the same care and respect we would our own.
Your Top Questions About Fixing Uneven Floors Answered
Even with a solid game plan, you probably still have a few questions. That’s perfectly normal. We get calls from homeowners all over the Richmond area with similar concerns, so we’ve put together the most common ones right here.
Can You Fix Uneven Floors Without Ripping Them Out?
Yes, you absolutely can. In fact, a full replacement is rarely the answer. For widespread issues like cupping or crowning, our dustless sanding and refinishing process is designed specifically to level the playing field—literally. We carefully sand down the high spots, creating a perfectly flat, smooth surface without tearing out a single board.
We only recommend replacement for extreme cases, like severe water damage, rot, or boards that are cracked all the way through. Our first move is always to restore what you already have.
How Much Does It Cost to Fix Uneven Hardwood Floors in Richmond?
The final price tag really depends on what’s causing the problem and how big the area is. A simple hardwood floor repair for a few misbehaving boards is going to be a lot more budget-friendly than a complete sand and refinish or a project that involves leveling the subfloor underneath.
Here’s what really drives the refinishing cost:
- Total square footage: How much floor space are we talking about?
- The severity of the issue: Deeper cups or higher crowns take more time and effort to sand down.
- The root cause: If the subfloor is the real culprit, we have to fix that structural issue first, which will be a separate cost from the floor itself.
We always provide a free, no-surprises estimate so you know exactly what to expect for your specific situation.
How Long Does It Take to Level and Refinish a Floor?
The refinishing timeline is all about the scope of the project, but we pride ourselves on working efficiently to get you back to your life. For a standard room of about 300 square feet, a full dustless sanding and refinishing job usually takes 2 to 4 days. That gives us enough time for sanding, applying several coats of durable finish, and letting each coat dry properly.
If we discover subfloor issues that need addressing, that will naturally add more time to the project.
Will Fixing My Uneven Floors Stop Them from Squeaking?
It often helps a ton—but it’s not a guaranteed fix for every squeak. Annoying squeaks happen when wood rubs against wood or a nail. When we sand, fill gaps, and apply a new, solid finish, we lock everything in place, which eliminates a lot of those minor noises from loose boards.
However, if your floor sounds like a haunted house with loud, widespread squeaks, that’s a big red flag for a subfloor problem. Sanding the surface won't fix that. In those cases, the subfloor needs to be properly secured to the joists to silence the noise for good.
Ready to restore your hardwood floors? Buff & Coat makes the process fast, clean, and stress-free.
Call 804-392-1114 or request your free estimate online.