For many Richmond homeowners, the thought of new flooring is exciting but also a little daunting. A professional flooring installation isn’t just a cosmetic upgrade; it’s a significant investment that boosts your home’s value and completely transforms the feel of your living space. This guide is your roadmap, breaking down the entire process so you know exactly what to expect.
Your Flooring Installation Journey Starts Here
We’ll walk you through everything, from choosing the right hardwood for Virginia’s climate to understanding what a professional crew does on-site. The goal is to make you feel confident every step of the way. Whether you’re in a historic Fan district home or a newer build in Short Pump, knowing what’s coming is the best way to get a beautiful floor that you’ll love for years.

Why a Professional Installation Matters
Installing new floors is a major decision, and how they’re installed is just as important as the wood you choose. The global hardwood flooring market recently soared to USD 51.38 billion and continues to grow, showing how much homeowners value quality floors. A high-quality installation can increase a home’s value by as much as 3-5%, making it a proven return on investment.
A professional install protects that investment by sidestepping common issues we often see from DIY or inexperienced jobs, like:
- Gaps and Buckling: A classic sign that the wood wasn’t properly acclimated to our local Richmond climate or that the installer didn’t leave enough room for natural expansion.
- Squeaks and Creaks: These happen when the subfloor wasn’t prepped correctly or when planks aren’t securely fastened.
- Uneven Surfaces: This occurs when the subfloor isn’t leveled first, leading to weak spots and premature wear on your brand-new floor.
At Buff & Coat, we see ourselves as your partners in making a smart, long-term investment in your home’s beauty and value. Our 15+ years of experience in floor installation in Richmond means we’ve seen it all and know how to do it right.
While this guide focuses on hardwood, it’s always good to know what else is out there. For instance, a residential epoxy floor coating offers a durable and stylish alternative, especially for basements or garages. For now, let’s dive into the world of wood flooring installation.
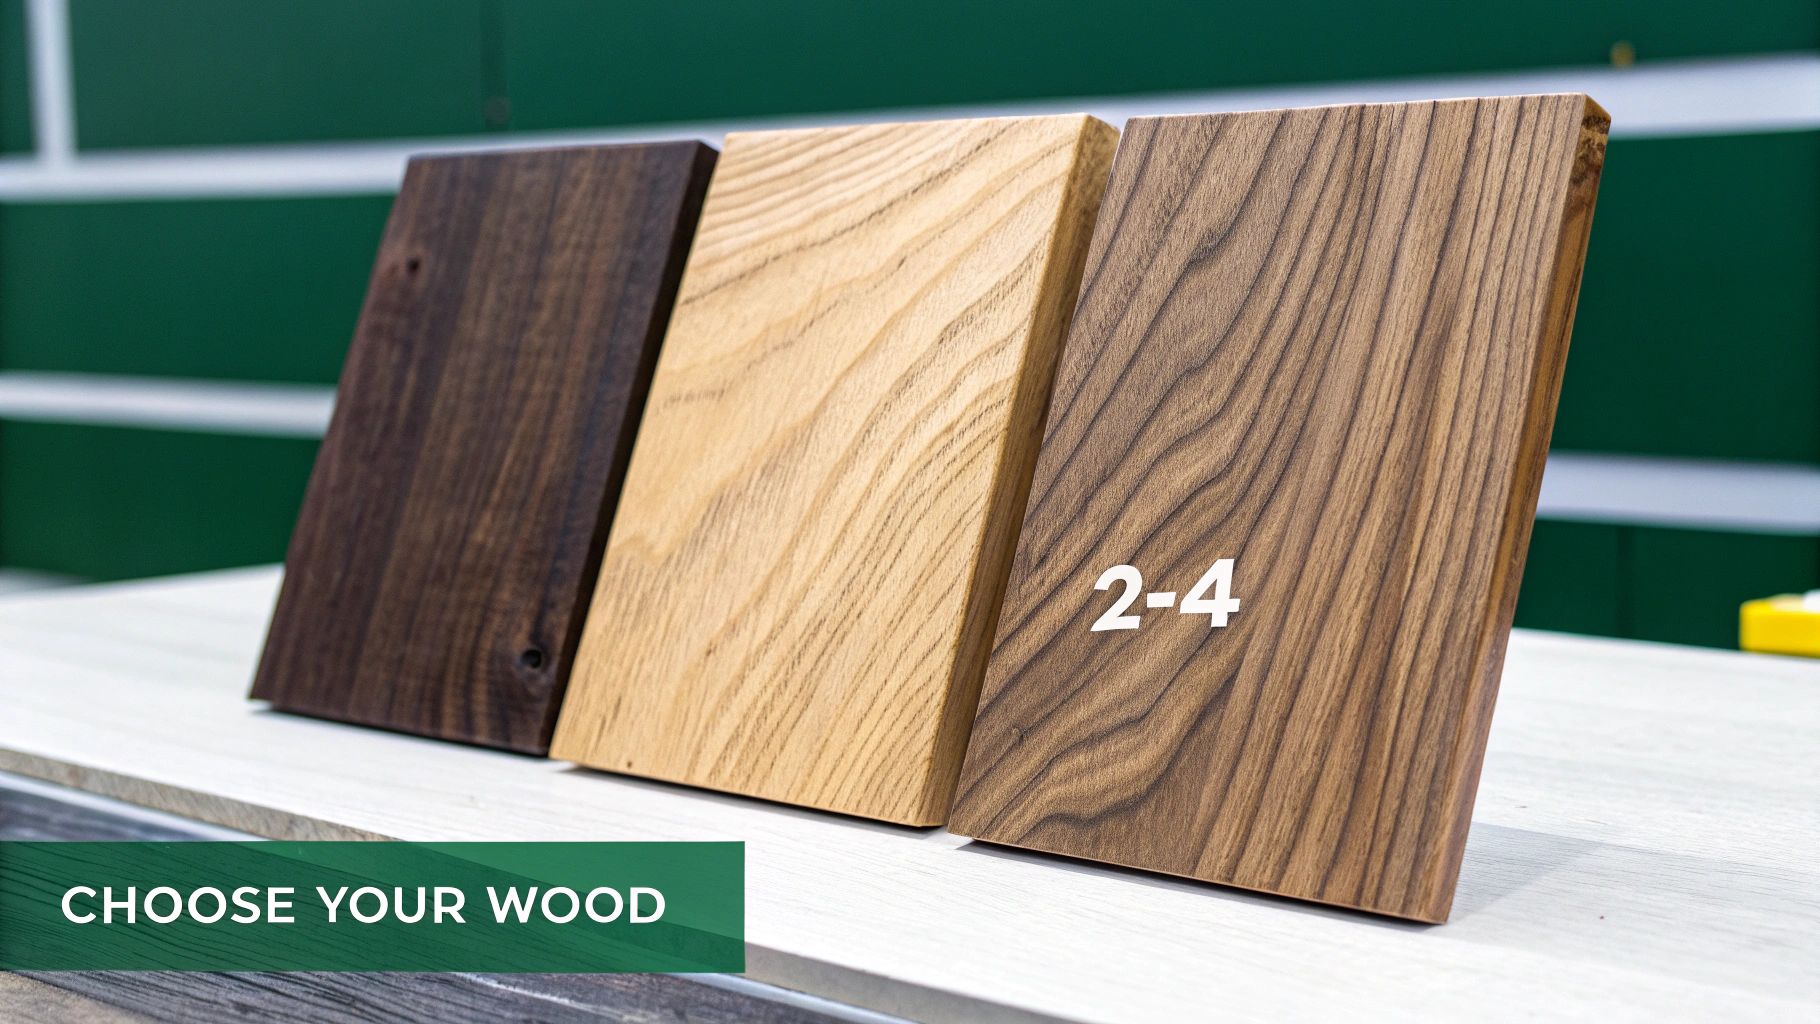
Choosing The Right Hardwood For Your Richmond Home
The first big decision in any flooring installation is picking the right material. This is especially true here in the Richmond area, where our distinct seasons and humidity swings can put a floor to the test. Getting this choice right is the key to a long-lasting, beautiful floor you’ll love for years.
You’re generally choosing between two main options: classic solid hardwood and modern engineered hardwood. Both are fantastic, but the best one for your project depends on where it’s going and what your priorities are.
Solid Hardwood: The Timeless Classic
Solid hardwood planks are exactly what they sound like—a single, solid piece of wood from top to bottom. It’s the traditional flooring you see in many historic Richmond homes, famous for its incredible longevity and classic appeal.
Its biggest selling point is durability. Because it’s one solid piece, it can be sanded down and refinished many times, essentially erasing decades of wear. A well-maintained solid hardwood floor can easily last a century or more.
However, solid wood’s weakness is moisture. It naturally expands and contracts with changes in temperature and humidity, which makes it a poor choice for basements or any below-grade areas where dampness can be an issue.
Engineered Hardwood: Modern Durability
Engineered hardwood is the clever, modern answer to solid wood’s limitations. It’s made of a real hardwood veneer on top, bonded to multiple layers of high-quality plywood or fiberboard. These core layers are stacked in a cross-grain pattern, giving the plank incredible structural stability.
That stability is a game-changer in Virginia’s climate. Engineered wood is far less likely to warp or buckle when faced with the humidity we often see in Chesterfield and Henrico counties. This makes it perfect for installations over concrete slabs or in finished basements.
The trade-off is refinishing. While engineered wood is incredibly popular and can often be installed 20-30% faster than its solid counterpart, its refinishing potential is limited by the thickness of that top wood layer. In contrast, a solid wood floor can be sanded and recoated up to 5-10 times in its lifetime.
Solid vs. Engineered Hardwood: A Quick Comparison
For Richmond homeowners, seeing the key differences side-by-side can make the decision much clearer. Here’s a quick breakdown to help you determine what’s best for your home.
| Feature | Solid Hardwood | Engineered Hardwood |
|---|---|---|
| Composition | 100% solid wood plank | Real wood veneer over a multi-layer plywood core |
| Installation Areas | Above-grade rooms only; not for basements | Can be installed on any level, including basements |
| Moisture Resistance | Low; susceptible to warping from humidity swings | High; very stable and resistant to humidity changes |
| Refinishing Capacity | Can be sanded and refinished 5-10 times | Can be refinished 1-3 times, depending on veneer thickness |
| Lifespan | 100+ years with proper care | 20-50 years |
| Typical Cost | Generally higher initial material and labor cost | Often more budget-friendly and faster to install |
Ultimately, engineered flooring offers versatility and stability for challenging areas, while solid hardwood provides unmatched longevity for the main levels of your home.
Popular Wood Species For Central Virginia Homes
Beyond the construction, the wood species itself sets the tone and determines durability. We see a few clear favorites in homes around the Richmond area:
- Oak (Red & White): The undisputed champion. Oak is tough, readily available, and its strong grain pattern is great at hiding minor dings and scratches. Red oak has warm, pinkish tones, while white oak leans more neutral and gray.
- Maple: Known for a clean, subtle grain and light color, maple brings a bright, contemporary feel to a space. It’s harder than oak, so it’s a great pick for high-traffic zones, but its smooth surface can make scratches a bit more obvious.
- Hickory: As one of the hardest domestic woods available, hickory is exceptionally durable and a fantastic choice for busy families with kids and pets. It has dramatic color variations and a bold grain, creating a beautifully rustic look.
Our Pro Tip: When choosing a species, think about your lifestyle first. A busy family in Mechanicsville will love the toughness of hickory, while someone in a quiet Fan apartment might prefer the classic, clean look of maple.
Sorting through these options can feel like a lot, but understanding the core differences is the first step. For a closer look, check out our guide on the best engineered hardwood flooring brands.
If you’re weighing your options for a new flooring installation in the Richmond area, Buff & Coat can provide honest recommendations based on your home’s specific needs. Call 804-392-1114 to discuss your project.
Preparing Your Home for a Flawless Installation
A beautiful new hardwood floor doesn’t just happen. The secret to a floor that looks incredible for decades is all in the prep work. This is where we prevent almost all of those annoying issues like creaks, gaps, and uneven spots from ever showing up.
Think of it this way: getting your home ready isn’t just about clearing a room. It’s about creating the perfect environment for that new wood to settle in and become a permanent, stunning part of your home.
Letting the Wood Settle In: Acclimation is Key
This is one of the most critical steps, and it’s amazing how often it gets overlooked. Wood is a natural material that breathes, expanding and contracting with changes in temperature and humidity. Here in Richmond, with our humid summers and drier winters, skipping this step is asking for trouble.
That’s why we bring the new hardwood to your home and let it sit for several days before we lay a single plank. This gives the wood’s moisture content time to equalize with the unique climate inside your house. Rushing this process can lead to ugly gaps between boards in the winter or buckling when summer humidity kicks in.
The Subfloor: Your New Floor’s Foundation
Your new hardwood is only as good as the subfloor it’s sitting on. Before installation, our team does a thorough subfloor assessment. It must be three things: clean, flat, and dry.
- Clean: Every bit of debris, old carpet staples, glue, and dust has to go. A clean surface ensures a secure bond and prevents bumps or hollow spots.
- Flat: We meticulously check the entire area for high and low spots. An uneven subfloor is a major cause of planks flexing and squeaking later. We’ll sand down high spots and use a professional leveling compound to fill in lows, creating a perfectly smooth plane.
- Dry: Moisture is the enemy of hardwood floors. We use moisture meters to test the subfloor and make sure it’s well within the acceptable range for a long-lasting, stable installation.
This level of detail is what separates a quick fix from a lifelong investment. Industry data shows that faulty prep work is behind 15-20% of all flooring installation callbacks. Professionals who obsess over climate control and subfloor prep slash that risk dramatically. You can discover more insights from industry market research to see why it matters.
A Quick Checklist to Help Us Out
A little bit of prep on your end can make a huge difference in how smoothly and safely the installation goes.
- Clear the Room Completely: Please remove all furniture, rugs, plants, and anything hanging on the walls from the installation area.
- Secure Nearby Items: Vibrations from our tools can travel. It’s a good idea to take down pictures or secure fragile items on shelves in rooms next to the work area.
- Plan for Pets and Kids: For everyone’s safety, the work area will be a construction zone. It’s best to keep pets and small children away from the space while we’re working.
- Designate a Cutting Area: If possible, a spot in the garage or driveway for us to cut boards is perfect. This helps contain sawdust and keeps the mess to a minimum inside your home.
Taking care of these simple things helps us stay focused on what we do best—giving you a flawless new floor with as little disruption to your life as possible.
If you have questions about preparing your space for a flooring installation in Richmond VA, Buff & Coat can walk you through the process. Call 804-392-1114 for a free consultation.
What to Expect During a Professional Flooring Installation
Alright, the prep work is done, and now it’s time for the main event: turning that stack of beautiful hardwood planks into your new floor. This is where real craftsmanship shines. When our team arrives, it’s not just about laying boards; it’s about a methodical process we’ve perfected over 15+ years in homes across Richmond.
The specific technique we use depends on the type of flooring you chose and your subfloor. Getting this matchup right is critical for a floor that will last for decades without issues.
Common Hardwood Installation Methods
Every home is unique, and the way we install the floor needs to respect that. Here in the Richmond area, we typically rely on three tried-and-true installation methods.
- Nail-Down: This is the classic, time-tested approach for solid hardwood floors over a wooden subfloor. We use a special flooring nailer that drives cleats through the tongue of each plank, securing it tightly to the subfloor. It creates an incredibly solid, long-lasting floor.
- Glue-Down: This is our go-to method for engineered hardwood, especially over concrete subfloors common in basements or newer construction. We spread a premium flooring adhesive across the subfloor, creating a permanent bond that feels solid underfoot.
- Floating: Many modern engineered and luxury vinyl plank (LVP) floors feature a “click-lock” system. The planks lock securely to each other but aren’t attached to the subfloor. This lets the floor expand and contract as one unit, making it an excellent choice for areas where humidity might fluctuate.
No matter which method we use, the success of the installation hinges on the preparation that comes before it.
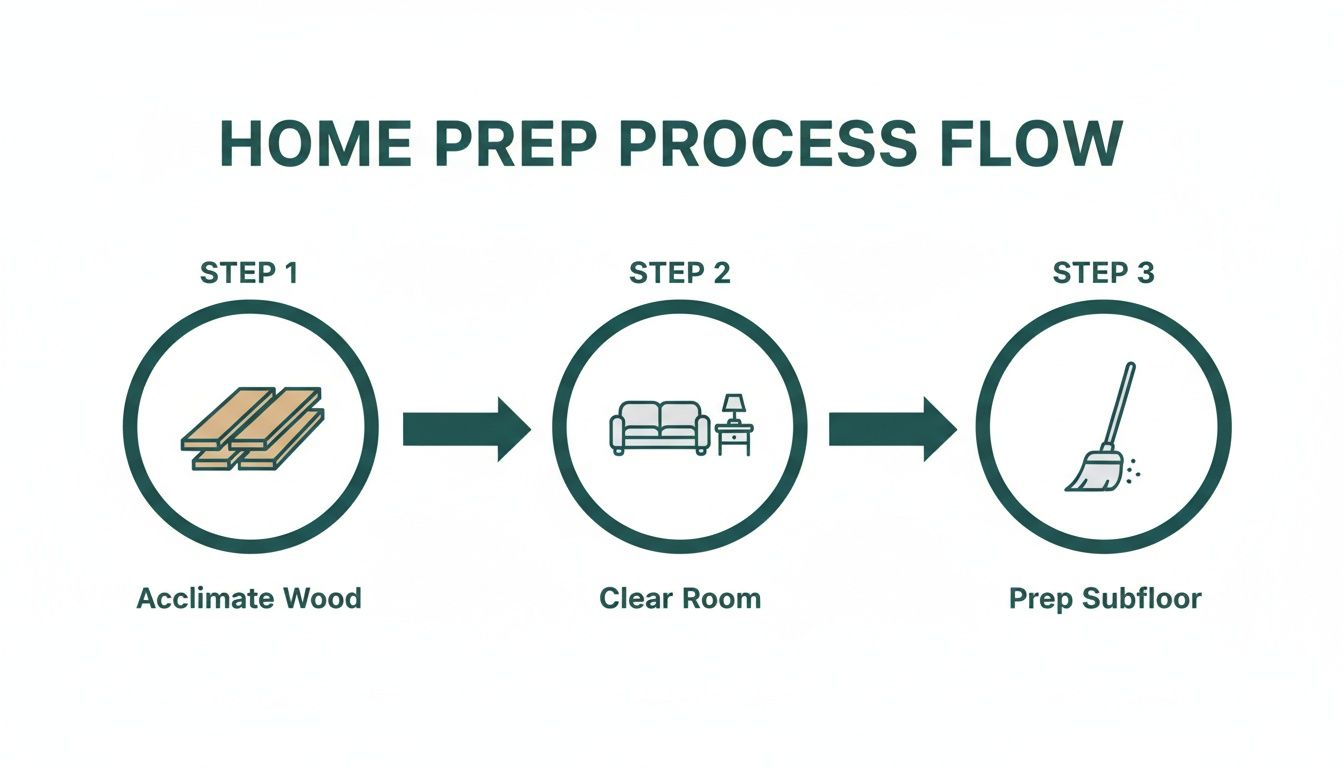
This simple flow—acclimate, clear, prep—is the non-negotiable foundation for every project. Getting this right prevents the vast majority of future flooring issues.
The Buff & Coat Approach to Craftsmanship
Our installation process is all about precision, starting with the very first row of planks. We take meticulous care to ensure this first line is perfectly straight, because it sets the guide for the entire room.
As we work, we focus on the small details that separate a decent job from a great one.
Our Pro Tip: We always stagger the joints between planks randomly. This isn’t just for looks; it’s a structural necessity. Properly staggered end joints distribute stress evenly across the floor, creating a stronger surface that looks far more natural than a repetitive, patterned layout.
You can tell the quality of an installation by how an installer handles cuts around vents, doorways, and other obstacles. We don’t take shortcuts or hide sloppy cuts with caulk. We take the time to carefully scribe and cut each piece for a perfect fit, ensuring clean, tight lines that signal a high-end finish.
You can learn more by reading our complete hardwood floor installation guide for Richmond.
Managing the Details: Expansion Gaps and Cleanliness
One of the most critical parts of any professional flooring installation is accounting for wood’s natural movement. Wood expands and contracts with changes in temperature and humidity. To allow for this, we leave a small expansion gap (usually about 3/8 to 1/2 inch) around the perimeter of the room. This gap is completely hidden by your baseboards and trim, but it gives the floor the “breathing room” it needs to prevent buckling or warping.
Finally, we treat your home with respect. We use dust collection systems on our saws and clean up as we work. Our goal is to leave you with a stunning new floor, not a mess. That commitment to a 5-star experience is at the core of everything we do.
Ready to see what a professional flooring installation looks like in your home? Buff & Coat offers free, no-pressure estimates in Richmond, Midlothian, and the surrounding areas. Call 804-392-1114 today.
Budgeting for Your Flooring Installation
Cost and timing are the two biggest questions for any home improvement project. Nailing down a realistic budget and schedule from the get-go is the best way to keep the project exciting, not stressful. For homeowners here in the Richmond area, a few key factors will shape the final price tag and how long the job takes.
Thinking through these variables is the first step toward making a smart investment. It’s never just about the price per square foot for the wood; it’s about the entire project, from start to finish.
Breaking Down the Costs
The total price for a professional flooring installation is a blend of the wood itself, skilled labor, and all the crucial prep work that guarantees a long-lasting result.
Here are the main things that will influence your budget:
- Square Footage: The bigger the area, the more material and labor time you’ll need.
- Material Choice: Solid hardwood generally has a higher upfront cost than engineered hardwood or LVP. An exotic species will also cost more than a classic, locally sourced oak.
- Subfloor Condition: This is a huge variable. If your subfloor is uneven, damaged, or has moisture issues, it must be fixed before a single new board is laid. It adds to the cost, but skipping this step is a recipe for disaster.
- Removal of Old Flooring: The quote will include the labor for tearing out and hauling away old carpet, tile, or existing wood floors.
- Labor and Complexity: A simple, square room is less expensive than a space with tricky angles, multiple closets, or staircases that demand precise, time-consuming cuts.
As you start piecing together the numbers, it helps to see where flooring fits into the bigger picture of a home renovation budget.
At Buff & Coat, we provide clear, itemized estimates so you know exactly what you’re paying for. We believe in honest advice and transparent pricing with no hidden fees.
For a more detailed breakdown, check out our full guide on how much a new flooring installation costs.
Flooring Installation Cost Factors in Richmond VA
These are the primary elements that we factor into every flooring installation quote.
| Cost Factor | Description | Impact on Budget |
|---|---|---|
| Material | The type of flooring you choose—solid hardwood, engineered wood, or LVP—and the specific species or style. | High |
| Labor | The cost for our skilled team to perform the installation, including complex cuts and layout. | High |
| Subfloor Prep | Repairing, leveling, or sealing the subfloor to create a stable foundation. This is a critical step. | Medium to High |
| Demolition | Tearing out and properly disposing of your old flooring material like carpet, tile, or old wood. | Medium |
| Project Size | The total square footage of the area being covered. | High |
| Project Complexity | Rooms with irregular shapes, stairs, or numerous obstacles require more time and precision. | Medium |
Ultimately, a quality installation is a combination of great materials and expert craftsmanship.
Understanding the Project Timeline
One of the first things people ask is, “How long until I can use my room again?” The timeline for a flooring installation depends on the size and scope of your project, but we can give you a general idea of what to expect.
Here’s a typical flow for a standard-sized project:
- Wood Acclimation (3–7 days): We deliver the new hardwood to your home so it can adjust to your home’s unique temperature and humidity. This crucial step cannot be rushed—it prevents gapping and buckling later on.
- Preparation (1 day): The crew arrives to clear the room, tear out the old flooring, and get the subfloor ready. This involves cleaning, leveling, and making any necessary repairs.
- Installation (2–4 days): Our team gets to work installing the new hardwood, making precise cuts and ensuring every board fits perfectly. The timeline here can vary based on the size and complexity of the space.
- Finishing Touches (1 day): Once the floor is in, we reinstall baseboards and trim and give the entire area a thorough cleaning. If your floors are being finished on-site, this is when the sanding, staining, and coating process would begin.
- Final Walkthrough (Under 1 hour): We’ll walk through the finished project with you to make sure every detail meets our high standards and leaves you completely satisfied.
Post-Installation Care: The First Few Weeks
Your beautiful new floors are installed, but the first few weeks are critical for protecting your investment and letting the finish cure properly.
- Wait Before Walking: If your floors were finished on-site, wait at least 24 hours before walking on them in socks. Give it 48 hours before allowing any light foot traffic.
- Hold Off on Furniture: The finish needs a full 72 hours to a week to harden. When you do move furniture back, make sure every piece has soft felt pads on its feet.
- No Rugs Yet: Don’t put down any area rugs for at least one to two weeks. The finish needs to breathe as it fully cures, and covering it too soon can trap moisture and leave a permanent mark.
Taking these simple precautions will ensure your floors look amazing for years. Down the road, a simple maintenance routine and an occasional refresh with our Buff & Coat service is all you’ll need to keep them in pristine condition.
Richmond homeowners: get a fast, free quote for your flooring installation. Call 804-392-1114 or request your estimate today.
Why Richmond Homeowners Choose Buff & Coat
Choosing the right wood is only half the job. Finding the best hardwood floor contractor in Richmond to install it is just as critical. A truly flawless flooring installation comes down to skill, experience, and an understanding of homes in our area. After more than 15 years serving communities from Midlothian to Glen Allen, we’ve built our name on trust and outstanding workmanship.
Unlike large, impersonal companies, Buff & Coat is a local, owner-operated business. This means the person you meet for your estimate is often the same expert overseeing your project, ensuring clear communication and that every job meets our high standards.
Our Commitment to Quality and Service
Our expertise goes beyond just installation. We are a full-service flooring partner, just as comfortable laying new floors as we are restoring old ones with our signature dustless sanding and refinishing services. This gives us a unique perspective, allowing us to provide honest, practical advice that fits your home and budget.
Here’s what sets Buff & Coat apart:
- 15+ Years of Local Experience: We’re a Richmond-based, owner-operated business dedicated to our community.
- Dustless Sanding Systems: We use advanced equipment that captures dust at the source, protecting your home’s air quality and leaving you with minimal cleanup.
- High-Quality, Low-Odor Finishes: We use premium, durable finishes that are safer for your family and pets, without harsh chemical smells.
- Clear Pricing & Honest Advice: You’ll get a detailed, easy-to-understand estimate. No hidden fees, no last-minute surprises.
- 5-Star Customer Service: From the first call to the final walkthrough, we treat your home with respect and ensure you’re completely satisfied with our work.
Local Expertise That Matters
Our long history in the Richmond area means we understand the specific challenges local homes face. We know how Virginia’s humidity impacts different types of wood, and we know how to prep a subfloor in a historic Fan townhome versus a newer build in Chesterfield. This local knowledge makes the difference between a floor that looks good today and one that performs perfectly for decades.
When you hire Buff & Coat, you’re not just getting another contractor. You’re partnering with a local expert who is genuinely invested in protecting and enhancing the value of your home. We combine proven techniques with an unwavering commitment to making our clients happy.
If you’re ready for a new floor, trust the team that Richmond homeowners have turned to for over a decade.
Richmond homeowners: get a fast, free, no-obligation estimate for your flooring installation. Call 804-392-1114 or request your quote today.
Frequently Asked Questions About Flooring Installation
We get a lot of great questions from homeowners around Richmond about new flooring projects. Here are some of the most common ones we hear, with straightforward answers.
How long does hardwood flooring installation usually take?
The timeline for a flooring installation depends on the size of the space, the type of wood, and the condition of your subfloor. For a typical project of around 500-1,000 square feet, the hands-on installation usually takes about 2-4 days. This doesn’t include the crucial acclimation period, where the wood must sit in your home for several days to adjust to our local humidity before installation. If the subfloor needs significant repairs, that could add another day. At Buff & Coat, we provide a clear, realistic schedule in every estimate.
Can I stay in my home during the installation?
Yes, you can stay in your home while we work, but the rooms we are installing in will be off-limits. You should expect some noise from our tools and crew. We use modern dust-containment systems to keep things as tidy as possible, but the area is still a work zone. Our advice is to plan on avoiding those specific rooms until we are finished. For a full-house installation, some clients choose to stay elsewhere for a night or two, but it’s not required.
Our Pro Tip: Even with our dustless systems, vibrations can travel. It’s a smart move to take down fragile pictures or decor from the walls in adjacent rooms before we start.
What is the difference between pre-finished and site-finished hardwood?
This choice comes down to speed versus total customization.
Pre-finished hardwood arrives with the stain and protective topcoat already applied at the factory. This makes the installation process much faster and cleaner, as there is no sanding, staining, or coating happening inside your home.
Site-finished hardwood is raw, unfinished wood that we install first. After it’s laid, we sand it smooth and then apply the stain and finish right there. This approach gives you complete control over the final color and sheen, resulting in a perfectly sealed, uniform surface from wall to wall. We can walk you through the pros and cons of each to help you decide.
How should I prepare for my installation appointment?
Preparing your space is simple. We ask that you clear the rooms of all furniture, rugs, decor, and personal items. It’s also a great help if you can ensure a clear path from the door to the work area for our tools and materials. Don’t worry about removing the old flooring or prepping the subfloor—we handle all of that. We’ll provide a full pre-installation checklist ahead of time to make the process as smooth as possible.
Why is acclimating wood so important in Richmond?
Acclimating wood is non-negotiable in our climate. Richmond, and Central Virginia in general, experiences significant humidity swings between seasons. Wood naturally expands in humid summers and contracts in dry winters. If we install new planks without letting them adjust to your home’s specific indoor environment first, they will likely gap apart in the winter or buckle and warp in the summer. Giving the wood several days to acclimate ensures a stable, long-lasting flooring installation.
Ready to restore your hardwood floors? Buff & Coat makes the process fast, clean, and stress-free.
Call 804-392-1114 or request a free estimate online today.