Why Deep Cleaning Hardwood Floors Makes All the Difference
Deep cleaning hardwood floors removes embedded dirt and grime that regular sweeping and mopping simply can’t reach. Here’s what you need to know:
Quick Deep Cleaning Steps:
- Prep – Remove furniture, vacuum with soft brush attachment
- Clean – Use pH-neutral hardwood cleaner with microfiber mop
- Work – Mop in direction of wood grain, change pads when dirty
- Dry – Allow 2-4 hours for complete drying with fans
- Inspect – Check for missed spots and repeat if needed
Deep cleaning isn’t just about appearance. It protects your floor’s finish, removes up to 96% of allergens, and can extend your floor’s life by years. Deep cleaning once or twice a year prevents expensive refinishing and keeps your home healthier.
As one homeowner put it: “Deep cleaning your hardwood floors is an investment in your home’s beauty and health.”
Regular mopping only spreads dirt around, while proper deep cleaning extracts it from cracks and crevices where it damages your floor’s finish over time.
I’m David Emmerling, and I’ve spent over 20 years restoring hardwood floors in the Richmond area through my company, Buff & Coat. Homeowners who master deep cleaning hardwood floors can often delay professional refinishing by 3-5 years, saving thousands while keeping floors stunning.

Regular Cleaning vs. Deep Cleaning
Here’s something I tell every homeowner: regular cleaning and deep cleaning are like the difference between washing your face and getting a professional facial. Both matter, but they serve different purposes.
When you sweep or dust mop daily, you’re doing great maintenance work. You’re picking up the obvious stuff – crumbs, pet hair, dirt the kids tracked in. But beneath the surface, dirt and grime settle deep into your wood grain and between floorboards where your regular mop can’t reach.
| Cleaning Type | What It Removes | How Often | Purpose |
|---|---|---|---|
| Surface Cleaning | Visible dust, crumbs, pet hair | Daily to weekly | Maintain appearance |
| Deep Cleaning | Embedded grime, allergens, finish-dulling particles | 1-2 times per year | Preserve finish and extend lifespan |
The average home collects up to 40 pounds of dirt, dust, and allergens each year. Much of this settles into your hardwood floors’ natural grain and crevices, where it sits and waits.
Regular mopping can actually make things worse by spreading embedded dirt around rather than removing it. This is why your floors can look dull even right after cleaning. You’re not crazy – there’s real science behind why surface cleaning isn’t enough.
Why Deep Cleaning Matters
Deep cleaning hardwood floors provides three game-changing benefits that regular cleaning simply can’t deliver.
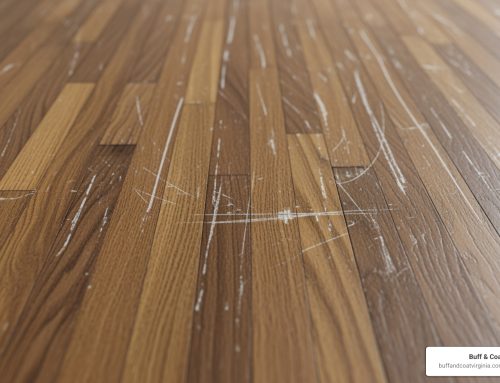
Finish protection is the big one. Those embedded particles act like tiny pieces of sandpaper every time someone walks across your floor. Day after day, they gradually wear down your floor’s protective finish. Deep cleaning removes these abrasive particles before they cause permanent damage.
I’ve seen this in hundreds of Richmond homes – floors that receive regular deep cleaning can go 3-5 years longer before needing refinishing. That’s thousands of dollars staying in your pocket.
Allergen removal is where deep cleaning really shines for your family’s health. Professional deep cleaning removes an average of 96% of common household allergens from hardwood floors. These allergens get trapped in the wood grain and between boards, creating a hidden reservoir that regular vacuuming can’t touch.
Resale value protection is the long-term payoff. Well-maintained hardwood floors add significant value to your home, but only if they look well-maintained. Deep cleaning preserves the wood’s natural beauty and prevents that telltale dulling that makes floors look old and worn.
Pre-Clean Prep: Know Your Floor & Gather Gear

Success with deep cleaning hardwood floors starts before you even touch your mop. I’ve seen homeowners damage beautiful floors simply because they didn’t know what type of finish they were working with.
Your first step is becoming a floor detective. Most modern hardwood floors have a sealed polyurethane finish, but don’t assume yours does. Try this water test: drop a small amount of water in a corner. If the water beads up, you have a sealed floor. If it soaks in within minutes, you’re dealing with an unsealed floor that needs gentler treatment.
Solid hardwood is one piece of wood from top to bottom. Engineered hardwood has multiple layers. Both clean the same way, but engineered floors are more sensitive to moisture, so work faster and use less water.
Finish type makes all the difference. Polyurethane finishes (most common) can handle water-based cleaners. Oil-based finishes need pH-neutral cleaners that won’t strip the protective coating. Wax finishes are pickiest – they hate water-based cleaners and need special care.
For your cleaning arsenal, you’ll need a microfiber mop with replaceable pads, a soft-bristle vacuum attachment, and a good pH-neutral hardwood cleaner. Don’t forget clean microfiber cloths, furniture pads, and fans to speed drying.
Here’s what you must avoid: steam cleaners. Consumer Reports research proves that steam forces moisture into wood seams, causing warping and finish damage even on sealed floors. I’ve seen thousands in damage from well-meaning homeowners who thought steam would give them a deeper clean.
Safe Solutions & DIY Mixes
Commercial hardwood cleaners take the guesswork out of deep cleaning hardwood floors. They’re formulated specifically for wood and won’t break down your finish over time.
If you prefer mixing your own solutions, diluted vinegar works well – mix half a cup of white vinegar with a gallon of warm water. Only use this on sealed floors, and test it somewhere hidden first. Mild dish soap is another safe option: just one tablespoon in half a gallon of water.
What should you never use? Undiluted vinegar will eat away at your floor’s finish. Ammonia-based cleaners are too harsh. Oil soaps leave buildup on polyurethane finishes that attracts more dirt. Never use bleach or other harsh chemicals.
For proper dilution ratios and safety guidelines, the American Cleaning Institute has excellent resources. When in doubt, stick with commercial cleaners designed for hardwood floors.
Step-by-Step Guide to Deep Cleaning Hardwood Floors

After years of restoring floors, I’ve refined this process to give you professional results without the professional price tag. The key to successful deep cleaning hardwood floors is patience and the right technique.
Prep the Surface Before Deep Cleaning Hardwood Floors
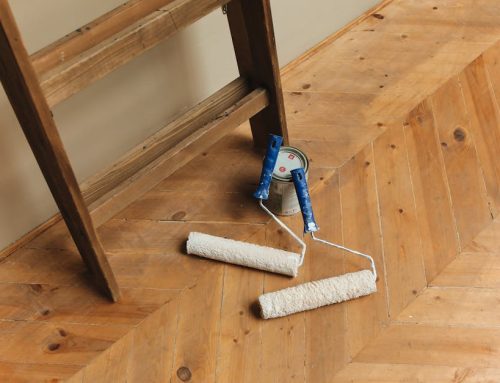
Before you touch that mop, your floors need to be completely clear and debris-free. This prep work makes the difference between okay results and stunning results.
Start by clearing everything out. Move all furniture, area rugs, and anything else sitting on your floors. For massive pieces you can’t budge, slide furniture pads underneath and work around them carefully.
Next, vacuum thoroughly using your soft brush attachment. Pay extra attention to edges where dust bunnies hide and between floorboards where crumbs migrate. Never use the beater bar setting – it’s like using sandpaper on your floors.
Finish with a dry microfiber dust mop to catch anything your vacuum missed. Any leftover particles will just get pushed around during wet cleaning. Better to remove them now.
The 6-Step Method for Deep Cleaning Hardwood Floors
This method has saved countless floors from premature refinishing, and it’ll work wonders for yours too.
Step one is spray mist application. Whether using a spray mop or applying cleaner directly, remember: less is always more. Your floor should look barely damp, not like you’re preparing for a slip-and-slide party.
Work in manageable 4-foot sections to prevent your cleaning solution from drying before you can work it properly. This keeps everything even and prevents annoying streaks.
Always follow the wood grain direction when mopping. Working against the grain pushes dirt deeper into the wood’s natural grooves. With the grain, you’re lifting debris out.
Change those microfiber pads frequently. Once a pad gets dirty, you’re spreading grime around instead of removing it. I usually go through 3-4 pads on an average living room. Clean pads separate amateur from professional results.
Don’t forget the edge work. Use a slightly damp microfiber cloth to clean along baseboards and in corners where your mop can’t reach. For stubborn debris between floorboards, a plastic putty knife works without scratching.
Progress section by section from the farthest corner toward your exit. Plan your route so you’re not walking across freshly cleaned areas.
Drying & Inspecting After Deep Cleaning Hardwood Floors
The cleaning is done, but you’re not finished yet. Proper drying and inspection ensure your floors look perfect and stay healthy.
Get those fans running immediately. Air circulation speeds drying and prevents moisture from seeping into seams. Open windows if weather cooperates. If you see pooled water, grab a clean microfiber cloth and buff it dry right away.
Allow 2-4 hours for complete drying before moving furniture back or walking in street shoes. Humidity and ventilation affect drying time, so adjust accordingly.
Take a final walk-through once everything’s dry. Look for missed spots, streaks, or areas with uneven sheen. Your floors should have consistent, beautiful appearance. If you spot problem areas, now’s the time to touch them up.
The change is always amazing. What started as dull, tired-looking floors now gleam with renewed life. That’s the power of proper deep cleaning hardwood floors.
Tackling Stains, Scratches & Post-Clean Care

Life happens on hardwood floors. Even after thorough deep cleaning of hardwood floors, you’ll face the occasional spill, scratch, or mysterious mark that needs special attention. Most issues are easier to fix than you might think.
Pet stains and odors require immediate action for best results. Enzyme-based cleaners designed for hardwood work best because they break down organic compounds causing the smell. For older stains, try making a paste with baking soda and water. Let it sit for 10-15 minutes to draw out the stain, then wipe clean.
Those frustrating white water rings from glasses often disappear with a simple remedy. Mix equal parts white vinegar and olive oil, apply with a soft cloth, and let it sit for 15 minutes. The oil nourishes the wood while vinegar breaks down mineral deposits. Buff clean with a dry cloth afterward.
Scuff marks from shoes or furniture can usually be removed with surprising simplicity. A clean tennis ball on the end of a broom handle works wonders. For stubborn scuffs, sprinkle baking soda on a slightly damp cloth and gently rub in circular motions.
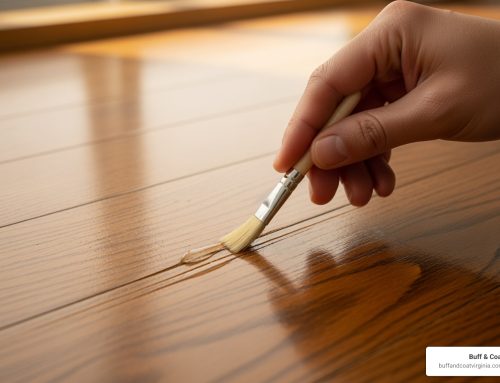
For minor scratches, you have several options depending on depth. Surface scratches often respond well to wood touch-up markers that match your floor’s color. For deeper scratches, wax sticks can fill and hide the damage. Apply the wax, let it set, then buff with a soft cloth. Work with the wood grain, not against it.
Humidity control might not seem related to stain removal, but it’s crucial for preventing future problems. Keep indoor humidity between 35-55% to prevent wood expansion and contraction that creates gaps where dirt and spills can settle.
For more advanced restoration techniques, our guide on buffing hardwood floors between coats offers professional insights into maintaining your floor’s protective finish.
Common Mistakes to Avoid
The biggest mistake I see is over-wetting floors. More water doesn’t mean better cleaning—it means potential disaster. Excess moisture can seep between boards, causing warping, cupping, or finish damage requiring professional repair.
Harsh chemicals are another common pitfall. Ammonia, bleach, and abrasive cleaners might seem like they’d work better, but they strip away your floor’s protective finish. What looks like deep cleaning is actually deep damage.
Steam cleaners deserve special mention. Despite marketing claims, steam can force moisture into sealed wood joints and cause problems even on properly finished floors. The heat breaks down bonds in your floor’s finish.
Skipping proper drying is like doing half the job. Always use fans to circulate air and ensure complete drying before walking on floors with street shoes or replacing furniture.
When to Call a Pro
Some situations need professional attention. Deep gouges that catch your fingernail typically need wood filler and professional refinishing.
Finish failure is another red flag. If water no longer beads up on your floor surface, your protective coating is compromised, leaving raw wood vulnerable to damage.
Large water damage from flooding or major spills often causes boards to warp or cup. This needs professional assessment because it might require board replacement or subfloor repairs.
At Buff & Coat, we see floors that could have been saved with earlier professional intervention. Our dust-free techniques and commercial-grade equipment remove embedded dirt that even thorough deep cleaning hardwood floors at home can’t reach. Our signature buff and coat process restores floors to like-new condition without the expense of full refinishing.
Long-Term Maintenance & Protective Habits

Think of deep cleaning hardwood floors as just the beginning of your floor care journey. The real secret to gorgeous hardwood floors isn’t just the deep clean—it’s what you do every day to protect that investment.
I’ve seen floors that looked brand new after 20 years, and floors that needed refinishing after just 5. The difference? Daily habits that take less than five minutes but save thousands of dollars.
Start with your daily routine. A quick sweep or dust mop in high-traffic areas prevents dirt from getting ground into the wood grain. It’s like brushing your teeth—skip it for a few days, and you’ll notice the difference.
Weekly maintenance means breaking out the vacuum with that soft brush attachment. Focus on edges and corners where pet hair and debris love to hide. Those corners are exactly where dirt builds up and causes long-term damage.
Monthly damp mopping in busy areas keeps your floors looking fresh between deep cleans. Stick to your hardwood-specific cleaner and remember—if you can see puddles, you’re using too much water.
The magic happens with quarterly deep cleaning using the method we covered earlier. This removes embedded grime that monthly mopping can’t touch. Most clients who follow this schedule can go years longer before needing professional refinishing.
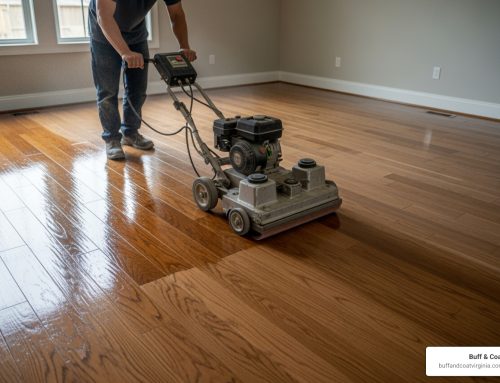
Annual professional care is like taking your car in for a tune-up. Our signature buff and coat service refreshes your floor’s protective finish without the mess and expense of full refinishing. It’s preventive maintenance that pays for itself.
Protection is cheaper than repair. Those little felt pads under furniture legs prevent scratches that can cost hundreds to fix. Area rugs at entrances and high-traffic zones catch dirt before it reaches your floors. These simple steps can double your floor’s lifespan.
Humidity control between 35-55% prevents expansion and contraction that creates gaps and cracks. A simple hygrometer from the hardware store helps you monitor this. Too dry in winter? Add a humidifier. Too humid in summer? Run that air conditioner.
Pet owners need to stay on top of nail trims. Those tiny scratches add up over time, and they’re completely preventable. A shoes-off policy might seem strict, but outdoor shoes track in grit that acts like sandpaper.
For specific product recommendations that won’t damage your floors, check out our guide on the best floor cleaners for different situations.
Homeowners who follow these habits consistently tell me their floors still look amazing after decades. It’s not about perfection—it’s about consistency. A few minutes of daily care prevents hours of deep cleaning and years of premature wear.
Frequently Asked Questions about Deep Cleaning Hardwood Floors
Let me answer the most common questions I hear from homeowners about deep cleaning hardwood floors. After two decades in the business, these same concerns come up again and again.
How often should I deep clean hardwood floors?
Most homes need deep cleaning once or twice a year, but your specific situation matters more than a rigid schedule. I tell my clients to think about their lifestyle first.
If you have kids tracking in mud, dogs running around, or love hosting dinner parties, you’ll probably need to deep clean every 3-4 months. Quieter households with mostly adult traffic can often stretch it to twice yearly – once in spring and once before the holidays.
Here’s my rule of thumb: if your floors look dull even after regular mopping, or if you notice dirt in the wood grain that won’t come up with normal cleaning, it’s time for a deep clean. Don’t wait until the buildup is so bad that you need professional refinishing.
Can I use vinegar or steam on hardwood?
This is probably the question I get asked most, and I understand the confusion. There’s so much conflicting advice out there.
For vinegar: You can use it, but only if you’re careful. Mix just 1/2 cup of white vinegar with a full gallon of water – that’s much more diluted than most people think. Only try this on sealed floors, and always test it in a corner first. I’ve seen undiluted vinegar strip finishes, so please don’t skip the dilution step.
For steam cleaners: This one’s simple – just don’t. I know the marketing makes them sound perfect for hardwood, but steam can force moisture deep into wood seams. Even on properly sealed floors, that heat and moisture can cause warping, dulling, and permanent damage. It’s not worth the risk when safer methods work just as well.
How long until the floor is safe to walk on?
Plan on 2 to 4 hours before your floors are ready for normal foot traffic. I know that seems like a long time, but proper drying is crucial for avoiding water damage.
The actual time depends on your home’s conditions. Good airflow speeds things up dramatically – run fans, open windows if the weather’s nice, and maybe even turn on your HVAC system. High humidity days will take longer than dry ones.
Your floors should feel completely dry to the touch with no tackiness or cool spots before you walk on them with street shoes. Socks are usually fine after about an hour, but give those floors the full drying time they need. Trust me, a few extra hours of patience now saves you from expensive repairs later.
Conclusion

Your hardwood floors tell the story of your home. Every footstep, every family gathering, every quiet morning – it’s all there in the wood. Deep cleaning hardwood floors isn’t just about maintaining appearances. It’s about preserving those memories and protecting one of your home’s most valuable features.
The beauty of proper deep cleaning lies in its simplicity. You don’t need expensive equipment or harsh chemicals. Just the right technique, a little patience, and the commitment to do it regularly. When you remove that embedded dirt and restore your floor’s natural luster, you’re not just cleaning – you’re adding years to your floor’s life.
Think about the cost savings alone. A homeowner who deep cleans their floors twice a year can often delay refinishing by 3-5 years. That’s thousands of dollars staying in your pocket while your floors continue to look stunning.
But the benefits go beyond money. There’s real comfort in knowing your floors are truly clean, with 96% of allergens removed from those hard-to-reach spaces. Your family breathes easier, and you can feel proud of the healthy environment you’ve created.
When regular deep cleaning hardwood floors isn’t enough to restore that original beauty, that’s where our signature buff and coat process comes in. We’ve spent over 20 years perfecting this dust-free technique that brings back your floor’s original shine without the mess and disruption of full refinishing.
Your floors have been there for you through everything. Now it’s time to be there for them. With the techniques you’ve learned today, you have everything you need to keep them beautiful for decades to come. For the complete picture of long-term care, check out our guide on the impact of proper hardwood floor maintenance.
Great floors aren’t born – they’re maintained. Your investment in proper care today ensures your hardwood floors will continue telling your family’s story for generations to come.