Why Wood Floor Finish Repair Saves You Time and Money
Wood floor finish repair is often the smartest solution for damaged hardwood floors. It allows you to restore their beauty without the cost and disruption of a full refinishing project. As a leading provider of hardwood floor services in Richmond, we’ve seen how targeted repairs can make a huge difference. Most homeowners can tackle minor finish damage, but the key is knowing whether the issue is just on the surface or has penetrated the wood.
Quick Assessment Guide:
- Surface scratches & scuffs: Spot repair with matching polyurethane.
- Peeling or worn finish: Light sanding and recoating.
- Minor water spots: Clean, sand lightly, and apply new finish.
- Deep gouges into wood: May need professional attention.
- Widespread damage: Consider full refinishing.
Surface-level issues like light scratches, scuffs, and dull spots respond well to DIY methods. However, deep damage, extensive wear, or mismatched repairs often require expert intervention to avoid costly mistakes.
I’m David Emmerling, and with over 20 years of experience in wood floor finish repair, I’ve helped thousands of homeowners bring their floors back to life through my company, Buff & Coat. We’ve seen every type of finish damage and know which repairs work best.

Wood floor finish repair vocab explained:
First, Assess the Damage: Is Spot Repair Right for You?

Before starting any wood floor finish repair, you must correctly identify the problem. Think of your floor’s finish as a protective wrapper. Most everyday wear only affects this top layer, which is great news for a simple fix. The key question is: Are you dealing with finish damage or wood damage? Run your fingernail across a scratch. If it doesn’t catch, it’s likely just finish damage and perfect for a DIY spot repair. If it catches or looks lighter than the surrounding wood, the damage has reached the wood itself.
Your floor type also matters. Solid hardwood can handle multiple sandings, while engineered hardwood has a thinner wear layer, limiting aggressive repairs. If you’re unsure about extensive damage, it’s wise to consult a professional.
Common Types of Finish Damage
These issues typically respond well to spot repairs:
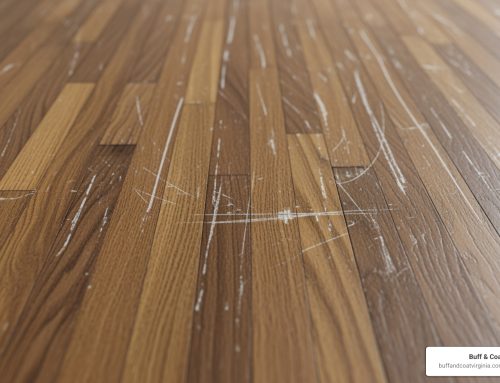
- Surface scratches: Light marks from furniture or foot traffic that only affect the top finish layer.
- Scuffs: Dull streaks from rubber-soled shoes or chair legs that disrupt the surface sheen.
- Peeling finish: Flakes or bubbles where the coating has lost its grip due to age or moisture.
- Dulling in high-traffic areas: The finish wears thin in places like hallways and entryways, looking flat and lifeless.
- Minor water spots: Hazy surface marks from spills that haven’t penetrated the wood.
- Chemical stains: Discoloration from cleaning products or other chemicals reacting with the finish.
Deep Damage vs. Finish Damage
These situations may require more than a simple spot repair:
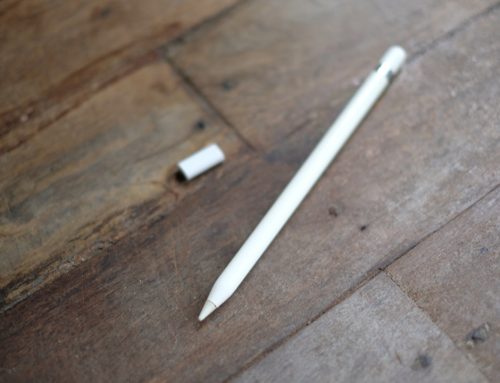
- Scratches that penetrate the wood: These appear as lighter lines against the stain color and may need filling.
- Gouges: Dents or chips from dropped objects that require wood filler before refinishing.
- Deep water stains: When wood turns dark brown or black, water has penetrated the fibers, often requiring sanding to bare wood. For more details, see our guide on Hardwood Floor Water Damage.
- Warping or buckling: A structural issue caused by moisture absorption that requires board replacement, not just finish repair.
When damage is widespread, a complete Hardwood Floor Refinishing Complete Guide is more effective than countless spot repairs. Thankfully, most everyday damage is finish-level, allowing you to restore your floors without the expense of full refinishing.
Gather Your Arsenal: Tools and Materials for the Job

A successful wood floor finish repair requires having the right tools and materials ready. Safety first: wear safety glasses and gloves. For the repair, you’ll need fine-grit sandpaper (150-320 grit), a sanding block, tack cloth for dust removal, and mineral spirits for cleaning. For deeper scratches, have wood filler and a putty knife on hand. For application, use artist’s brushes for precision and a foam brush for larger areas. The most critical item is a matching polyurethane finish.
Identifying Your Floor’s Finish
Matching your existing finish is crucial for an invisible wood floor finish repair. The main question is whether you have water-based or oil-based polyurethane. Water-based finishes dry clear, while oil-based ones have a warm, amber glow that deepens with age. A simple test: dab denatured alcohol in a hidden spot. If it softens, it might be shellac; if not, it’s polyurethane. The visual cue of color (clear vs. amber) is often the best indicator.
Sheen level is also vital. Your floor could be matte, satin, semi-gloss, or gloss. Wear can dull the original sheen over time. Getting the sheen right is essential for a successful Hardwood Floor Scratch Repair.
Choosing the Right Repair Products
Several products can help with targeted repairs. Stain markers are great for minor surface scratches, adding color to help them blend. For deeper gouges, wax filler sticks can be melted to fill the void. Polyurethane pens are perfect for fine-line scratches. For larger worn areas, you’ll need canned polyurethane finish in the correct type and sheen.
My golden rule: always test any product in a hidden area first, like a closet corner. This ensures your color and sheen match before you commit to a visible repair. For a deep dive into products, check out our Hardwood Floor Scratch Filler: Ultimate Guide. With the right materials, your repair will blend seamlessly.
The Step-by-Step Guide to Wood Floor Finish Repair

With your tools gathered, it’s time to perform the wood floor finish repair. This process requires patience and precision, but the results are worth it. Rushing these steps can lead to an obvious patch job, so take your time to create a seamless repair.
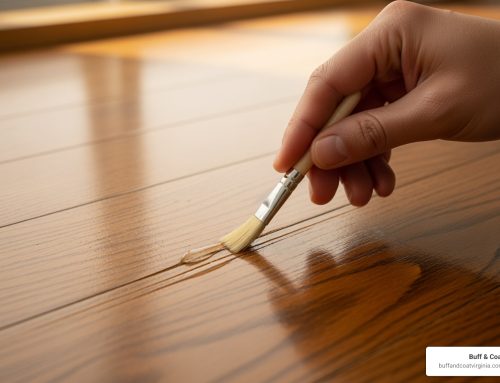
Step 1: Prepare the Surface for a Flawless Wood Floor Finish Repair
Proper surface preparation is the most critical step for a professional-looking repair.
- Clean Thoroughly: Vacuum the damaged area and about six inches beyond it. Wipe it down with a cloth dampened with mineral spirits to remove any grease or grime. Let it dry completely.
- Isolate the Area: Use painter’s tape to protect the surrounding floor, but remember you’ll need to blend beyond the tape line.
- Abrade the Surface: For light scuffs, a green dish scrubbing pad works well. For worn or peeling finish, use 220-grit sandpaper on a sanding block with even pressure. The goal is to create a surface the new finish can adhere to.
- Feather the Edges: Extend your sanding about an inch into the undamaged finish, using lighter pressure as you move outward. This creates a gradual transition, preventing a hard line.
- Remove All Dust: Vacuum the area again, then wipe it with a tack cloth. Even the smallest dust particle can create a bump in your new finish.
Step 2: Apply and Blend the New Finish
Now you can bring your floor back to life. The key is building thin layers and blending them perfectly.
- Test First: Always apply your finish in a hidden spot (like a closet) to confirm the sheen match.
- Apply Thin Coats: Use an artist’s brush for small spots or a foam brush for larger areas. Apply a very thin first coat; don’t try for full coverage at once.
- Feather Brushstrokes: As you finish each stroke, gently lift the brush toward the existing finish to create a paper-thin edge that blends in.
- Build Layers: Let each coat dry completely per the manufacturer’s instructions. Between coats, lightly scuff the surface with 320-grit paper or a scrubbing pad to remove any dust nibs, then wipe with a tack cloth.
- Blend the Final Coat: Your final coat should extend slightly beyond the repair area into the feathered, undamaged finish. This unifies the sheen and makes the repair disappear. It may take 3-4 coats on the main repair area to match the surrounding finish thickness.
Avoiding Pitfalls: Pro Tips for a Seamless Repair
Even a well-intentioned wood floor finish repair can go wrong. After two decades of fixing floor disasters, I’ve learned that most mistakes are avoidable if you know what to watch for.
-
Over-sanding: This is the most common DIY mistake. Using too much pressure or a coarse grit can remove the stain, creating a light spot that’s hard to hide. Use fine grits (220 or higher) and a gentle touch. You’re performing surgery, not demolition.
-
Dust Contamination: Any dust left on the surface will be trapped in your new finish, creating a rough texture. Use a tack cloth carefully before applying each coat and minimize air movement in the room while the finish is wet.
-
Mismatched Sheen: Even if you buy the correct sheen (e.g., satin), it might not perfectly match your aged floor. This is why testing in a hidden spot is non-negotiable. If a cured repair is too glossy, you can try to dull it carefully with 0000 steel wool.
-
Rushing the Process: Applying a new coat before the previous one is fully cured can cause bubbling and a soft finish that won’t last. Always follow the manufacturer’s recommended drying times.
-
Improper Disposal of Materials: This is a critical safety issue. Rags soaked in oil-based finishes can spontaneously combust if wadded up. Always spread them flat to dry outdoors or submerge them in water in a sealed metal container. The National Fire Protection Association has guidance on safe disposal.
For those interested in advanced techniques, Hardwood Floors Magazine offers great insights into color theory and blending. The key to avoiding these pitfalls is patience, testing, and knowing when a job is best left to a professional.
When DIY Isn’t Enough: Knowing When to Call a Professional

There’s great satisfaction in a successful DIY wood floor finish repair, but it’s equally important to recognize when a project is too big to handle alone. Sometimes, trying to fix a major issue can make it worse and more expensive to correct.
Here are clear signs it’s time to call a professional:
-
Extensive Damage: If you have widespread peeling, multiple deep gouges, or large worn-out sections, spot repairing becomes inefficient. A full restoration will yield better, more uniform results.
-
Deep Gouges and Structural Issues: Damage that penetrates deep into the wood, or causes boards to warp or buckle, requires specialized tools and expertise. These are structural problems, not just finish issues.
-
Widespread Water Damage: While you can fix minor surface spots, significant water damage that causes cupping, crowning, or dark discoloration needs a professional assessment with moisture meters to determine if boards can be saved.
-
Desire for a Perfect, Uniform Finish: For a flawless, factory-like finish across an entire room, professional equipment and experience are best.
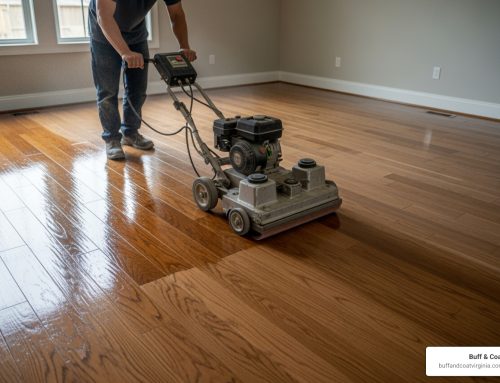
If you’re in our service area, we offer comprehensive hardwood repair solutions in Richmond, VA for any situation. Our signature Buff and Coat process is especially effective for floors with general wear and dullness. We use advanced, dust-free techniques to restore your floor’s beauty without the mess of traditional sanding.
Knowing when to call for backup is priceless wisdom that can save you time, money, and frustration in the long run.
Frequently Asked Questions about Wood Floor Finish Repair
Here are quick answers to the most common questions I hear about wood floor finish repair.
Can minor scratches on wood floors be repaired without refinishing the entire floor?
Absolutely. Most minor scratches and scuffs only affect the top finish layer and are perfect candidates for spot repair. You don’t need to refinish the entire floor for a few isolated marks. Even slightly deeper scratches can often be spot-repaired without resorting to a full sanding project.
How can you blend a repaired section of wood floor finish with the surrounding area?
The secret is feathering. When sanding, lightly sand the edges of the repair into the surrounding good finish to create a gradual transition. When applying the new finish, use light brushstrokes that extend slightly beyond the sanded area, lifting the brush at the end of each stroke to create a thin, blended edge that disappears.
What is the best way to match the sheen of a spot repair to the original finish?
Matching sheen is tricky but crucial. First, identify your floor’s sheen (matte, satin, semi-gloss, etc.). Then, always test your new finish in a hidden area, like a closet, before applying it to the visible repair. Finishes can vary by brand and change with age, so a test patch is your best insurance against a mismatched spot.
Restore Your Floors with Confidence
You now have the knowledge to tackle wood floor finish repair with confidence. Changing a scratched, dull floor into a gleaming surface is a rewarding home improvement victory.
Remember these key takeaways:
- Assess Wisely: Know if you’re dealing with surface damage or deeper issues.
- Prepare Carefully: Thorough cleaning and proper sanding are non-negotiable.
- Apply Patiently: Use multiple thin coats for a smooth, professional result.
- Blend Strategically: Use feathering techniques to make your repair invisible.
To keep your floors looking great, use furniture pads, clean regularly, and wipe up spills immediately. While DIY repair is great for small areas, some jobs need a professional touch. For extensive damage or a guaranteed perfect finish, professional refinishing is the best choice.
At Buff & Coat, our dust-free refinishing process has restored countless floors in the Richmond area. We understand the nuances that deliver spectacular results. Ready to see what our experts can do for your floors? Contact us today to schedule your free inspection and estimate. You’ll get honest advice on the best path forward for your beautiful hardwood floors.