

Home Blog Wax Removal from Hardwood Floors: A Richmond Guide
Wax Removal from Hardwood Floors: A Richmond Guide

A lot of Richmond homeowners end up in the same spot. The floor looks cloudy, smudged, or oddly white in the afternoon light, so they grab vinegar, a steam mop, or another bottle from the hardware store and hope for a quick fix.
That usually makes wax removal from hardwood floors harder, not easier. If you know how to identify wax buildup early, and you know when to stop with DIY cleaning and move to professional hardwood floor refinishing or a buff and coat service, you can protect the original floor instead of accidentally shortening its life.
Identifying Wax Buildup on Your Hardwood Floors
A floor can look worn and still be carrying a layer of old polish, wax, or acrylic residue on top. That misread sends people in the wrong direction fast. I see it in Richmond houses all the time, especially where the floors have been cleaned by different owners, tenants, or contractors over the years.
In our experience working on older homes around the Fan, Museum District, Bellevue, and the Near West End, the surface often tells a mixed story. The original finish may be thinning in traffic lanes, while a store-bought shine product is also leaving film across the top. Those are two different problems, and they do not get fixed the same way.
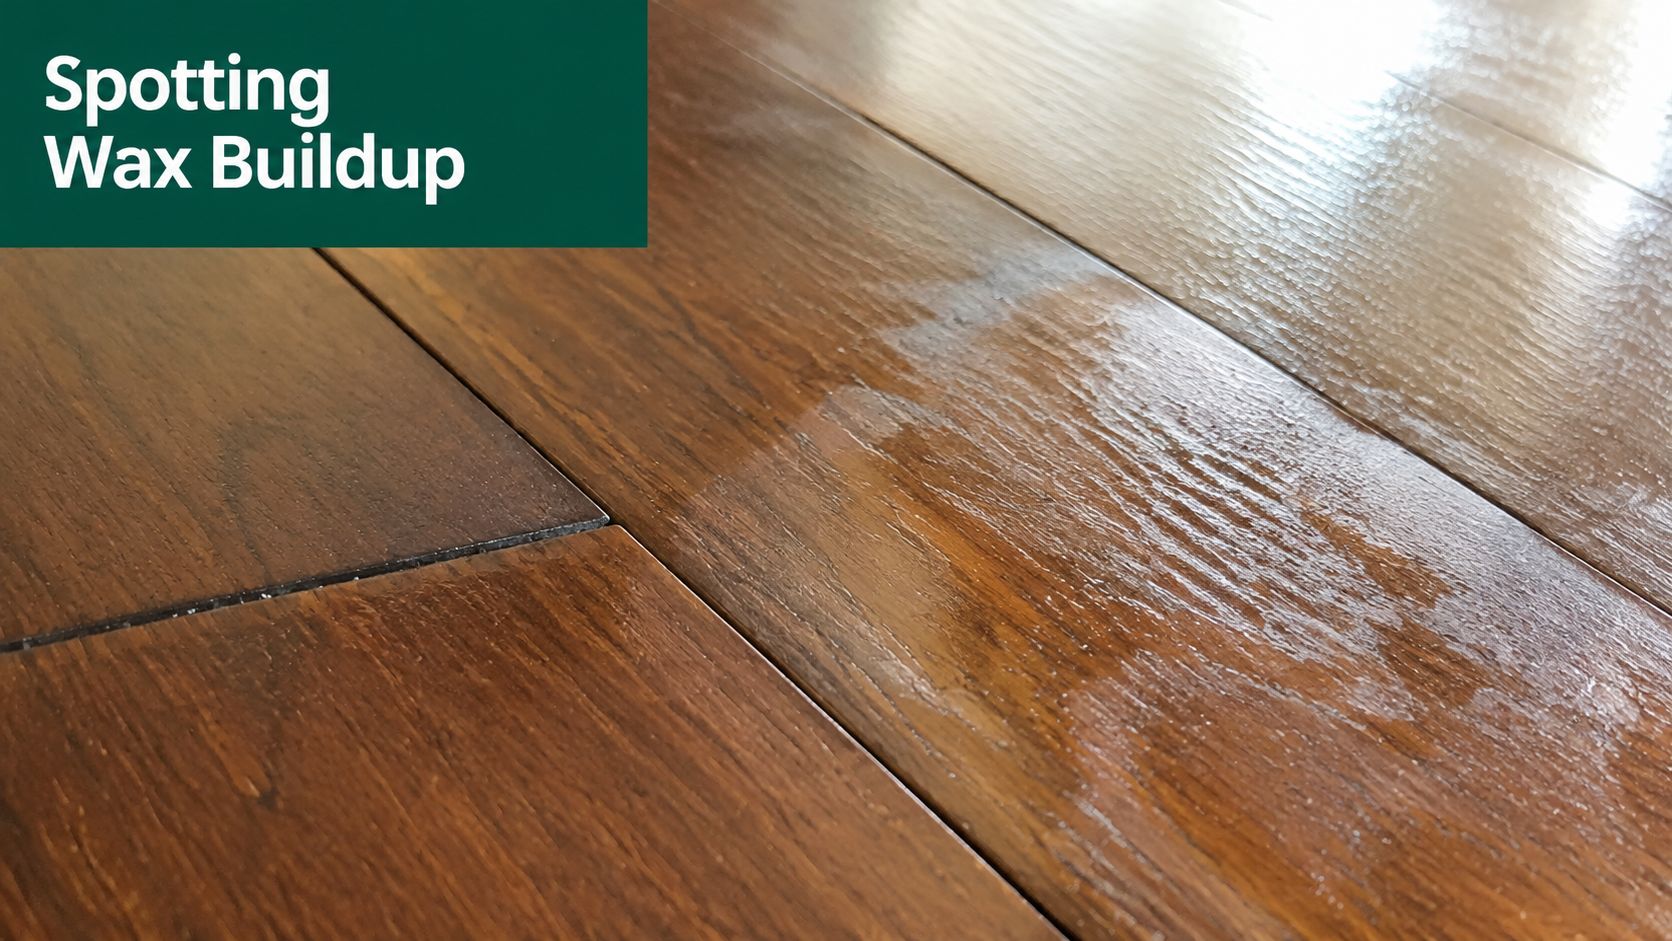
The first clue is usually a cloudy or milky film that stays put after normal cleaning. Another common sign is a floor that looks better for a few minutes after mopping, then goes right back to hazy once it dries. Products sold as “restorers” or “polish” can leave that look behind, especially if they were applied over an existing urethane finish instead of a true waxed floor.
Signs that point to buildup, not just wear
A worn finish usually shows up where people walk most. You see dull lanes, light scratching, and areas that have lost protection. Buildup acts differently because it sits on top of the finish instead of wearing through it.
Look for these clues:
- Smudges that return after cleaning
- A sticky or draggy feel under socks or bare feet
- White haze in angled sunlight near windows or doors
- Patchy shine where one board looks glossy and the next looks flat
- Residue along baseboards, corners, or board edges where product collects and never gets fully removed
If the floor looks dull but the cause is unclear, this guide on how to fix dull hardwood floors can help you separate finish wear from surface contamination.
Two simple at-home checks
Start with a small test area in a closet or another low-visibility spot. That gives you useful information without creating a repair in the middle of the room.
One check is a light water spot test. Place a few drops on the surface and watch what happens. If the water sits briefly and leaves a pale mark or reacts with the top layer, that can point to wax or another surface treatment rather than bare finish wear. Wipe it up right away.
You can also try a very careful fingernail check in an inconspicuous area. Lightly scrape the surface. If a soft film lifts, gums up, or shifts on top, there is usually an added layer above the original coating.
Use restraint here. Aggressive scraping, harsh solvents, or “green” cleaners chosen at random can do more harm than the residue itself. If you prefer lower-impact products for routine maintenance, this 2026 guide to sustainable cleaning is a better place to start than internet floor hacks.
Why the diagnosis matters
Improper assessment leads to lost time and money. A floor with buildup may respond well to careful removal and a Buff & Coat. A floor with finish failure may need a different restoration path. A floor coated with acrylic polish can become much harder to correct if someone keeps layering on cleaners to chase shine.
That matters even more in Richmond homes with original hardwood. Once moisture, abrasion, or the wrong chemical softens the surface, a simple cleanup can turn into board-level repair or a full refinish. If you are not sure whether you are looking at wax, acrylic residue, or finish wear, stop testing and get a professional opinion before you start stripping anything.
The Hidden Dangers of Common Floor Cleaning Hacks
A Richmond homeowner sees a dull, sticky film on original oak floors, grabs vinegar, a steam mop, or whatever promises quick shine, and means well. I've seen that choice turn a manageable cleanup into finish damage, swollen edges, and a much more expensive repair path.
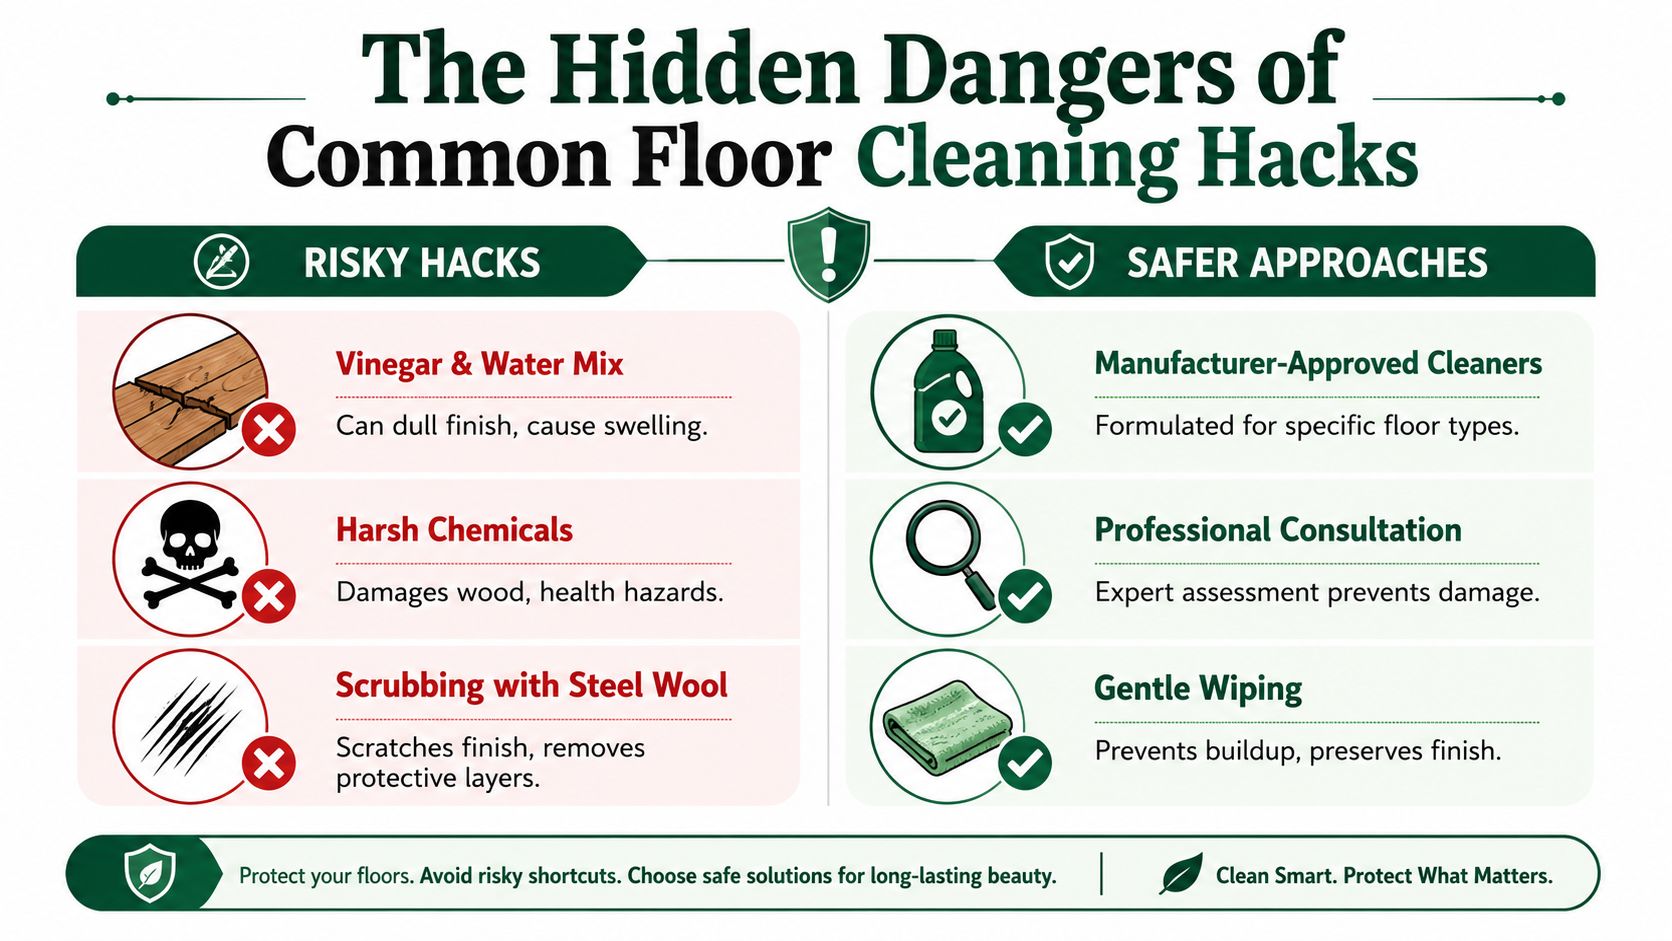
Wax and polish buildup need controlled removal. Popular shortcuts usually do one of three things. They smear residue, soften part of the surface without fully lifting it, or drive moisture and heat where hardwood does worst.
Why vinegar and soap mixes fall short
A common myth is that vinegar and water can “cut” wax. On hardwood, that advice overlooks the underlying issue. Wax, acrylic polish, cleaner residue, and failing finish do not respond the same way, so one kitchen-mix solution is a gamble.
In the field, vinegar mixes and oil soaps often leave floors looking better for a few minutes because the surface is wet and the haze is temporarily muted. Once the floor dries, the film usually shows back up. In some cases, the residue gets spread into a larger area, which makes later correction slower and more expensive.
That risk is higher in older Richmond homes with original floors. Many of those floors have already been screened, recoated, spot-repaired, or cleaned with years of mixed products. Adding acidic or soapy residue to an already layered surface can make diagnosis harder, not easier.
Steam mops can create damage you cannot wipe away
Steam is one of the fastest ways to turn a floor-cleaning problem into a floor-restoration problem.
Heat and moisture can cloud the finish, open board seams, raise edges, and push movement into older wood that already deals with Richmond humidity swings. If the floor has wax or polish on top, steam also tends to soften and redistribute that layer instead of removing it cleanly. The result is often a patchy, gummy mess.
I'm especially cautious with prefinished boards, older site-finished floors, and any floor near vents, exterior doors, or sunny windows. Those are the areas where stress shows up first.
Abrasive fixes are just as risky
Steel wool, harsh scrub pads, and aggressive “magic” cleaners can scratch through the topcoat before they solve the buildup. Once that happens, the floor stops being a cleaning issue and starts being a finish-repair issue.
That is the trade-off homeowners should understand. Safe cleaning protects value. Random hacks can strip value out of original hardwood surprisingly fast.
What to use for routine care instead
Routine maintenance should be boring. That is a good thing.
Use a product made for your floor type, a microfiber pad that is only lightly damp, and as little liquid as possible. If you want to simplify the rest of your cleaning routine too, this 2026 guide to sustainable cleaning is a useful reference. For wood-floor-specific upkeep, start with these best wood floor cleaners for safe regular maintenance instead of social media shortcuts.
A few habits prevent a lot of damage:
- Skip steam on hardwood. Heat and moisture are a bad combination for wood and finish.
- Skip abrasive pads. Scratches can force a bigger repair.
- Skip gloss-restoring mystery products. Many leave behind another layer to remove later.
- Use controlled moisture only. Wet mopping is one of the oldest ways to shorten a floor's life.
If the floor already looks cloudy, sticky, or uneven after repeated cleaning, stop experimenting. That is usually the point where DIY starts risking permanent damage, and a professional Buff & Coat service may be the better value.
A Safe Step-by-Step DIY Method for Wax Removal
A careful DIY attempt only makes sense in a very specific situation. The residue should be light, limited to a small area, and more like old paste wax than a thick acrylic shine product. In Richmond's older homes, that distinction matters. Original floors can hold decades of unknown cleaners and coatings, and one bad experiment can turn a cleanup job into finish repair.
I tell homeowners to treat this as value protection, not just stain removal. If the floor has broad cloudy patches, a tacky feel, or a plastic-looking film, stop before you start. Those are the floors we often see after DIY attempts failed because the buildup was never really wax to begin with.
Set up the job the right way
Good prep keeps a small test from becoming a bigger problem.
- Open windows and get airflow moving. Mineral spirits need ventilation, especially in tight rooms and older houses with less air movement.
- Wear gloves. It keeps the solvent off your skin and helps you work slower and cleaner.
- Pick a hidden test spot first. A closet, under a bed, or along an inside wall gives you a safer read on how the floor will react.
- Use gentle tools only. A plastic scraper, white cloths, and a small amount of mineral spirits are safer than metal blades, scrub pads, or anything that dumps liquid onto the wood.
If your plan involves soaking the floor, it is the wrong plan.
A safe test method for light residue
Keep the first test area small, about a square foot or less.
- Dampen a soft cloth with a small amount of mineral spirits. Do not pour it on the floor.
- Rub lightly with the grain and watch the cloth. Old wax usually transfers as yellow or brown residue.
- If the film softens, lift it carefully with a plastic scraper held nearly flat so you do not gouge the finish.
- Wipe the area again with a clean cloth.
- Dry it fully and give it a few minutes before judging the result.
That pause matters. A floor often looks better while it is still damp from solvent. What you want to see after it dries is a real change in haze, not a temporary change in sheen.
Know when DIY has reached its limit
The biggest mistake is assuming more effort will solve the problem. Sometimes it does the opposite. More rubbing can dull the finish, create shiny and dull patches, or smear softened residue into the grain lines.
Stop the DIY attempt if you notice any of these:
- The cloth stays mostly clean and the haze does not change
- The buildup feels hard or plastic-like
- The affected area spreads across the room
- Your test spot looks uneven compared with the surrounding boards
- You do not know the floor's finish history, especially in an older Richmond home
That last one is a real trade-off. On a newer floor with a known finish, a cautious test is usually low risk. On an older floor with layers of unknown products, the safer move is often getting a second opinion from local hardwood floor refinishers who can identify whether the floor needs recoating or a bigger repair.
A good DIY wax removal test should make the floor look cleaner without changing the finish itself. If the result is patchy, streaky, or uncertain, stop there. That is usually the point where a professional Buff & Coat service costs less than fixing avoidable damage later.
When to Call a Professional for Wax Removal in Richmond
You wipe the floor, the haze lightens for a few minutes, then the white cast comes right back by the next day. In a lot of Richmond homes, especially the older ones with original oak, that is the point where a home fix starts turning into a restoration decision.
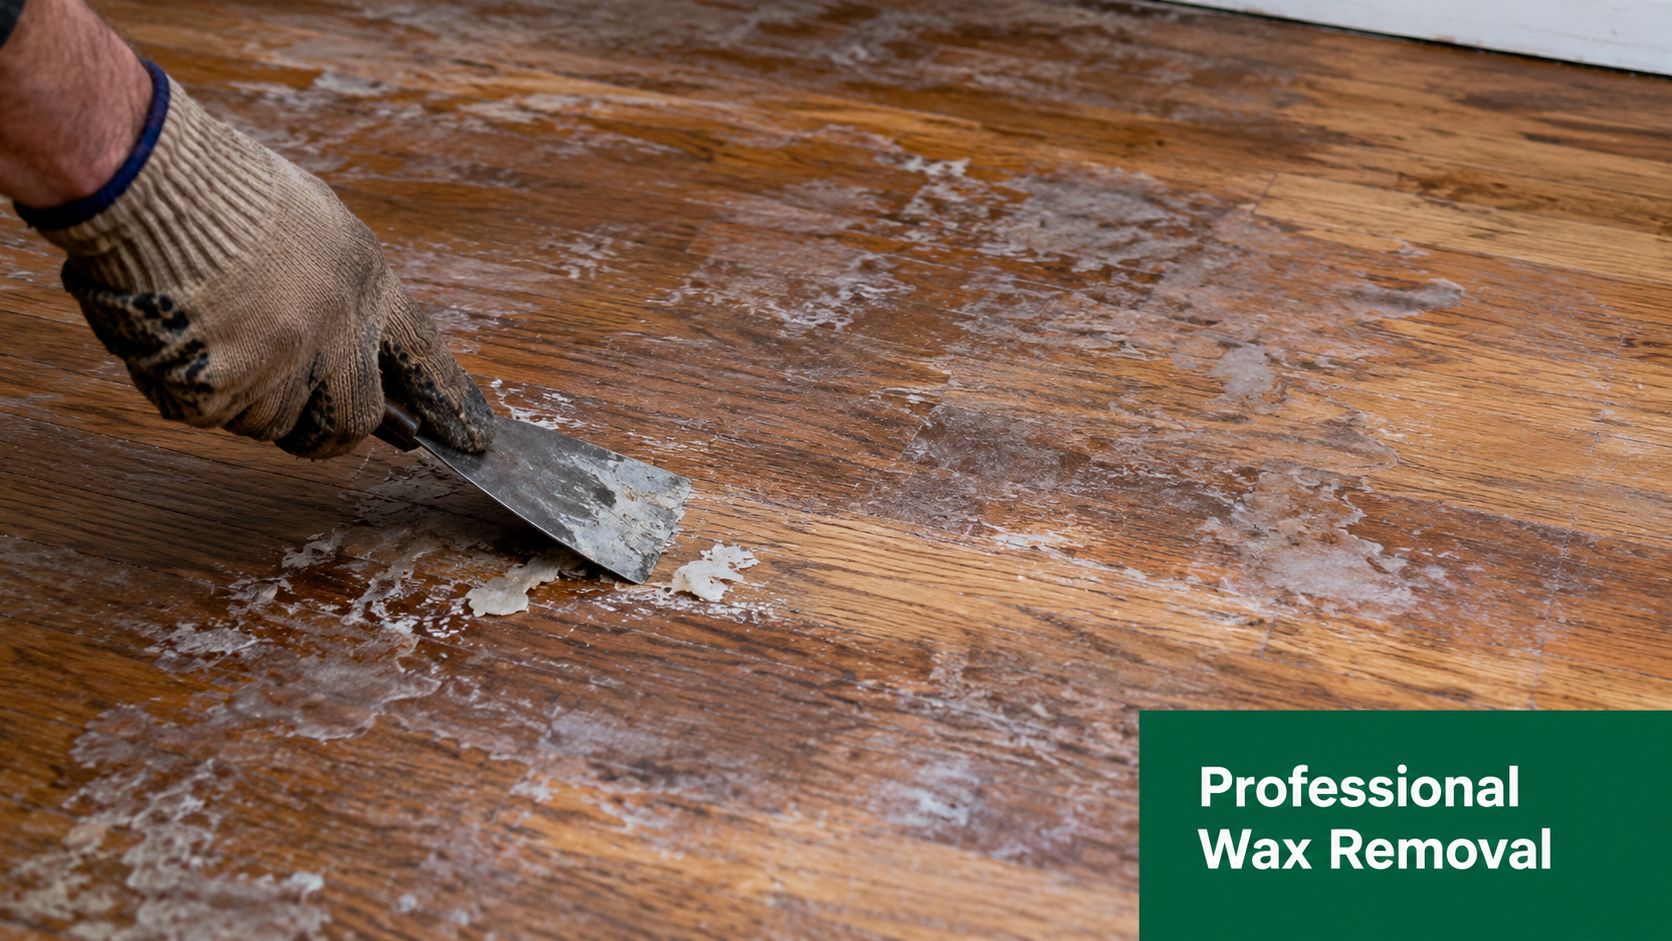
Some of the worst buildup I see is not traditional paste wax at all. It is a hardened acrylic film left behind by shine-restoring products used over and over. Once that film bonds to the existing finish, household solvents may smear it, dull it, or partly soften it without removing it evenly. That is how a floor goes from cloudy to blotchy fast.
The floors that usually need pro help
Professional help usually makes sense when the problem has moved past a small test area and into whole-floor correction.
A pro is the safer call when:
- The haze runs wall to wall, not just near an entry or spill spot
- Acrylic gloss products have been used more than once
- The floor still looks cloudy after careful cleaning and drying
- Your test area dries uneven or patchy
- You are getting the house ready for sale, rental turnover, or other value-sensitive work
- The floor is original and the finish history is unknown
That last point matters in Richmond. In older Fan, Museum District, and Near West End homes, I would rather protect good old boards than gamble on a shortcut. Vinegar, steam, aggressive scrubbing, and random internet hacks can turn a removable surface problem into finish damage that costs more to correct.
Professional stripping, buff and coat, and sanding are different jobs
Terms like screen and recoat and sandless refinishing are often confused, but they are not the same.
Professional wax or acrylic removal focuses on getting contamination off the surface so the floor can be evaluated properly. A buff and coat service abrades the existing finish lightly and applies a fresh coat, but only after the floor is clean enough for that new coat to bond. Full sanding removes the finish down to bare wood and is the right call when there is deeper wear, black staining, pet damage, or finish failure.
Here is the trade-off. If the floor only has buildup on top, jumping straight to sanding may be more work and expense than necessary. If contamination is still present, applying a new coat over it usually locks the problem in place and can cause peeling or poor adhesion later.
When getting a second opinion saves money
Call a professional when you are no longer trying to clean a floor. You are trying to preserve it.
That is especially true if the floor has sentimental value, original character, or real resale value. A careful inspection from local hardwood floor refinishers who can tell whether your floor needs wax removal, a buff and coat, or full sanding can keep you from spending money in the wrong direction.
If the white cast keeps returning, the test spots look worse than the rest of the room, or you suspect old product layers have built up for years, stop there. At that stage, the smart choice is usually restoring value, not risking permanent damage for one more DIY attempt.
Our Dust-Free Wax Stripping and Floor Restoration Process
A lot of Richmond floors look worse than they are. I see that often in older Fan, Museum District, and Near West End homes where original oak has been covered with years of wax, polish, and cleaner residue. Once that film is removed the right way, the floor usually tells the truth. Sometimes that truth is encouraging. Sometimes it shows wear that a simple cleanup will not fix.
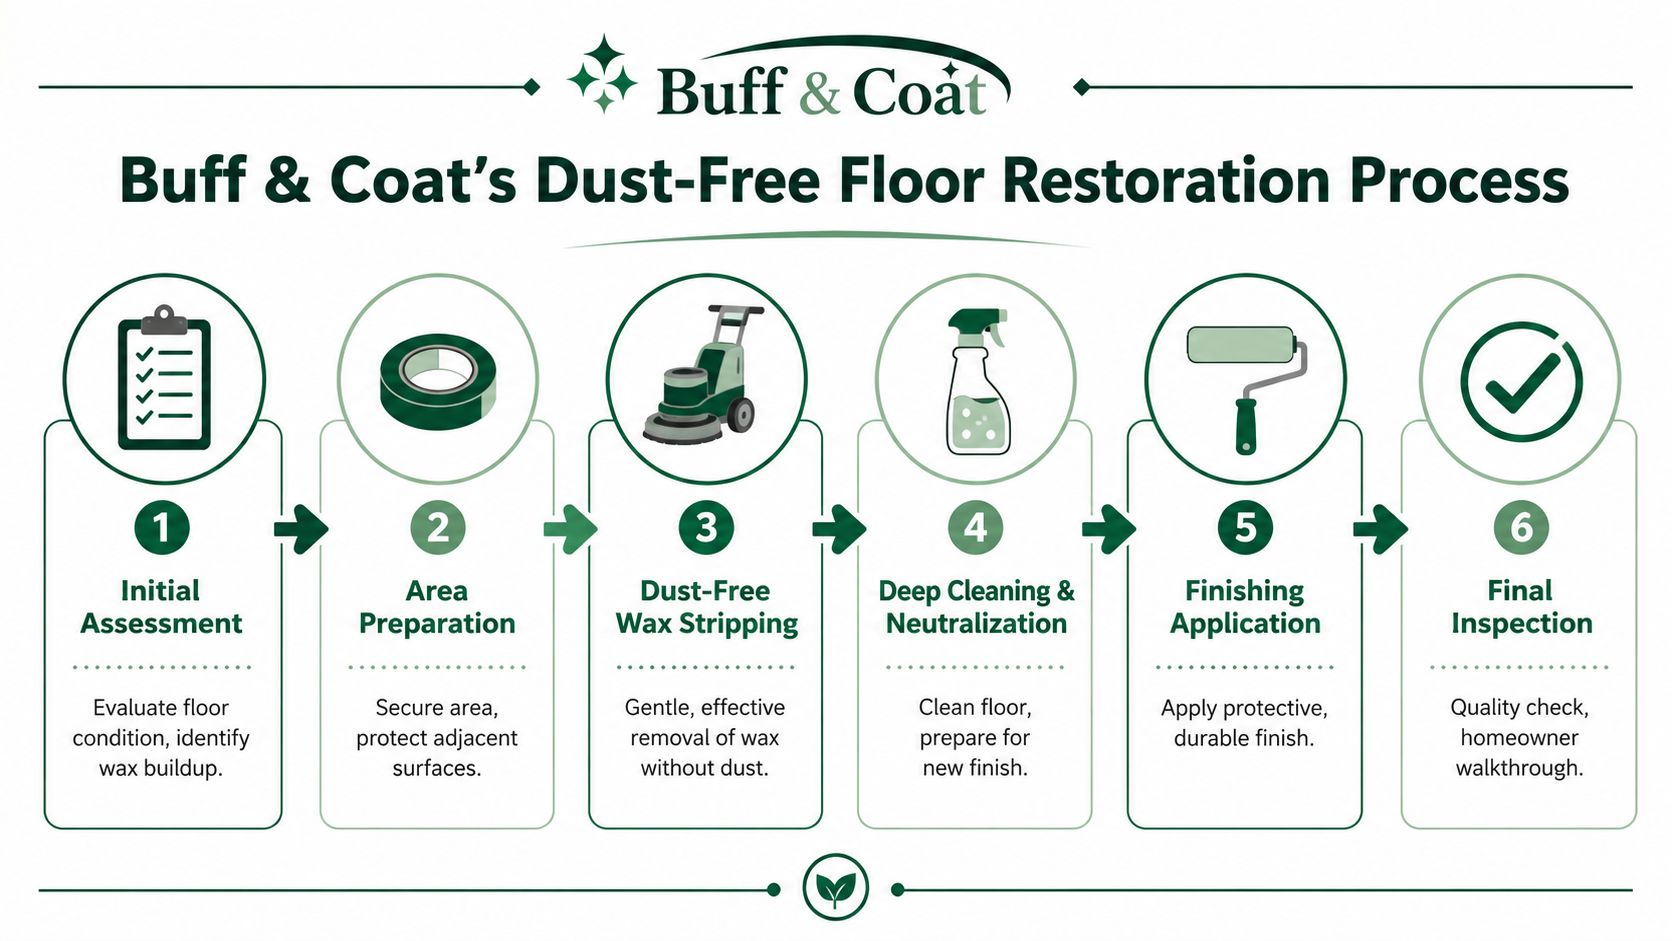
How the stripping process works
Our approach is built around one goal. Remove the contamination without creating a second problem.
That matters because a lot of popular DIY shortcuts do the opposite. Vinegar can dull certain finishes. Steam can force moisture into joints and weak spots. Aggressive scraping can cut into the finish and turn a buildup issue into a refinishing job. On older Richmond hardwood, that is a poor trade.
A professional sequence usually looks like this:
Assessment of the surface
We check whether the haze is wax, acrylic polish, worn finish, or a combination. That determines whether the floor can be cleaned and recoated, or whether it needs a more involved restoration plan.Application of the right stripping agents
We use professional emulsifiers made for floor contamination, not household degreasers or acidic cleaners. The point is to soften and release the buildup so it can be removed evenly.Controlled machine agitation
A buffer or scrubber works the product across the surface at a consistent pressure. That gets residue loose without the uneven gouging that hand scraping often leaves behind.Liquid extraction
The slurry is pulled off the floor instead of spread from board to board. This step is one of the big differences between safe professional work and a DIY attempt that just smears dissolved wax into the grain lines and edges.Drying and inspection
Once the residue is gone, we inspect the actual finish. That is when you find out whether the floor is a candidate for a recoat, a Buff & Coat, or full sanding.
If you want a homeowner-level overview before deciding how far to go, these hardwood floor wax removal tips are a useful starting point. However, the key value comes from matching the method to the floor in front of you.
Why dust control matters during restoration
Some floors stop at stripping and cleaning. Others need more.
If sanding is part of the fix, dust control matters for practical reasons, not marketing reasons. Good dust-contained sanding systems pull debris at the machine, which helps keep fine dust out of adjacent rooms, HVAC returns, furniture, and drapes. The difference is especially noticeable in occupied homes and in older houses where dust seems to travel everywhere. The dustless refinishing explainer does a solid job explaining how those systems work and what “dustless” means in the field.
Homeowners often ask for a cleaner process, especially when they are living in the house during the work, have pets, or want to protect the rest of the home while we restore the floors.
For homeowners comparing renewal options, a dedicated buff and coat service can make sense when the floor's finish is still serviceable after contaminants are removed.
Here's a look at the equipment mindset behind a clean process:
What homeowners can expect after stripping
Once the buildup is off, the floor usually falls into one of these categories:
| Situation | What it usually means |
|---|---|
| Surface looks clear and the finish is still intact | A recoat may be possible |
| The haze is gone but scratches and wear remain | You may need hardwood floor refinishing |
| Deep gouges, dark stains, or board issues show up | Hardwood floor repair or more extensive restoration may be needed |
This is the point where protecting value becomes the top priority. A floor with good finish left can often be refreshed without the cost and wood loss of full sanding. A floor with exposed wear, staining, or failed finish needs a different plan. Guessing wrong gets expensive.
For broader maintenance and finish guidance, the National Wood Flooring Association is still one of the best benchmarks homeowners can review before approving any restoration work.
FAQ About Hardwood Floor Wax Removal
We frequently answer the following questions during estimates in Richmond VA. They usually come up when a homeowner is trying to figure out whether the floor needs simple cleanup, a recoat, or full refinishing.
Common questions from Richmond homeowners
| Question | Answer |
|---|---|
| Can wax be removed from engineered hardwood floors? | Sometimes. The safe method depends on how thick the wear layer is and what product was applied over the factory finish. Engineered floors give you less room for trial and error than solid hardwood, especially in older Richmond homes where moisture and heavy scrubbing can create bigger problems fast. |
| Will wax removal fix scratches underneath? | No. Wax removal clears off buildup so you can see the floor honestly. If the finish is scratched, worn through, or dented, those issues stay put until the floor is recoated, repaired, or sanded. |
| How long does professional wax stripping take? | It depends on the size of the area, how heavy the buildup is, and what shows up after the wax comes off. One room with light residue is very different from an older house with years of wrong products layered over the finish. |
| Is wax removal the same as a buff and coat service? | No. Wax removal is contaminant removal. A buff and coat is a finish restoration step used only when the existing finish can still accept a new coat properly. If wax is still present, that bond can fail. |
| What if my floor still looks bad after the wax is gone? | That usually means the wax was hiding wear instead of causing all of it. I see this a lot in Richmond houses with original oak floors. Once the shiney residue is gone, faded finish, pet stains, black traffic lanes, and old repairs become easier to spot. |
| Does sandless refinishing remove scratches? | No. Sandless refinishing or a buff and coat cleans and abrades the existing finish so a fresh coat can bond. It does not cut past deeper scratches, dents, gouges, or stained wood fibers. If damage goes below the finish, the floor needs a different level of restoration. |
A few practical notes before you decide
If you're comparing DIY advice online, these hardwood floor wax removal tips are a useful starting point. The part many homeowners miss is the difference between safe residue removal and risky shortcuts. Vinegar, steam mops, and heavy water use can turn a wax problem into a finish problem, especially on older floors that cannot afford much more wear.
Older Richmond floors usually reward restraint.
That is why I tell homeowners to focus on preserving value, not forcing a quick cosmetic fix. If the buildup is only on the surface, careful removal may be enough to get the floor back on track. If the wax was masking worn finish, edge wear, or damage in the wood itself, a professional assessment will save money and help you avoid the wrong service.
Why Richmond Homeowners Choose Buff & Coat
Buff & Coat Hardwood Floor Refinishing is a Richmond-based company serving homeowners who want clear answers, careful workmanship, and practical options. The team handles dustless sanding, buffing and coating, hardwood floor installations, LVP/LVT installs, and repair work throughout Richmond, Midlothian, Chesterfield, Henrico, Glen Allen, Short Pump, Mechanicsville, and occasional jobs in Charlottesville, Fredericksburg, and Virginia Beach.
Homeowners often choose Buff & Coat because of the basics that matter:
- 15 years in business
- Dustless sanding systems
- Local, owner-operated
- High-quality finishes
- Clear pricing and honest advice
- 5-star customer service
If you're trying to decide between wax removal from hardwood floors, a buff and coat service, or full hardwood floor refinishing, Buff & Coat can look at the floor and tell you what makes sense.
Ready to restore your hardwood floors? Buff & Coat Hardwood Floor Refinishing makes the process fast, clean, and stress-free. Call 804-392-1114 or request your free estimate at buffandcoatvirginia.com.


